Category Archives: BB10

My semester in UCOSP

If you do not know what UCOSP is then you should consider reading my explanation post: What is UCOSP? Otherwise in short: UCOSP is a practical experience for Canadian Computer Science students to work on open source as a distributed team. For my UCOSP project I wrote a zip extraction library for BB10.

How I got enrolled

I found out about UCOSP in mid June while I was still at Microsoft for my internship. My self-assigned task that day was to arrange all my courses for the next school year. Many of the courses I wanted to take required pre-approval from professors which in turn required an essay, so planning ahead was vital.

While finishing up one of my essays I saw one of my friends online so I chatted with him. I tried to convince him to take one of the cool courses along with me. Meanwhile he asked if I had been invited to some course called “UCOSP”. In his words: “open source project course”. Little did he know that those words describe the perfect course ever! Imagine getting credits for doing open source projects!

Yet I had a stumbling block. Enrollment required an essay due the next day. Meanwhile said friend has one of the highest GPAs in our year and thus got invited. My own GPA is not bad per-say but it must not have been high enough for the invitations. Which makes sense since UCOSP is a new program at our university, they would want to run the pilot with our best students. Yet this means my work is just that much harder: I have to write an essay that qualifies for UCOSP but also one that convinces the professor to risk letting me in on his shiny new pilot course.

As if that was not hard enough my friend wasn’t sure he was allowed to give me the name of said university professor! So I sent an email off to the UCOSP steering commity asking for the contact. They replied the next morning with the professors name, and I sent off an essay email soon after. Five days later I got an email saying I was accepted.

Our Hackathon

At the beginning of every UCOSP semester all the students along with their project mentors are brought together for a hackathon. This semester the hackathon was in Toronto and hosted by Mozilla. Next semester I hear it will be in California hosted by facebook!

IMG_20130919_105120

Calgary’s Glenmore Reservoir from the airplane

Being on the wrong side of North America meant I had a long flight on the 19th of September. To make the trip more nerve-racking I’m far too cheap for a taxi. Instead, after my four hour flight I took the Airport express bus to the subway, after which I walked to the University of Toronto Campus for the evening meetup.

IMG_20130919_165118

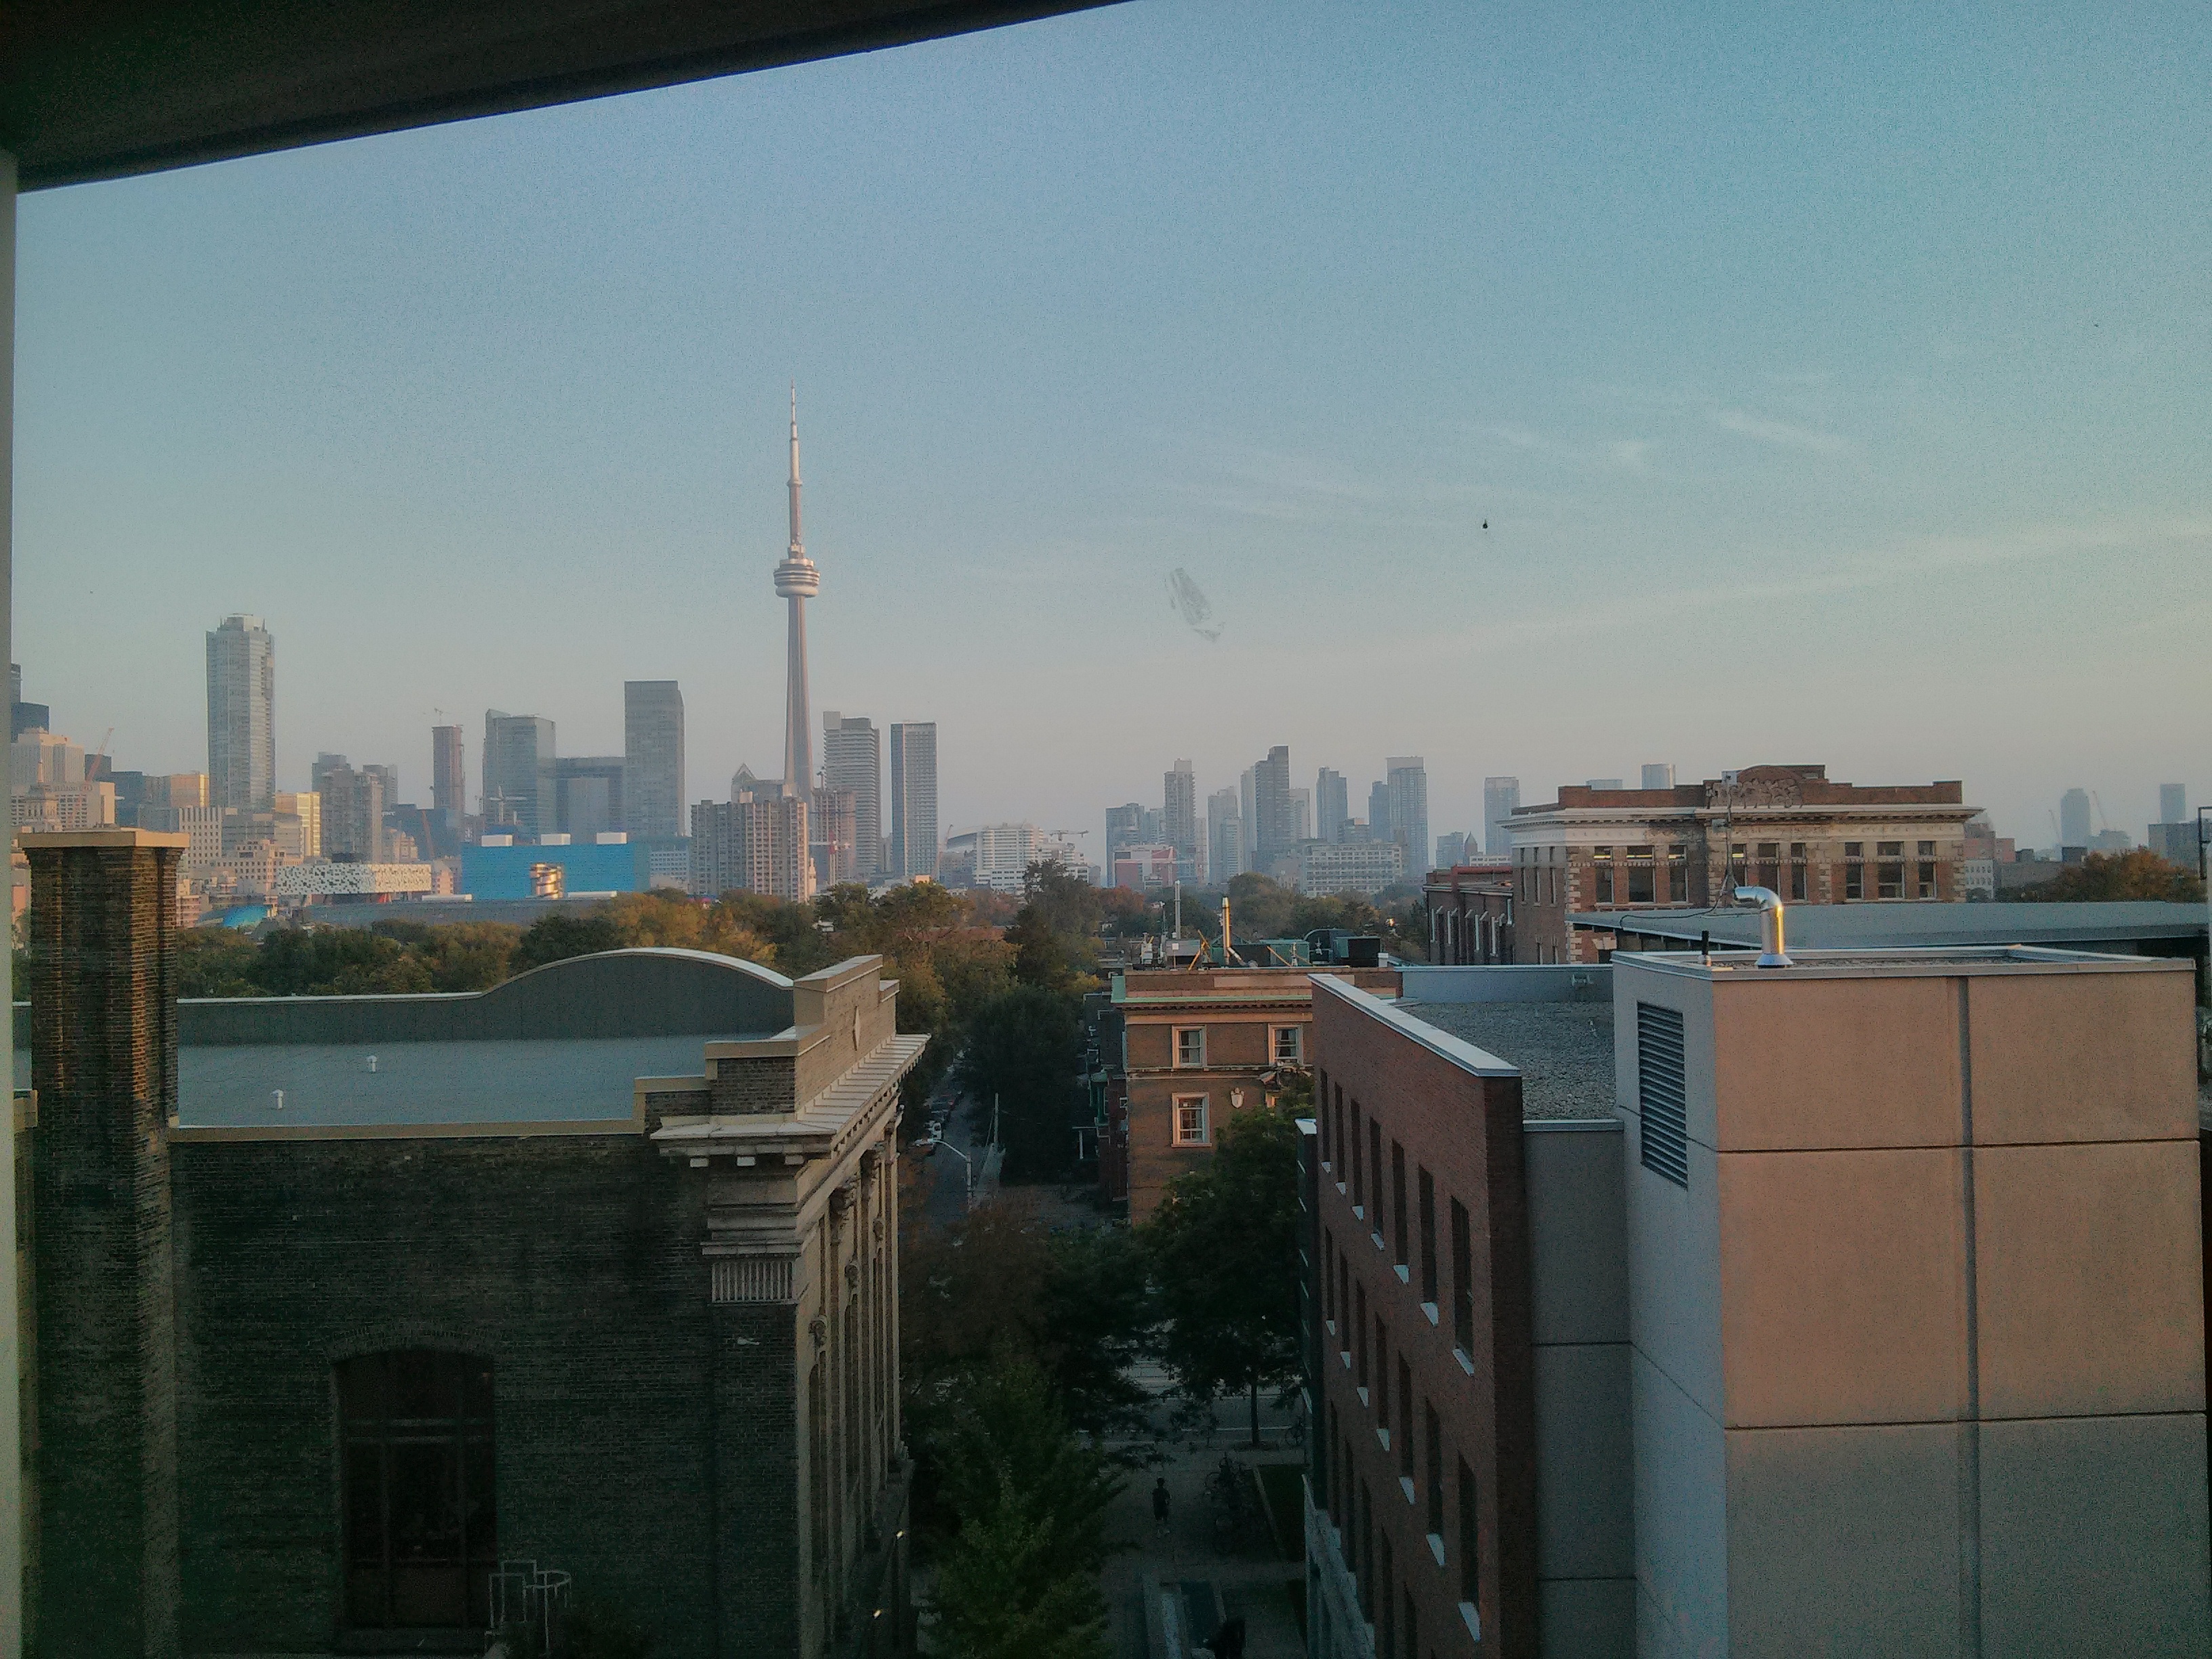
View from the Univeristy of Toronto’s Computer Science’s upper meeting room.

While the hackathon wasn’t starting until the next day, we had an optional meet-and-greet at the University of Toronto. Somehow everyone from my team made it except our mentor. Which is okay since there were only one or two mentors there in total. Beyond some ice-breakers, we also met some of the professors organizing UCOSP. In all it was a nice low key event.


IMG_20130920_065936

Left half of Mozilla’s entrance way. I should have taken a fuller photo but I only even took this one for the banner’s sake.

The walk from our hotel to Mozilla was long and took us through Toronto’s banking district known through out Canada as Bay Street. We ate breakfast at First Canadian Place, I had eggs.

IMG_00000010

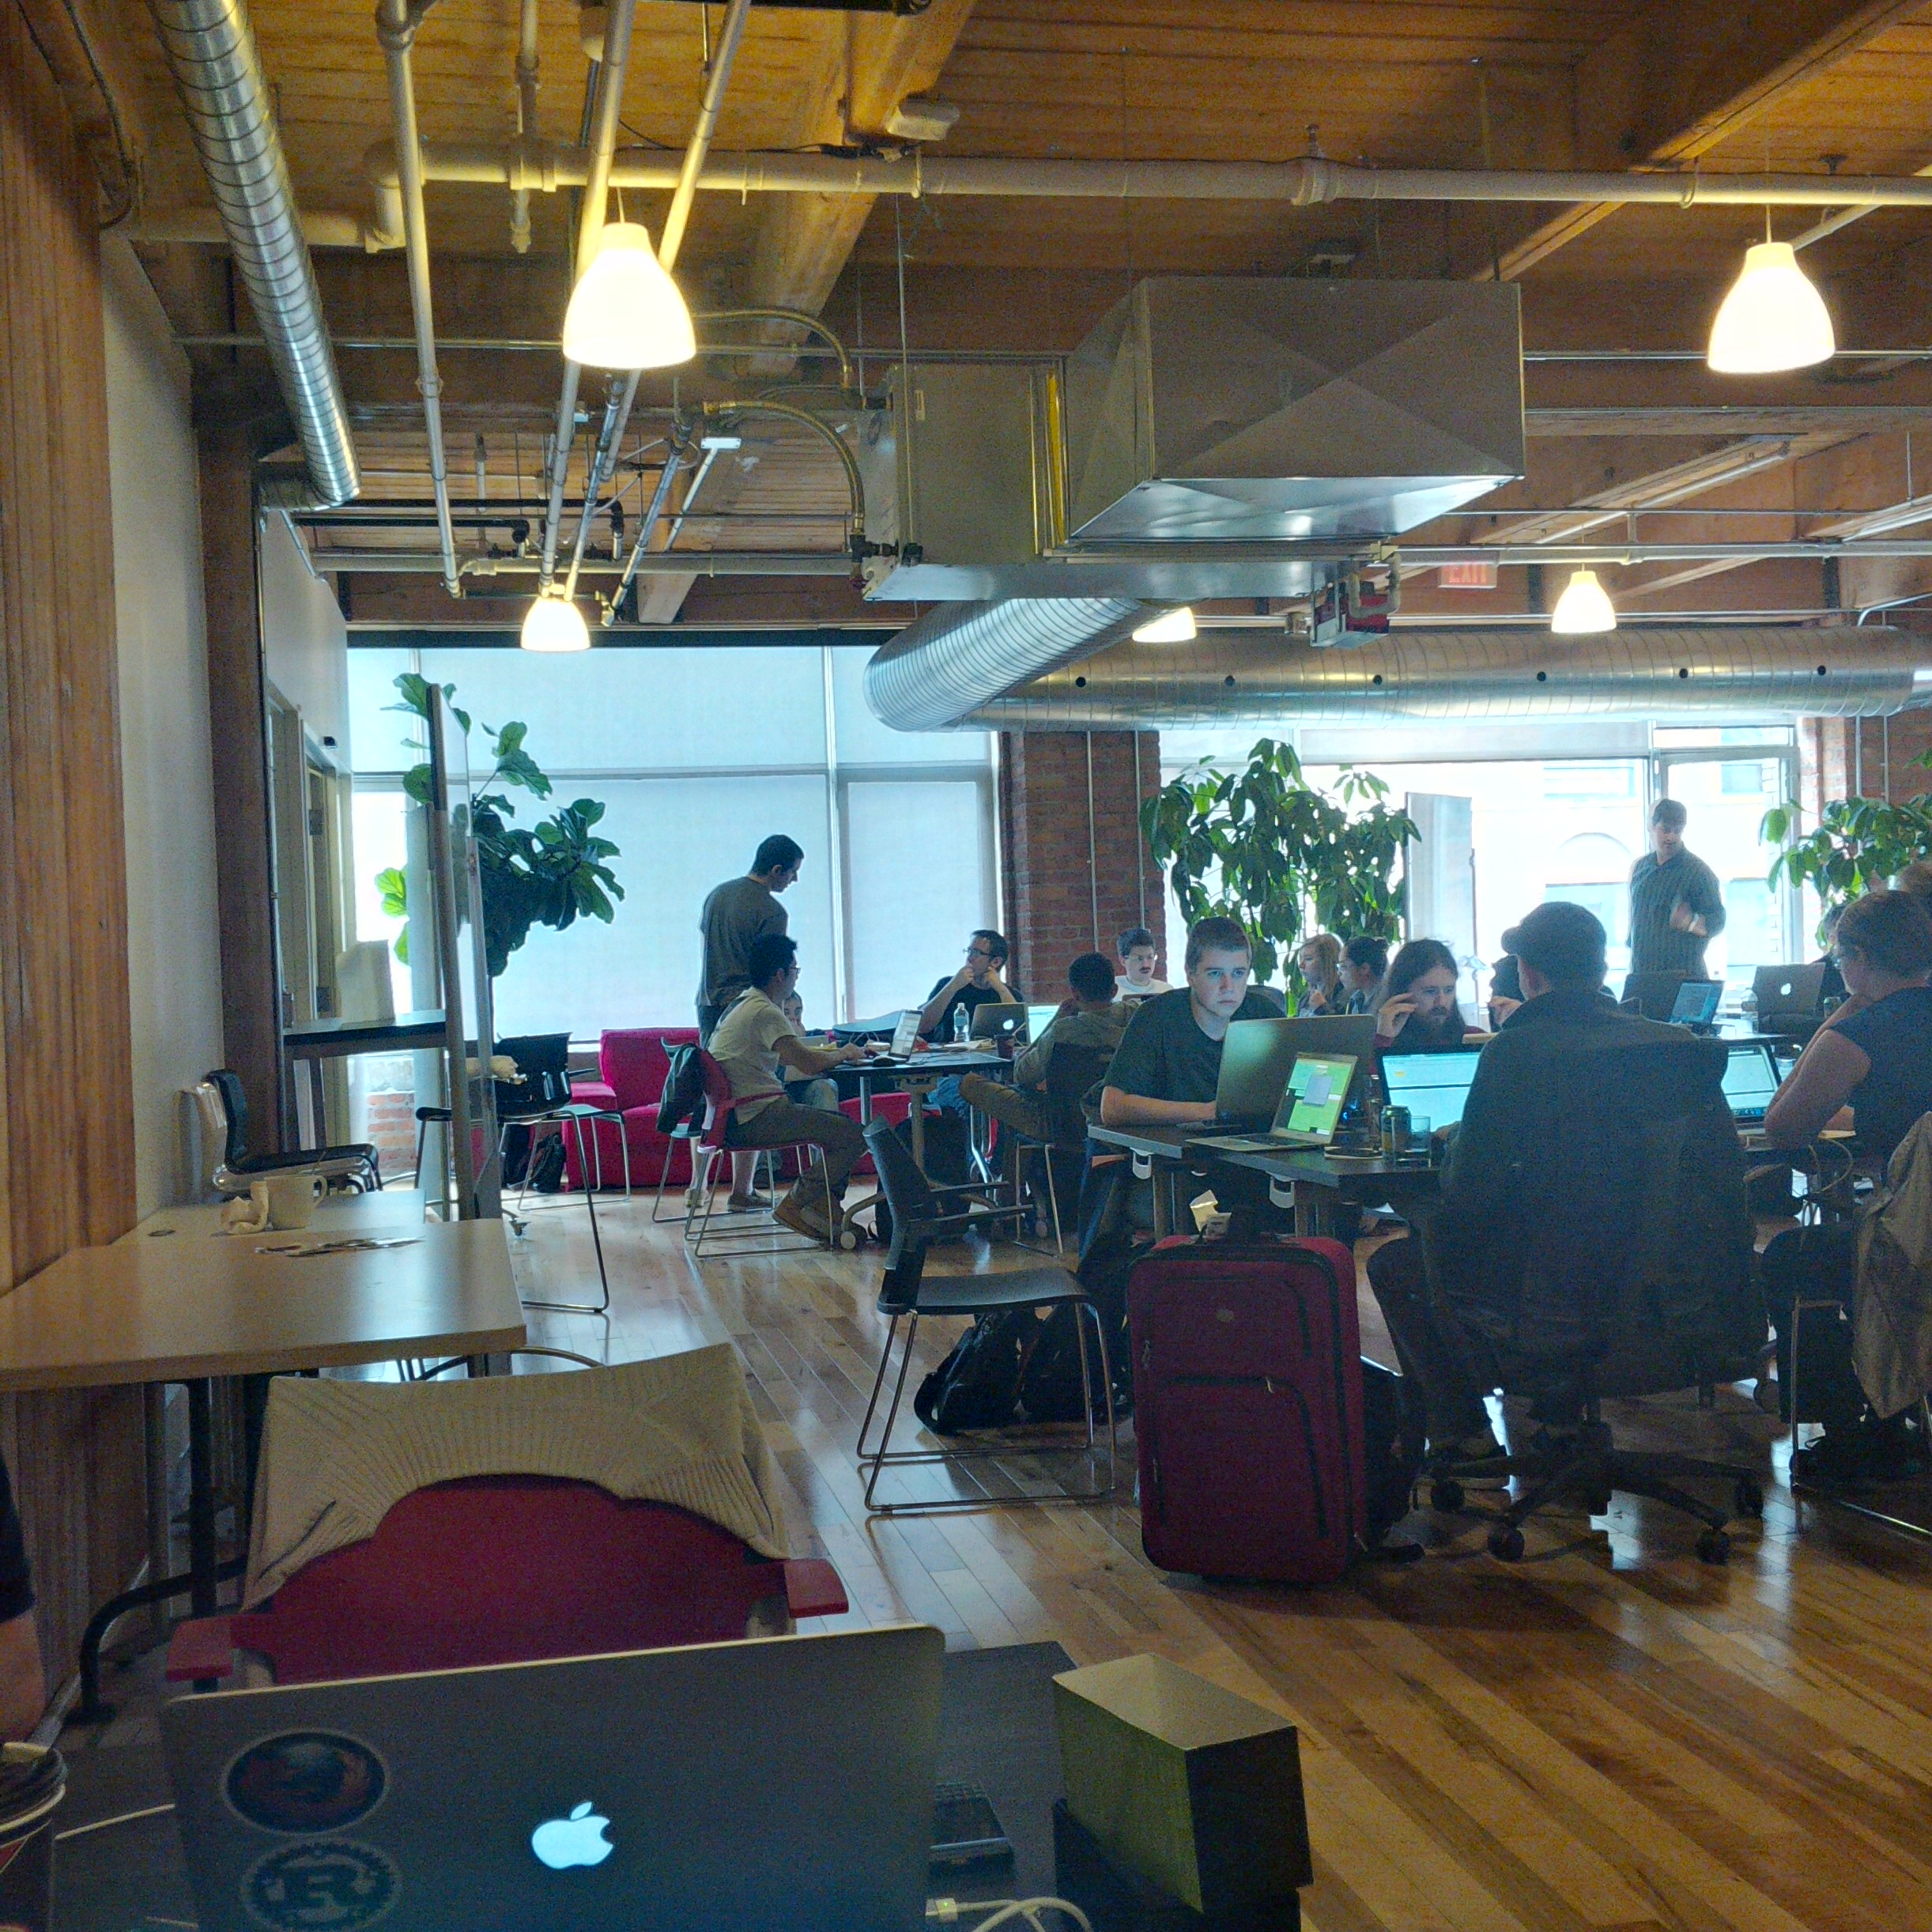
The hackathon in full swing! Look at that coding! The intensity! You can tell work is getting done because no one is talking.

At this point I have to apologise, I took almost no photos of the hackathon itself. I have a few but most are test photos from my developer phone. Speaking of which, our mentor gave us each a developer phone!

IMG_20130920_070913

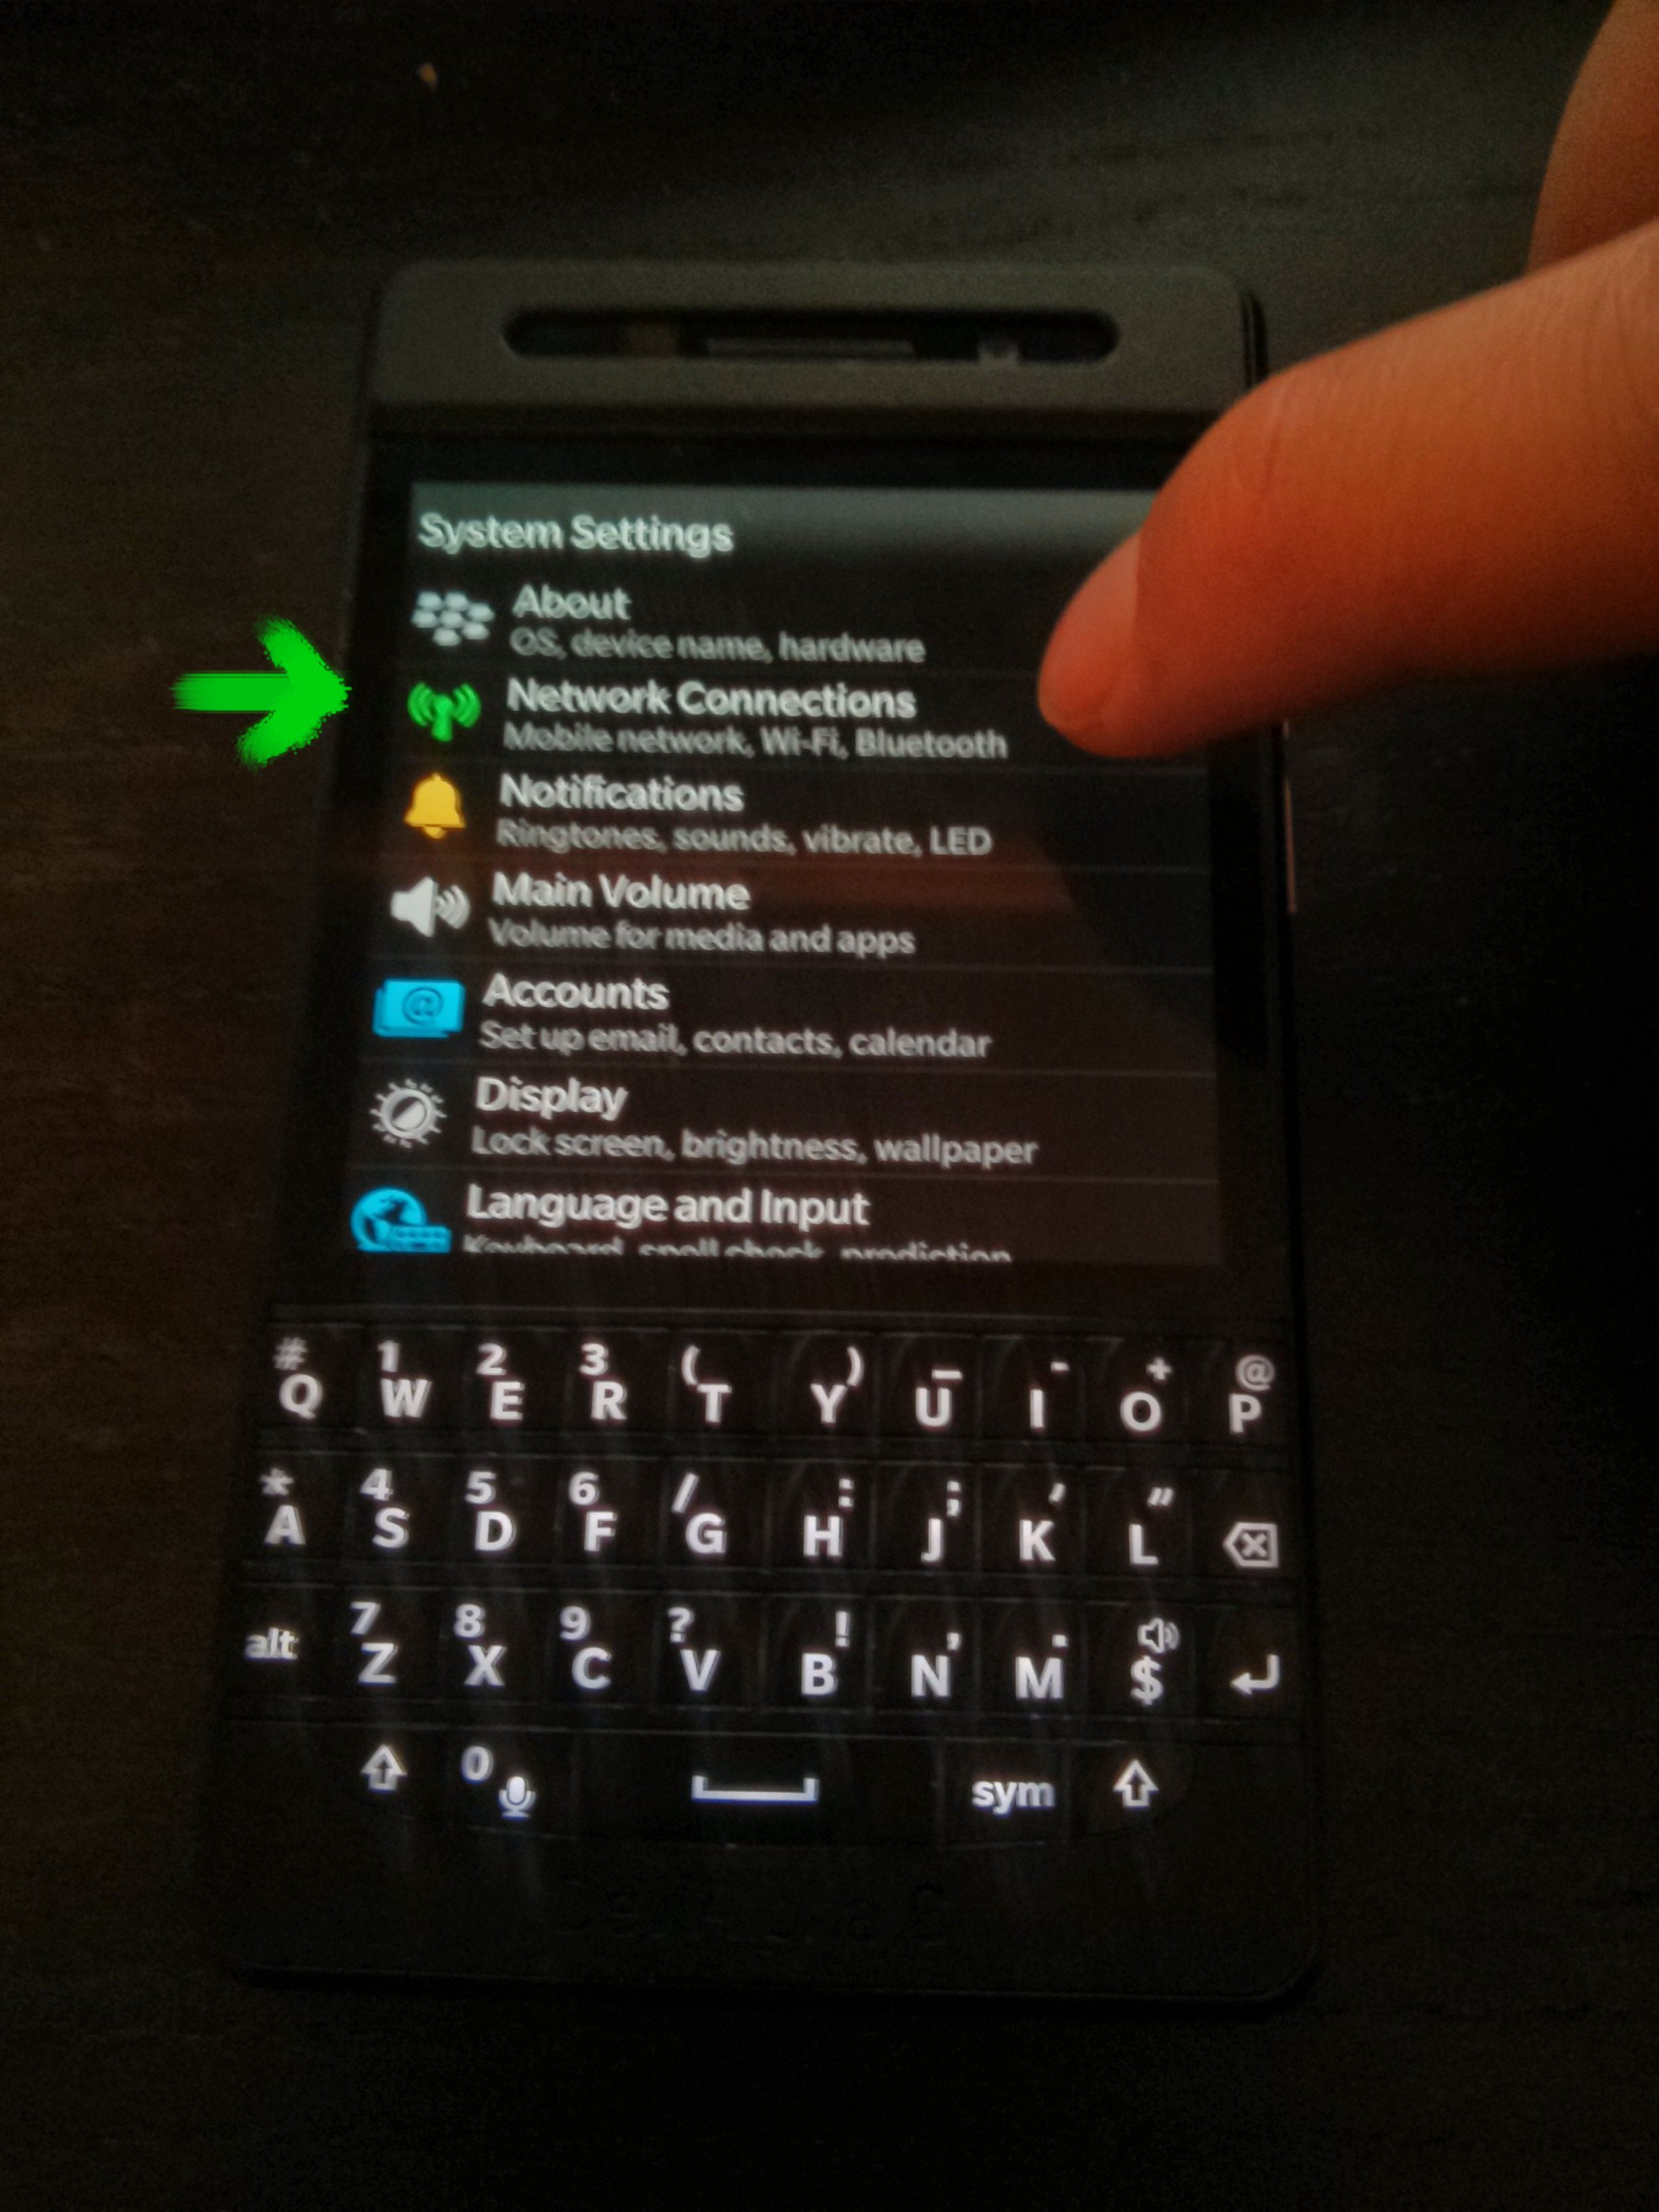
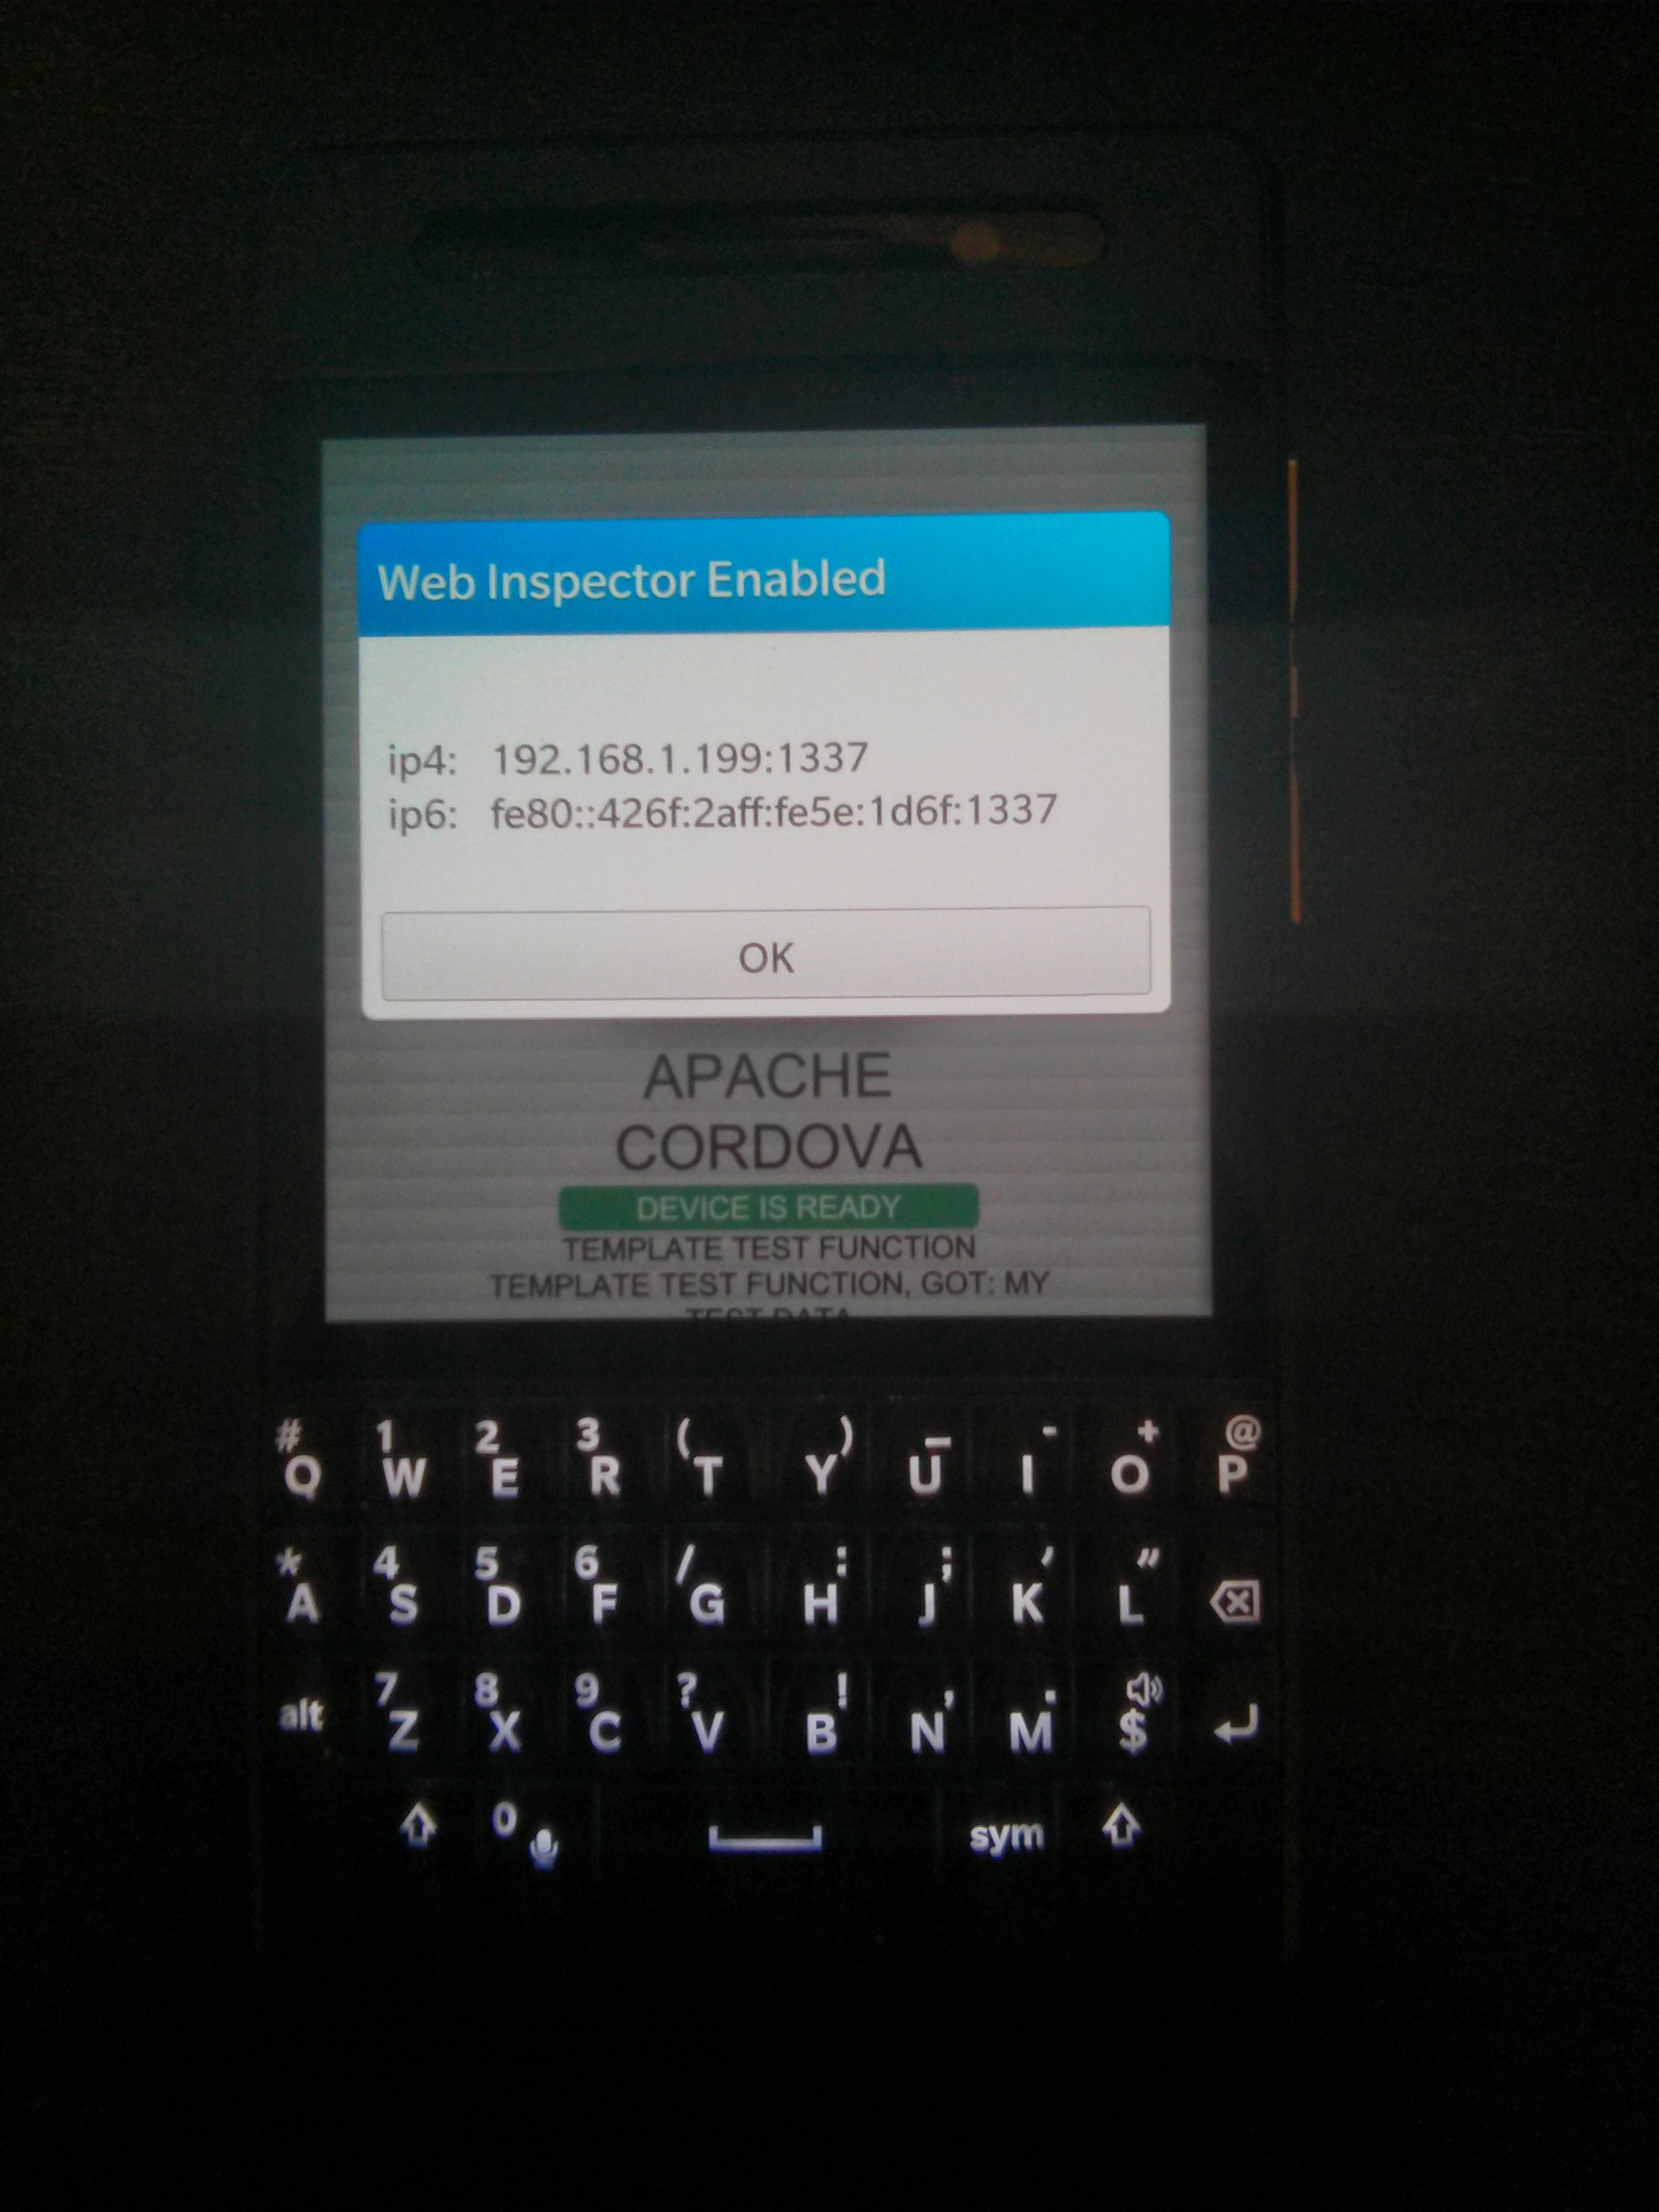
Our BB10 developer phone!

I have far too many smartphones at this point but this is still the first phone someone has ever given me. The phone itself is a Blackberry Q10 with a different shell. Since matte black is my favourite color I have to admit that I prefer this dev phone over the Q10. Since the BB10 emulator requires VMware under linux, which I do not own, this dev phone was critical.

You might be curious at this, I have yet to tell you what we were even working on!

Our Project

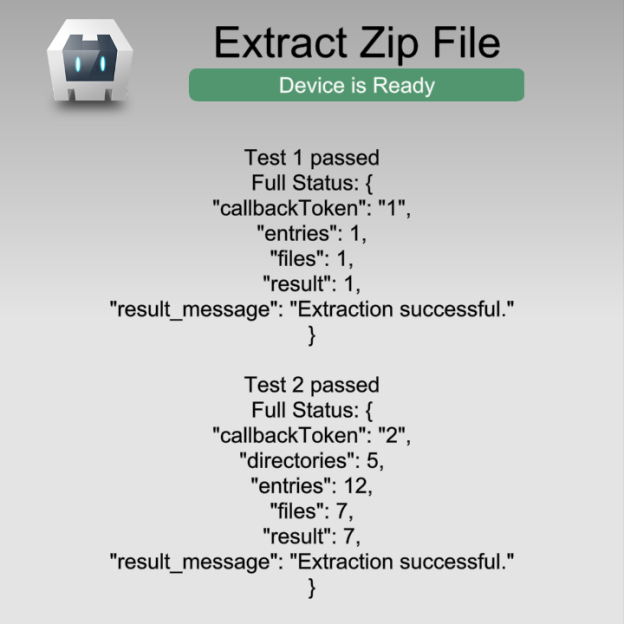
My team’s project was to port popular Cordova plugins to BB10’s new Cordova based html5 platofrm. Cordova is a compatibility layer over a mobile platform’s app embedded web browser which exposes phone features as web APIs. In iOS terms is wraps the WebView and provides access to memory cards, cameras, and etc. Cordova is the offical open source name of PhoneGap after Adobe bought and open sourced PhoneGap. At the time of our hackathon, Blackberry’s offical html5 platform was proprietary and called WebWorks. Our work was to coincide with the development of WebWorks 2.0 which was based on Cordova. Plugins are extra APIs. For example the API I ported exposes extraction of zip files. Our mentor set a goal of four plugins, of course more would be welcomed.

Back to the Hackathon

IMG_00000018_hdr

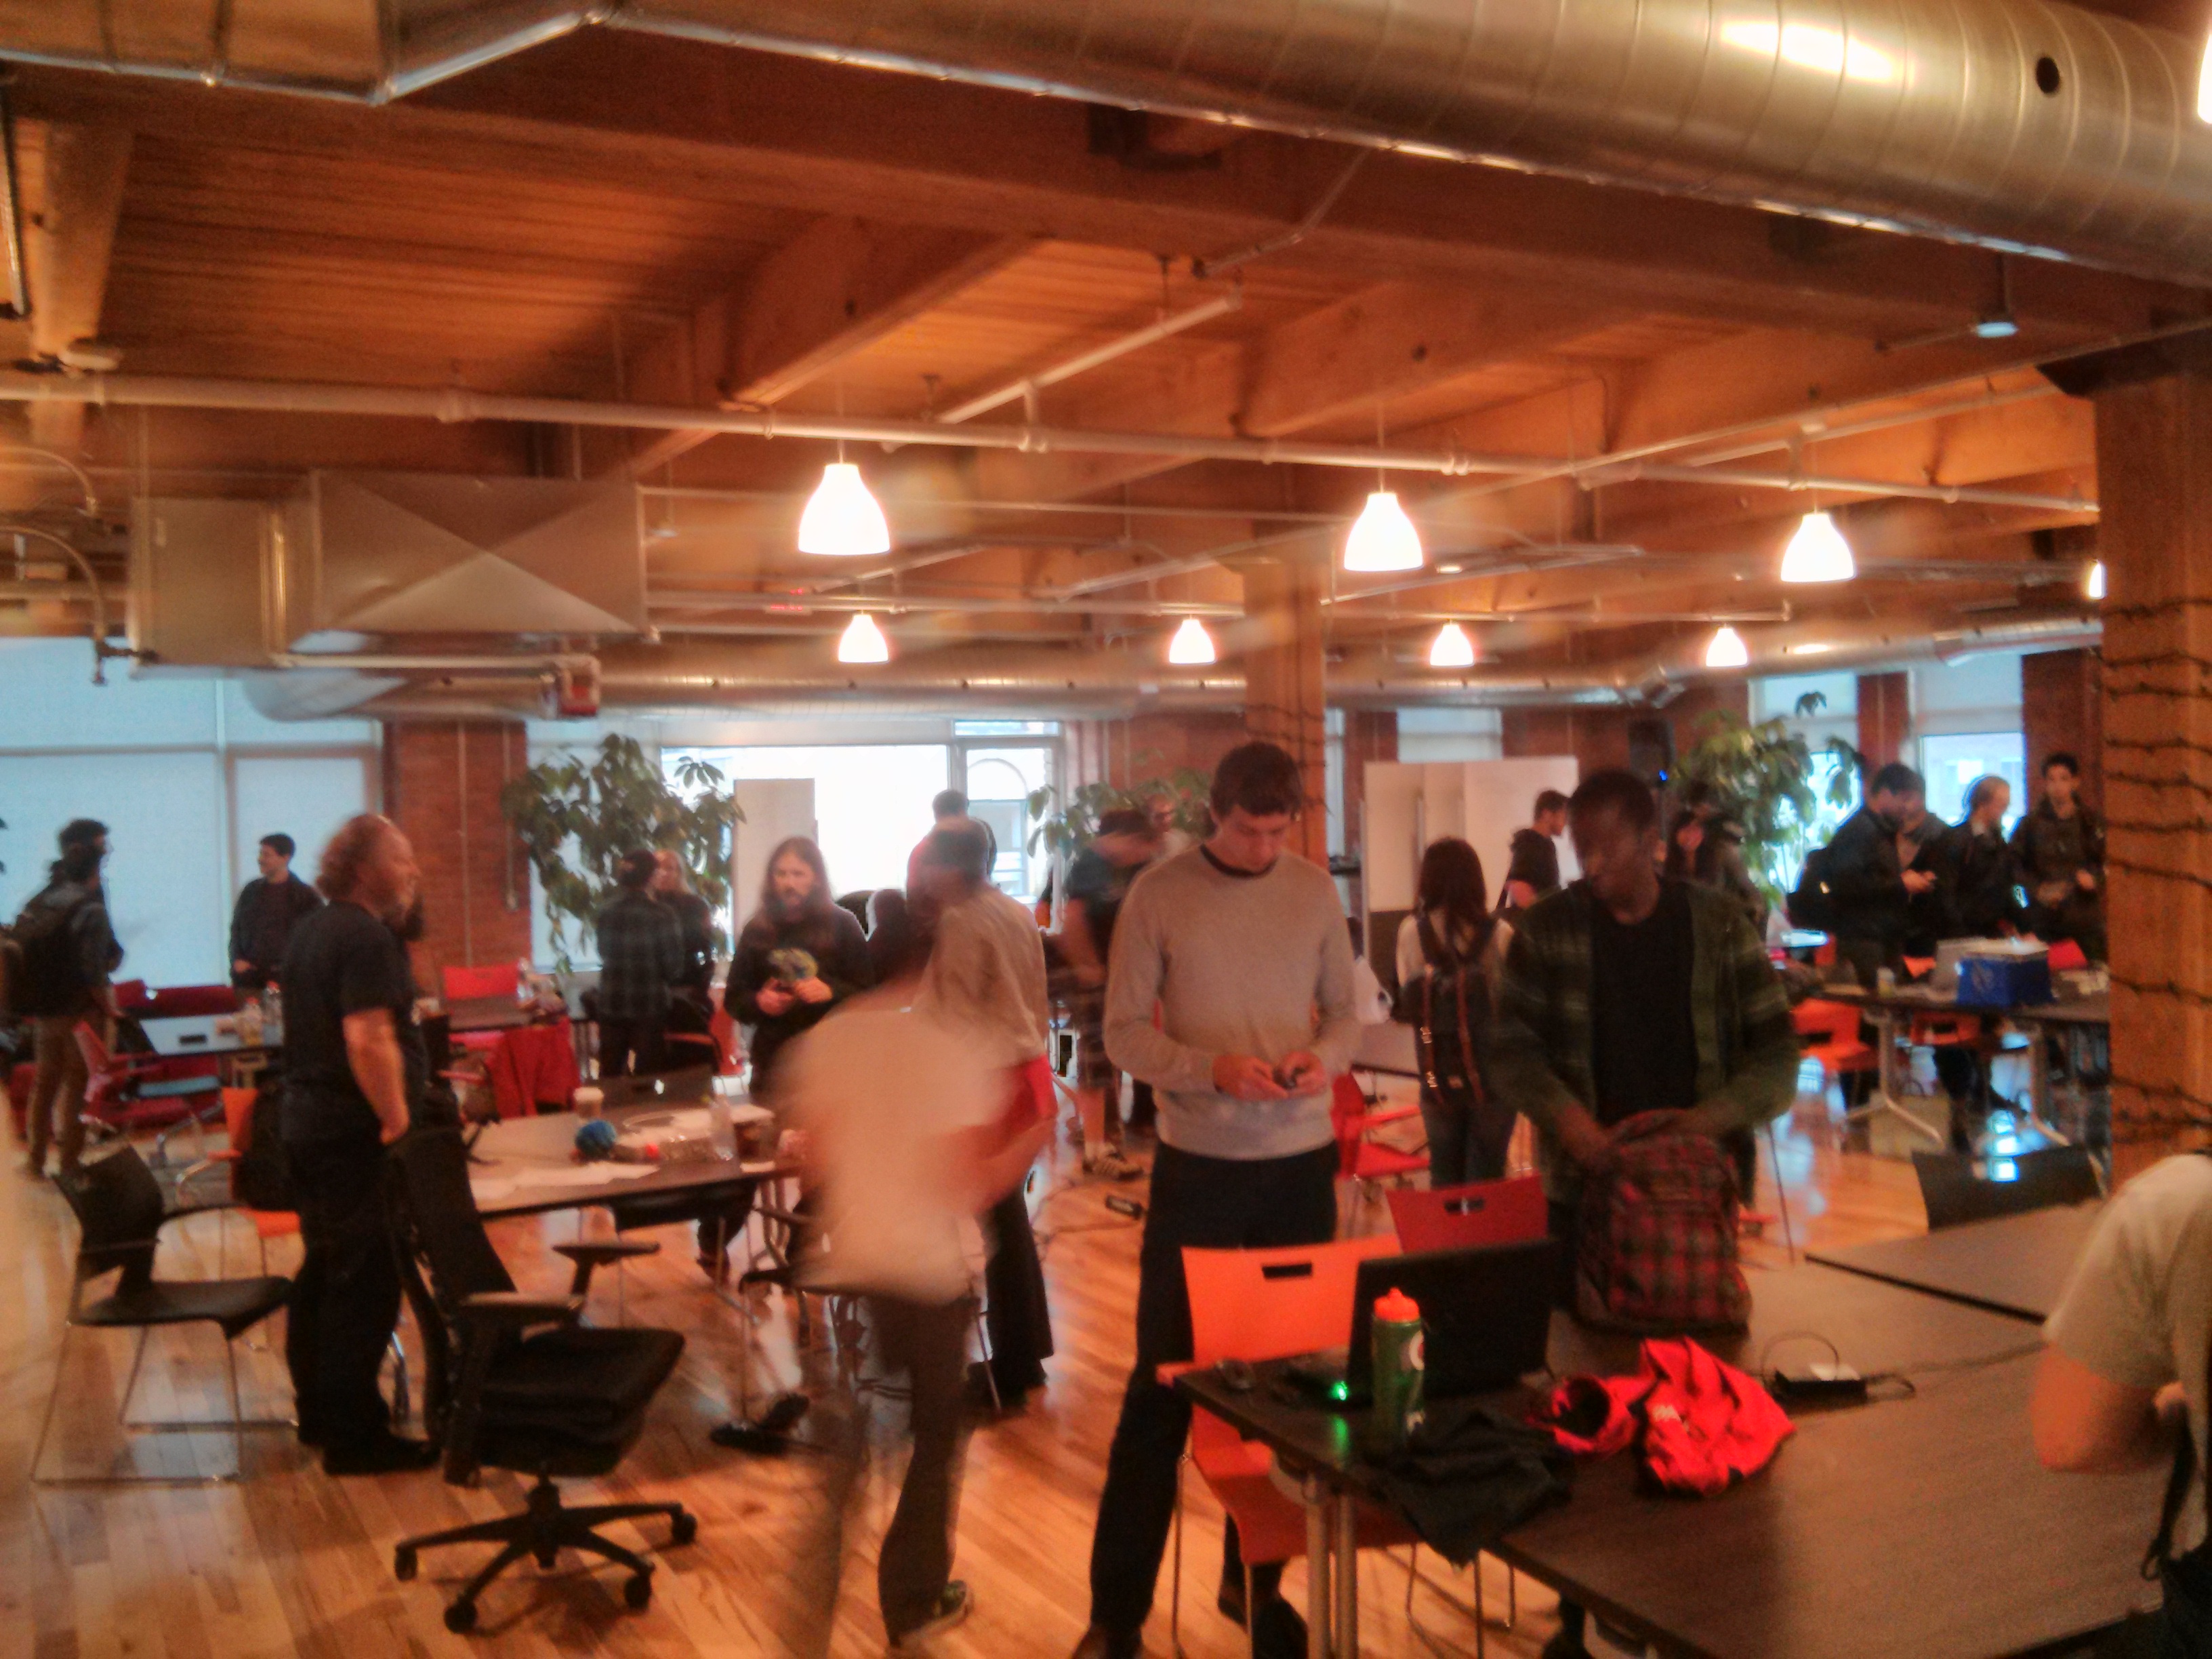
I might have been playing with the phone’s built in instagram-like filters when I took this photo, or maybe the HDR. Otherwise I cannot explain the lighting.

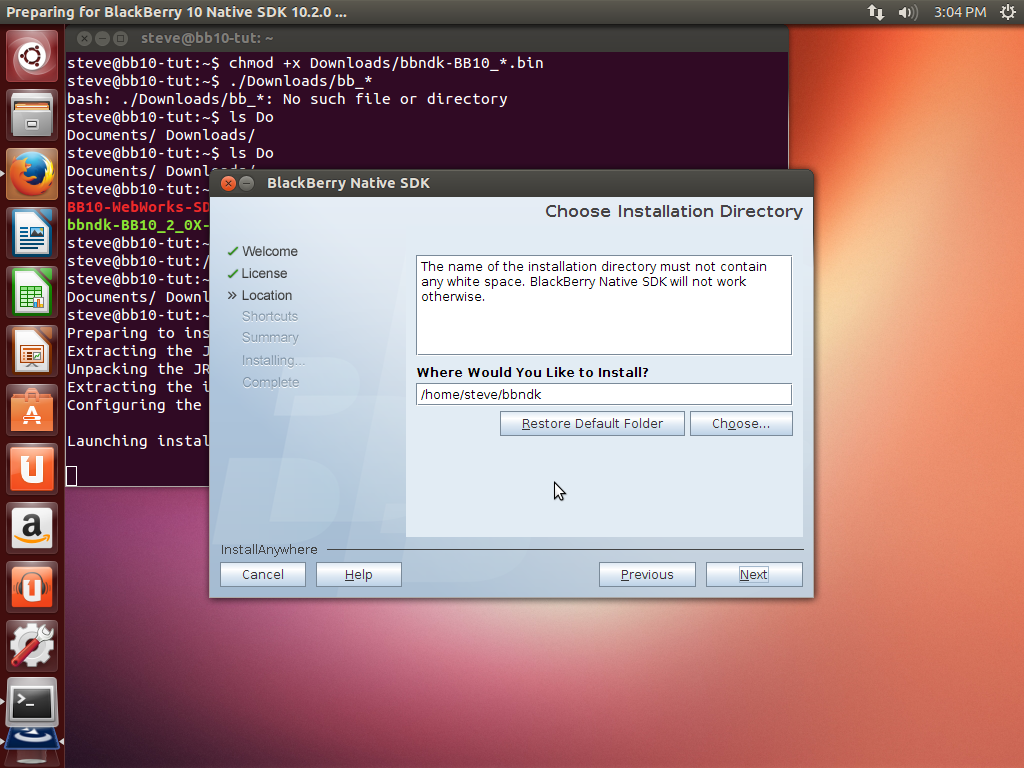
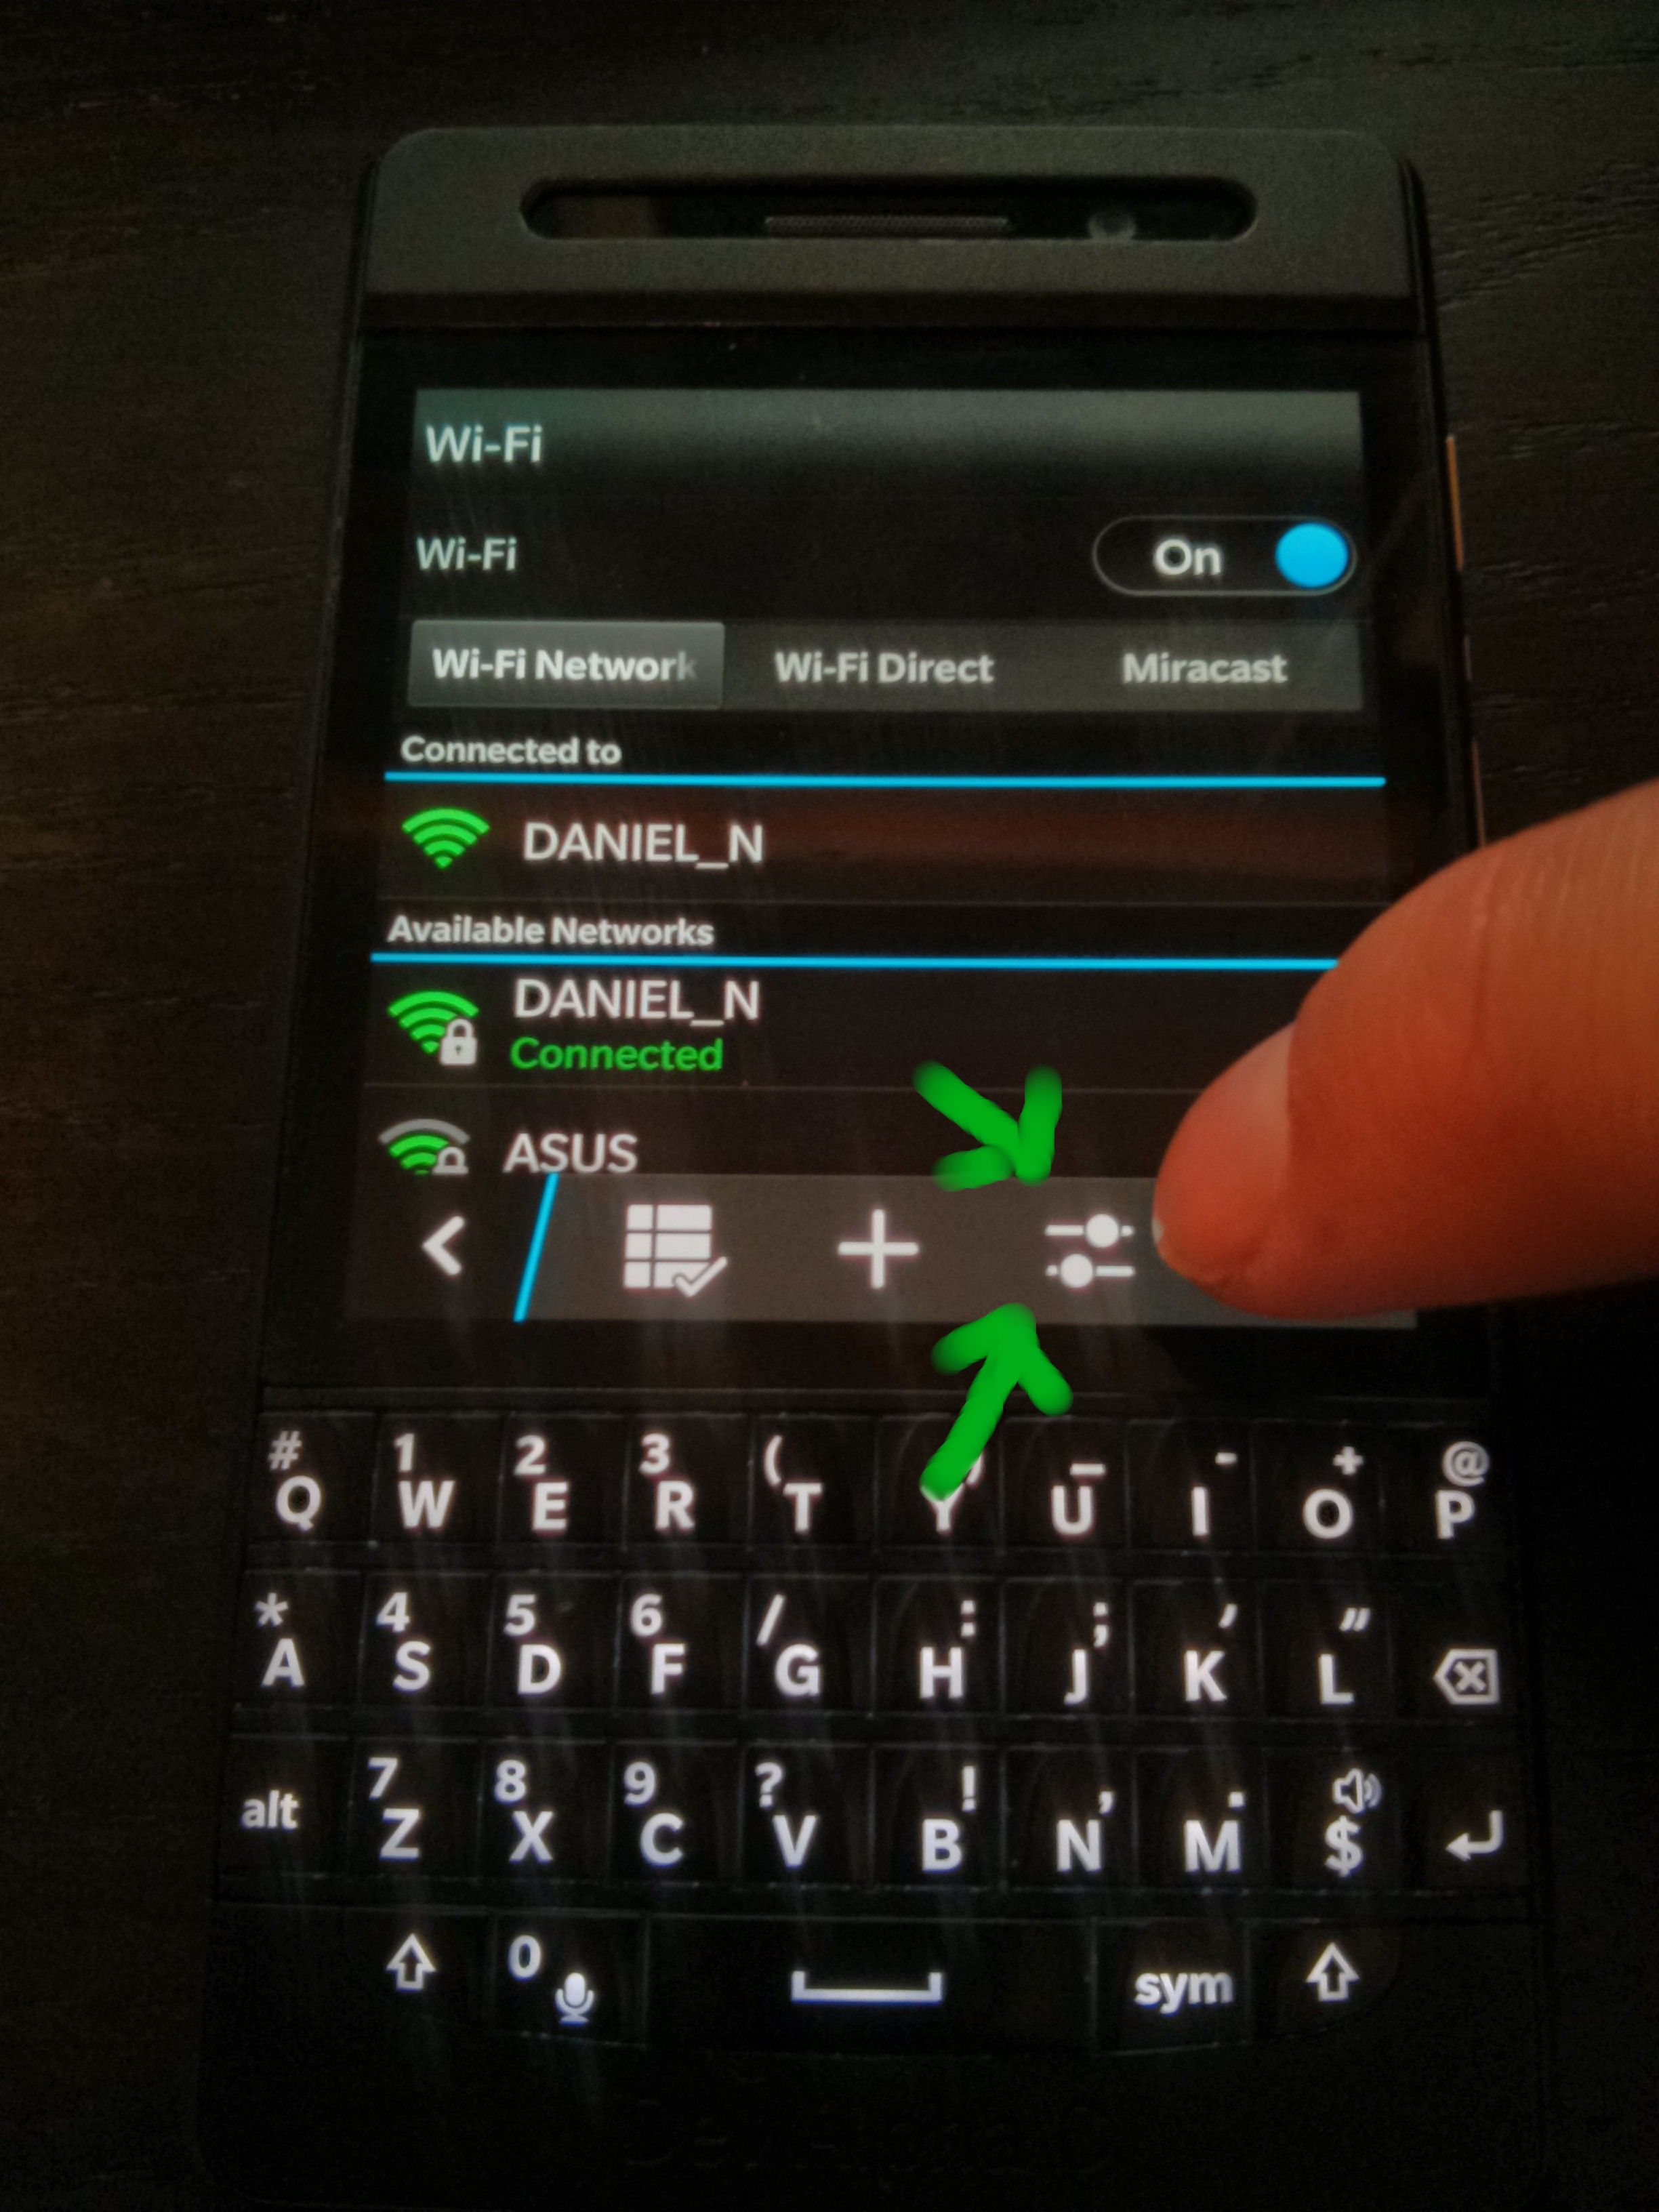
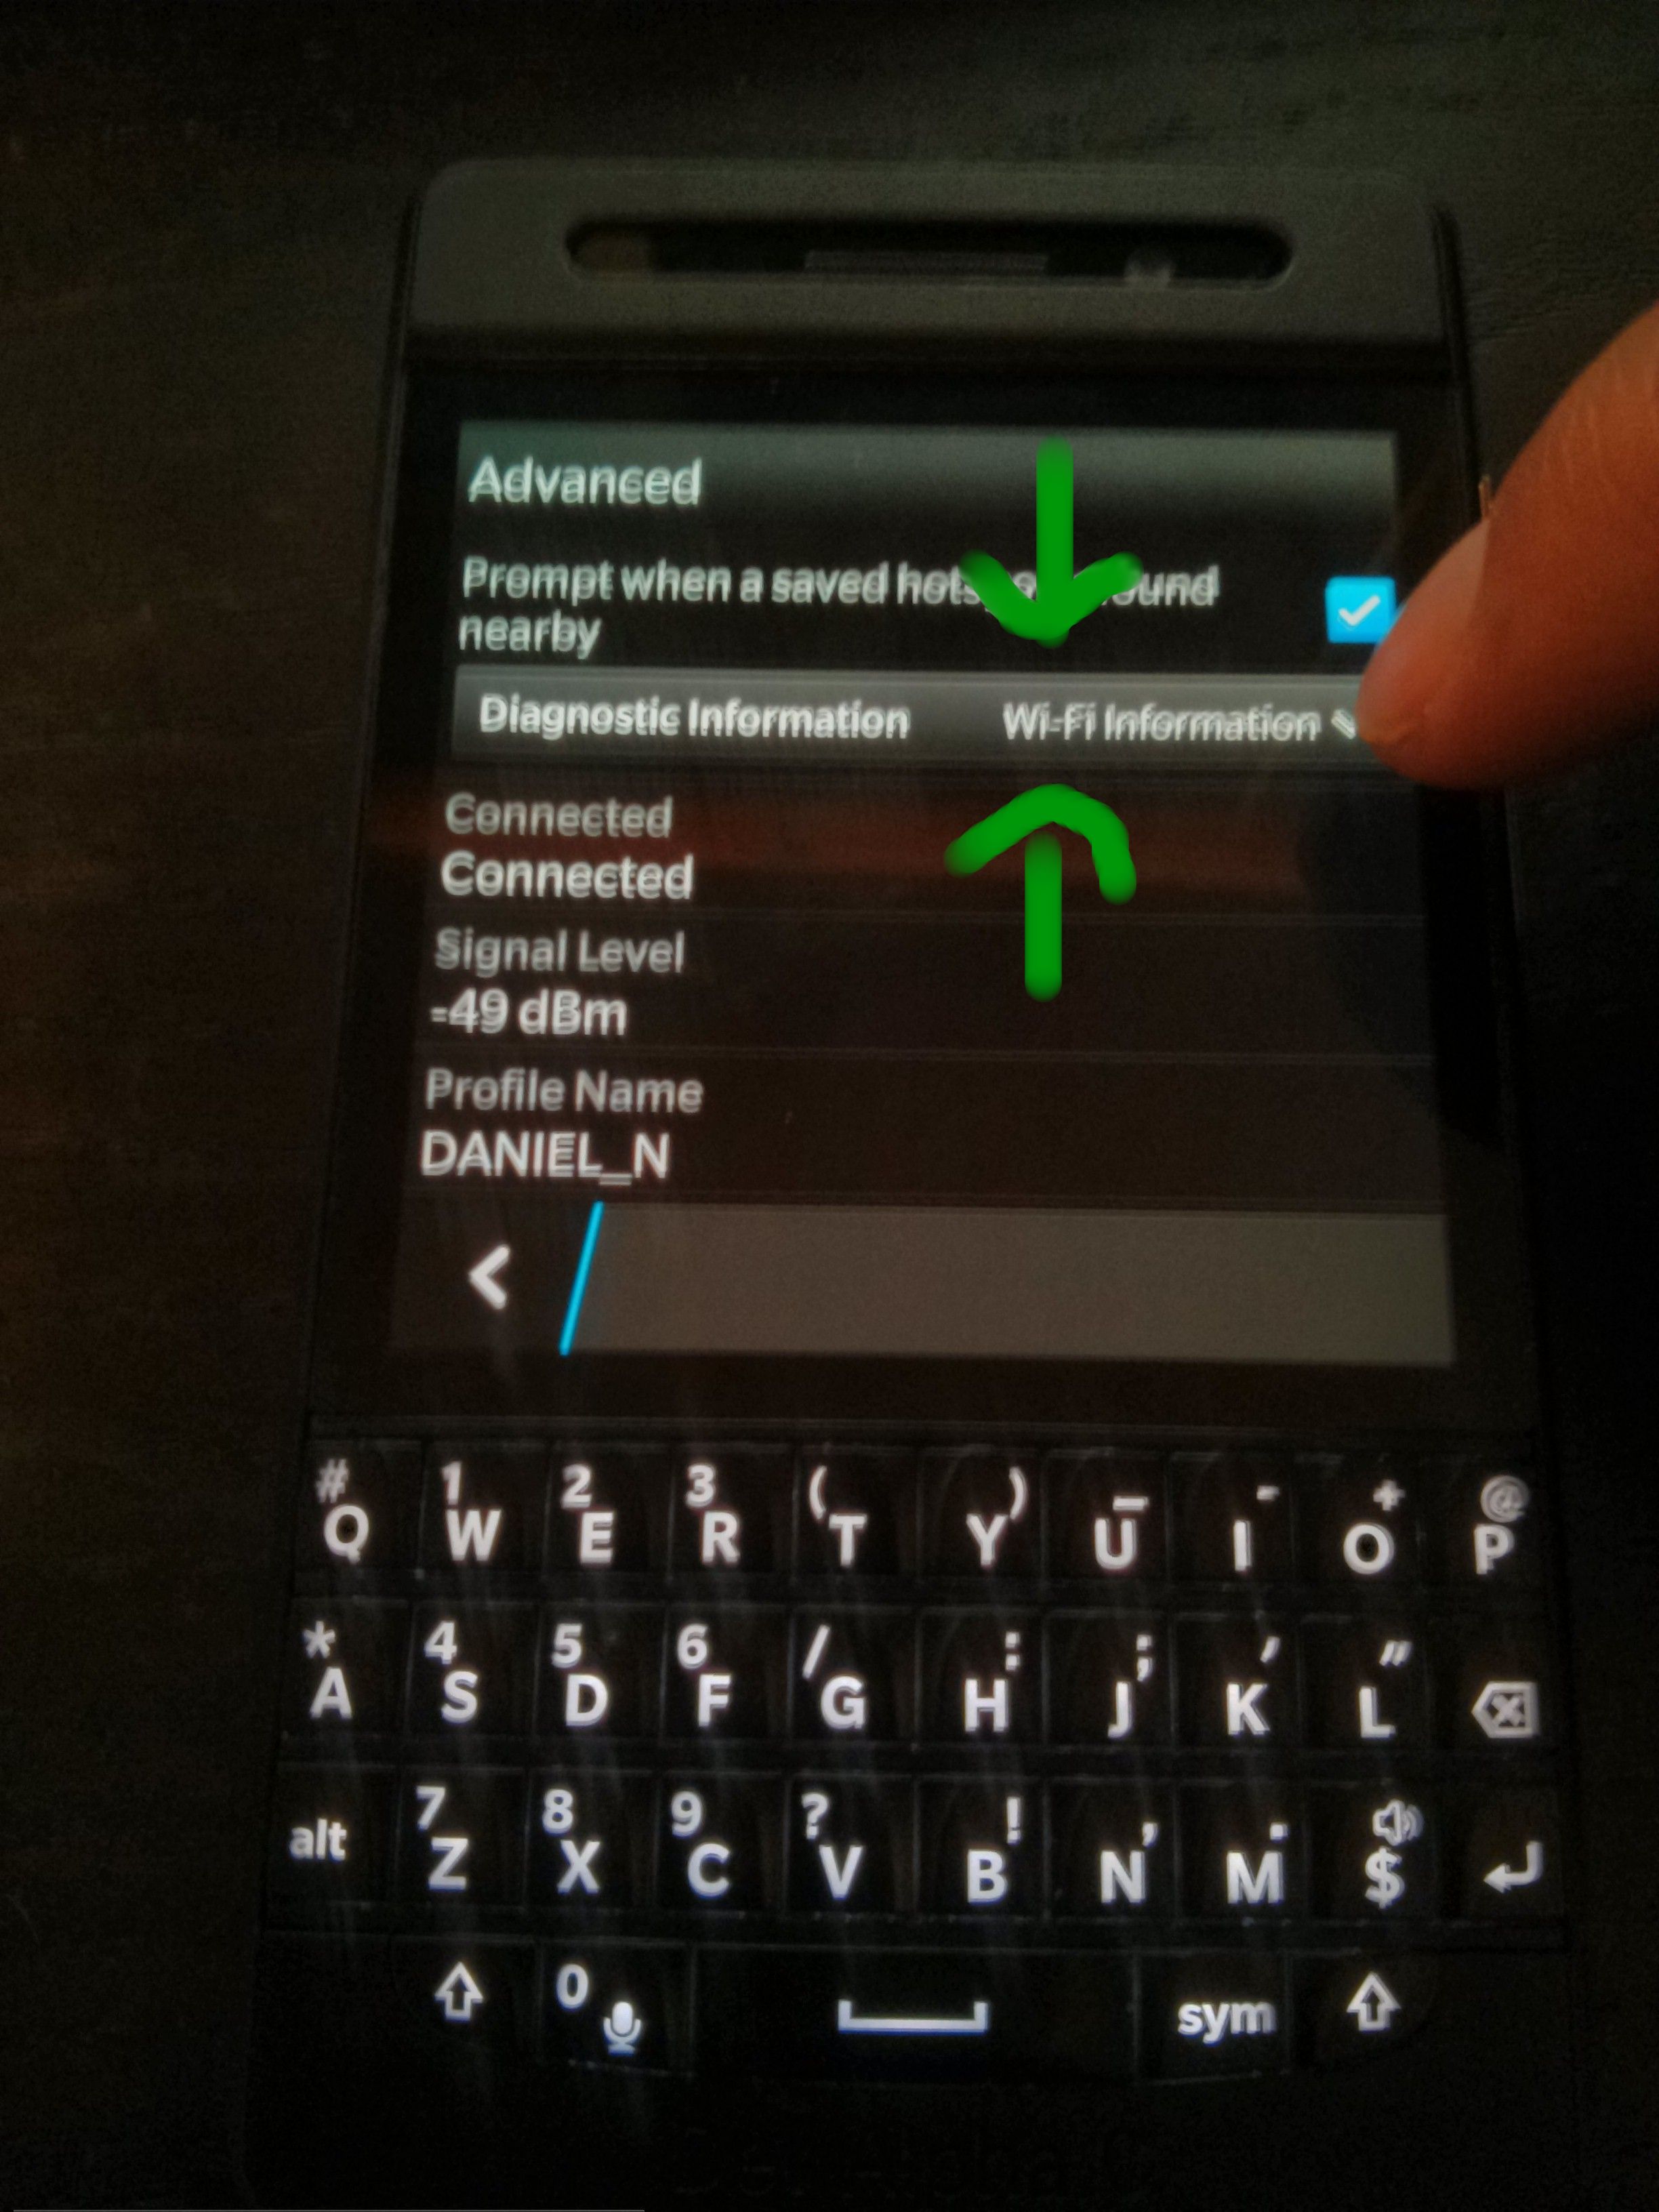
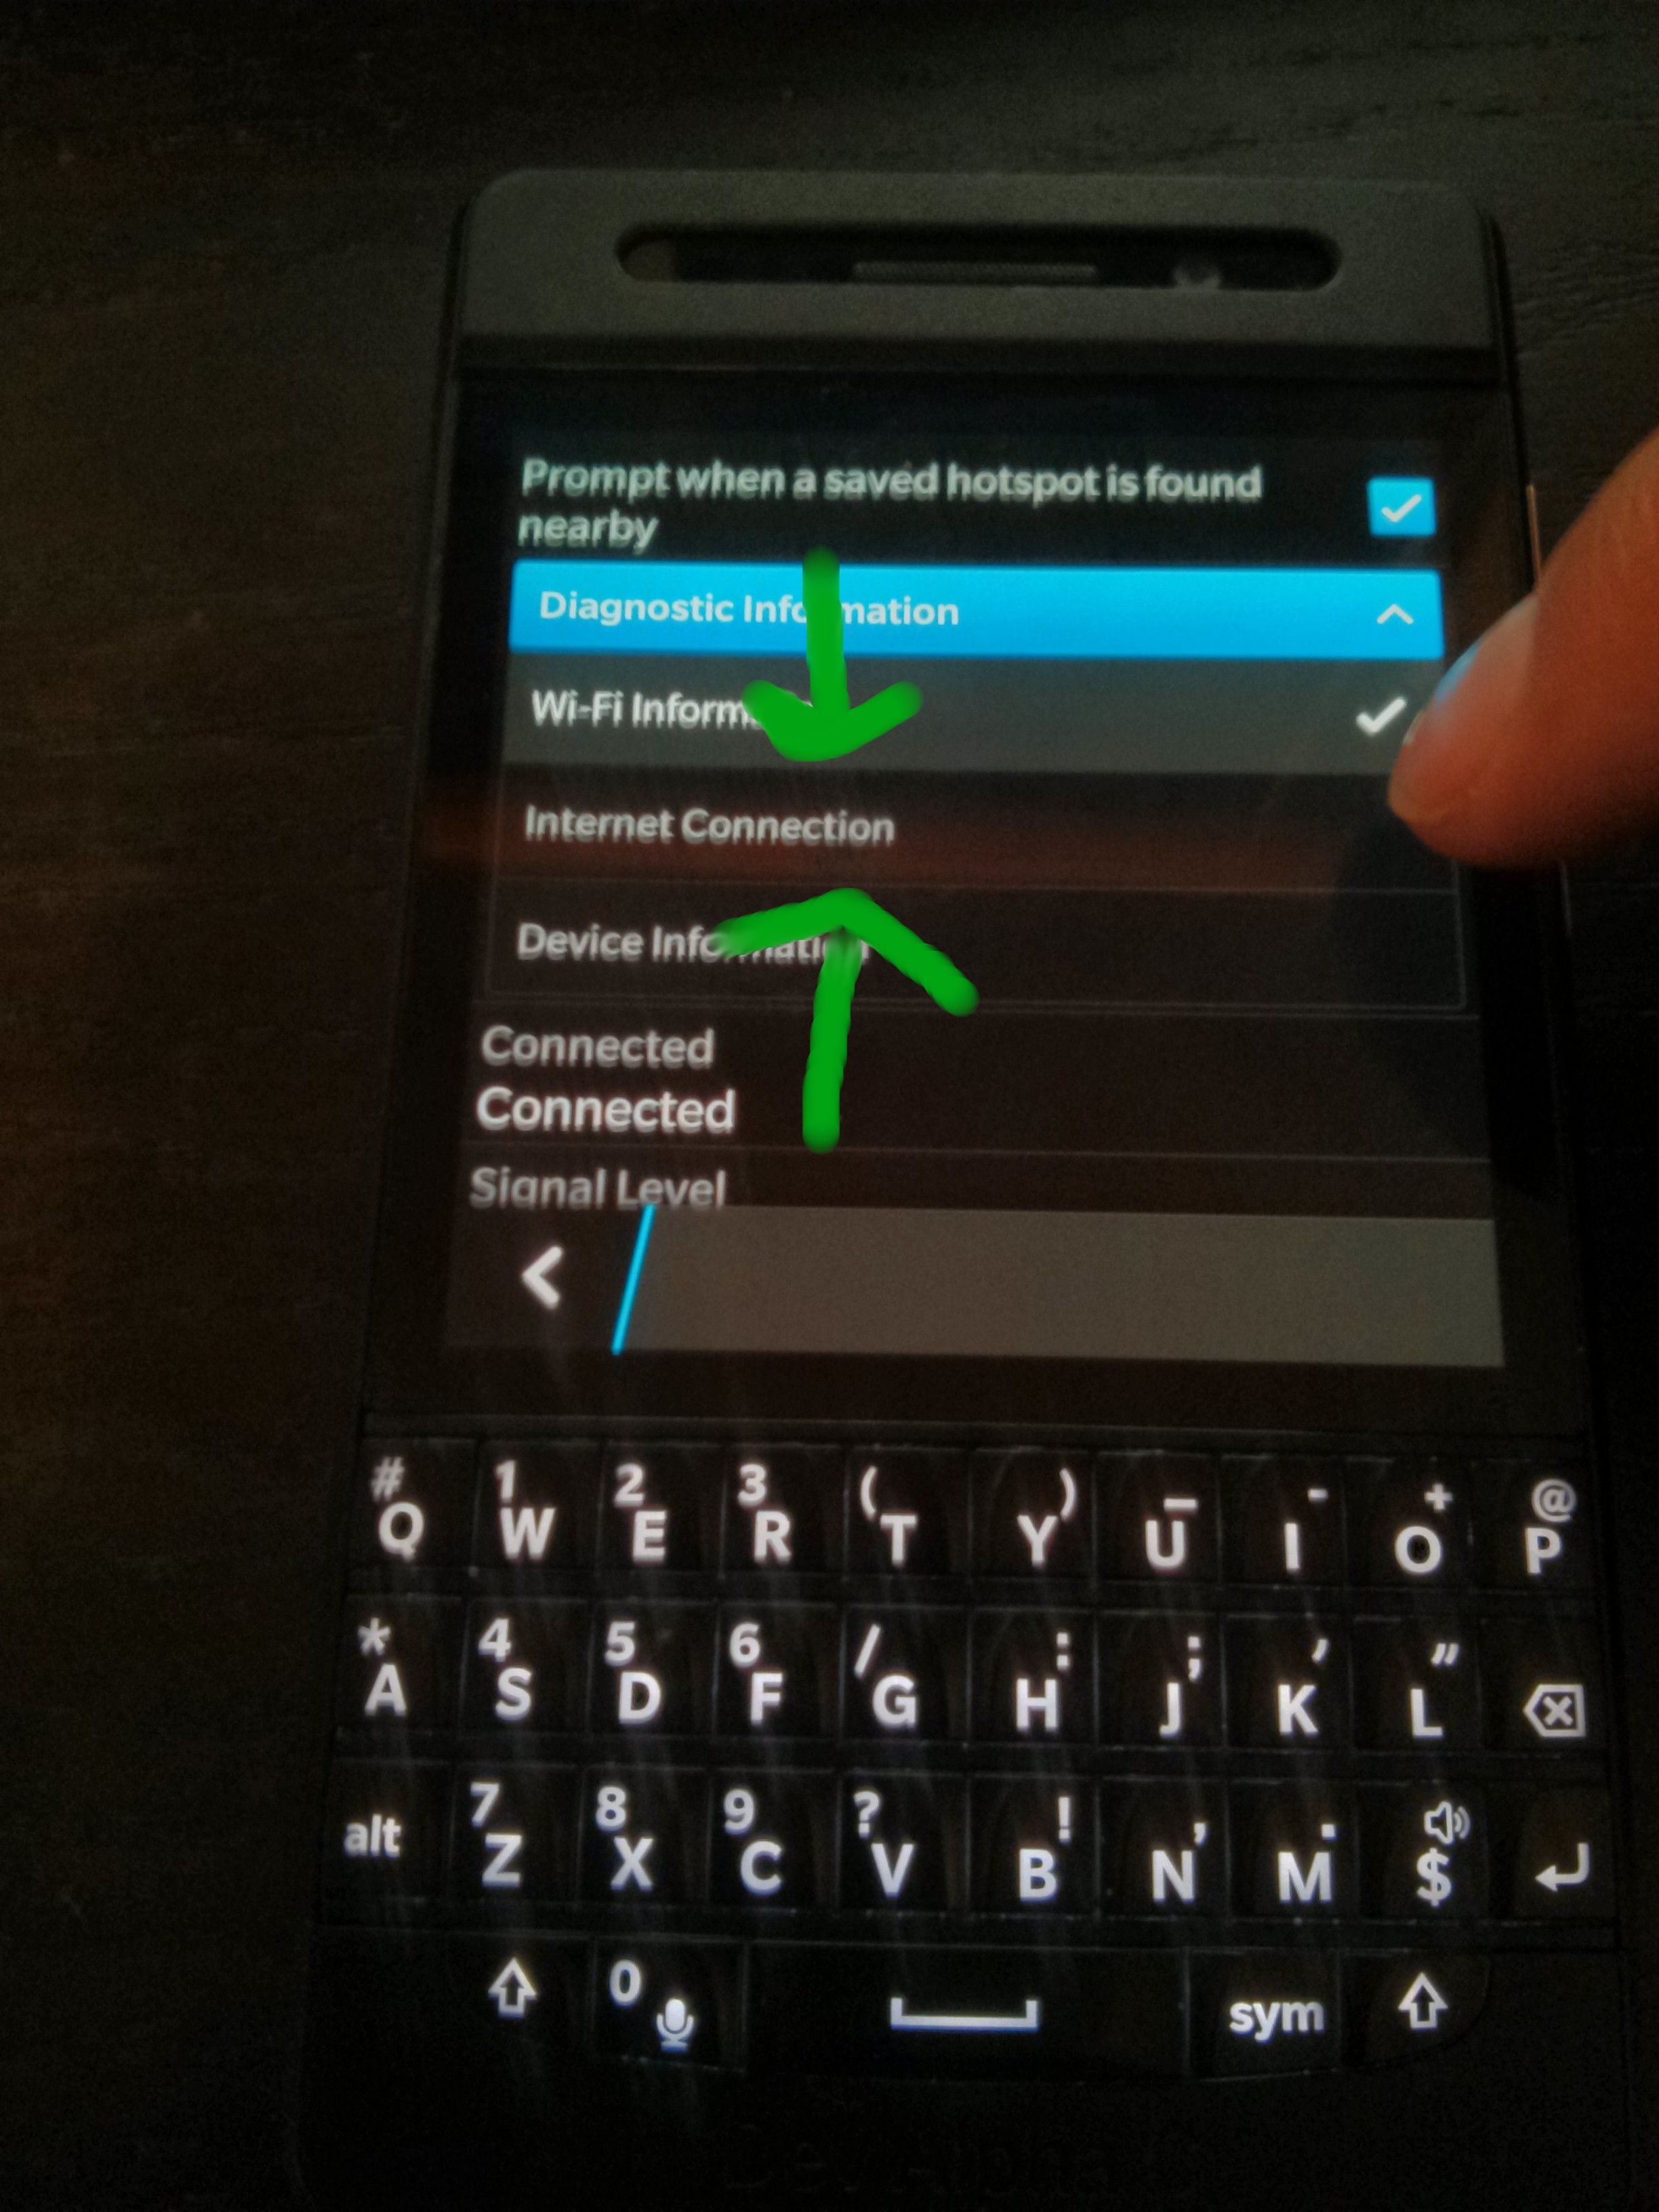
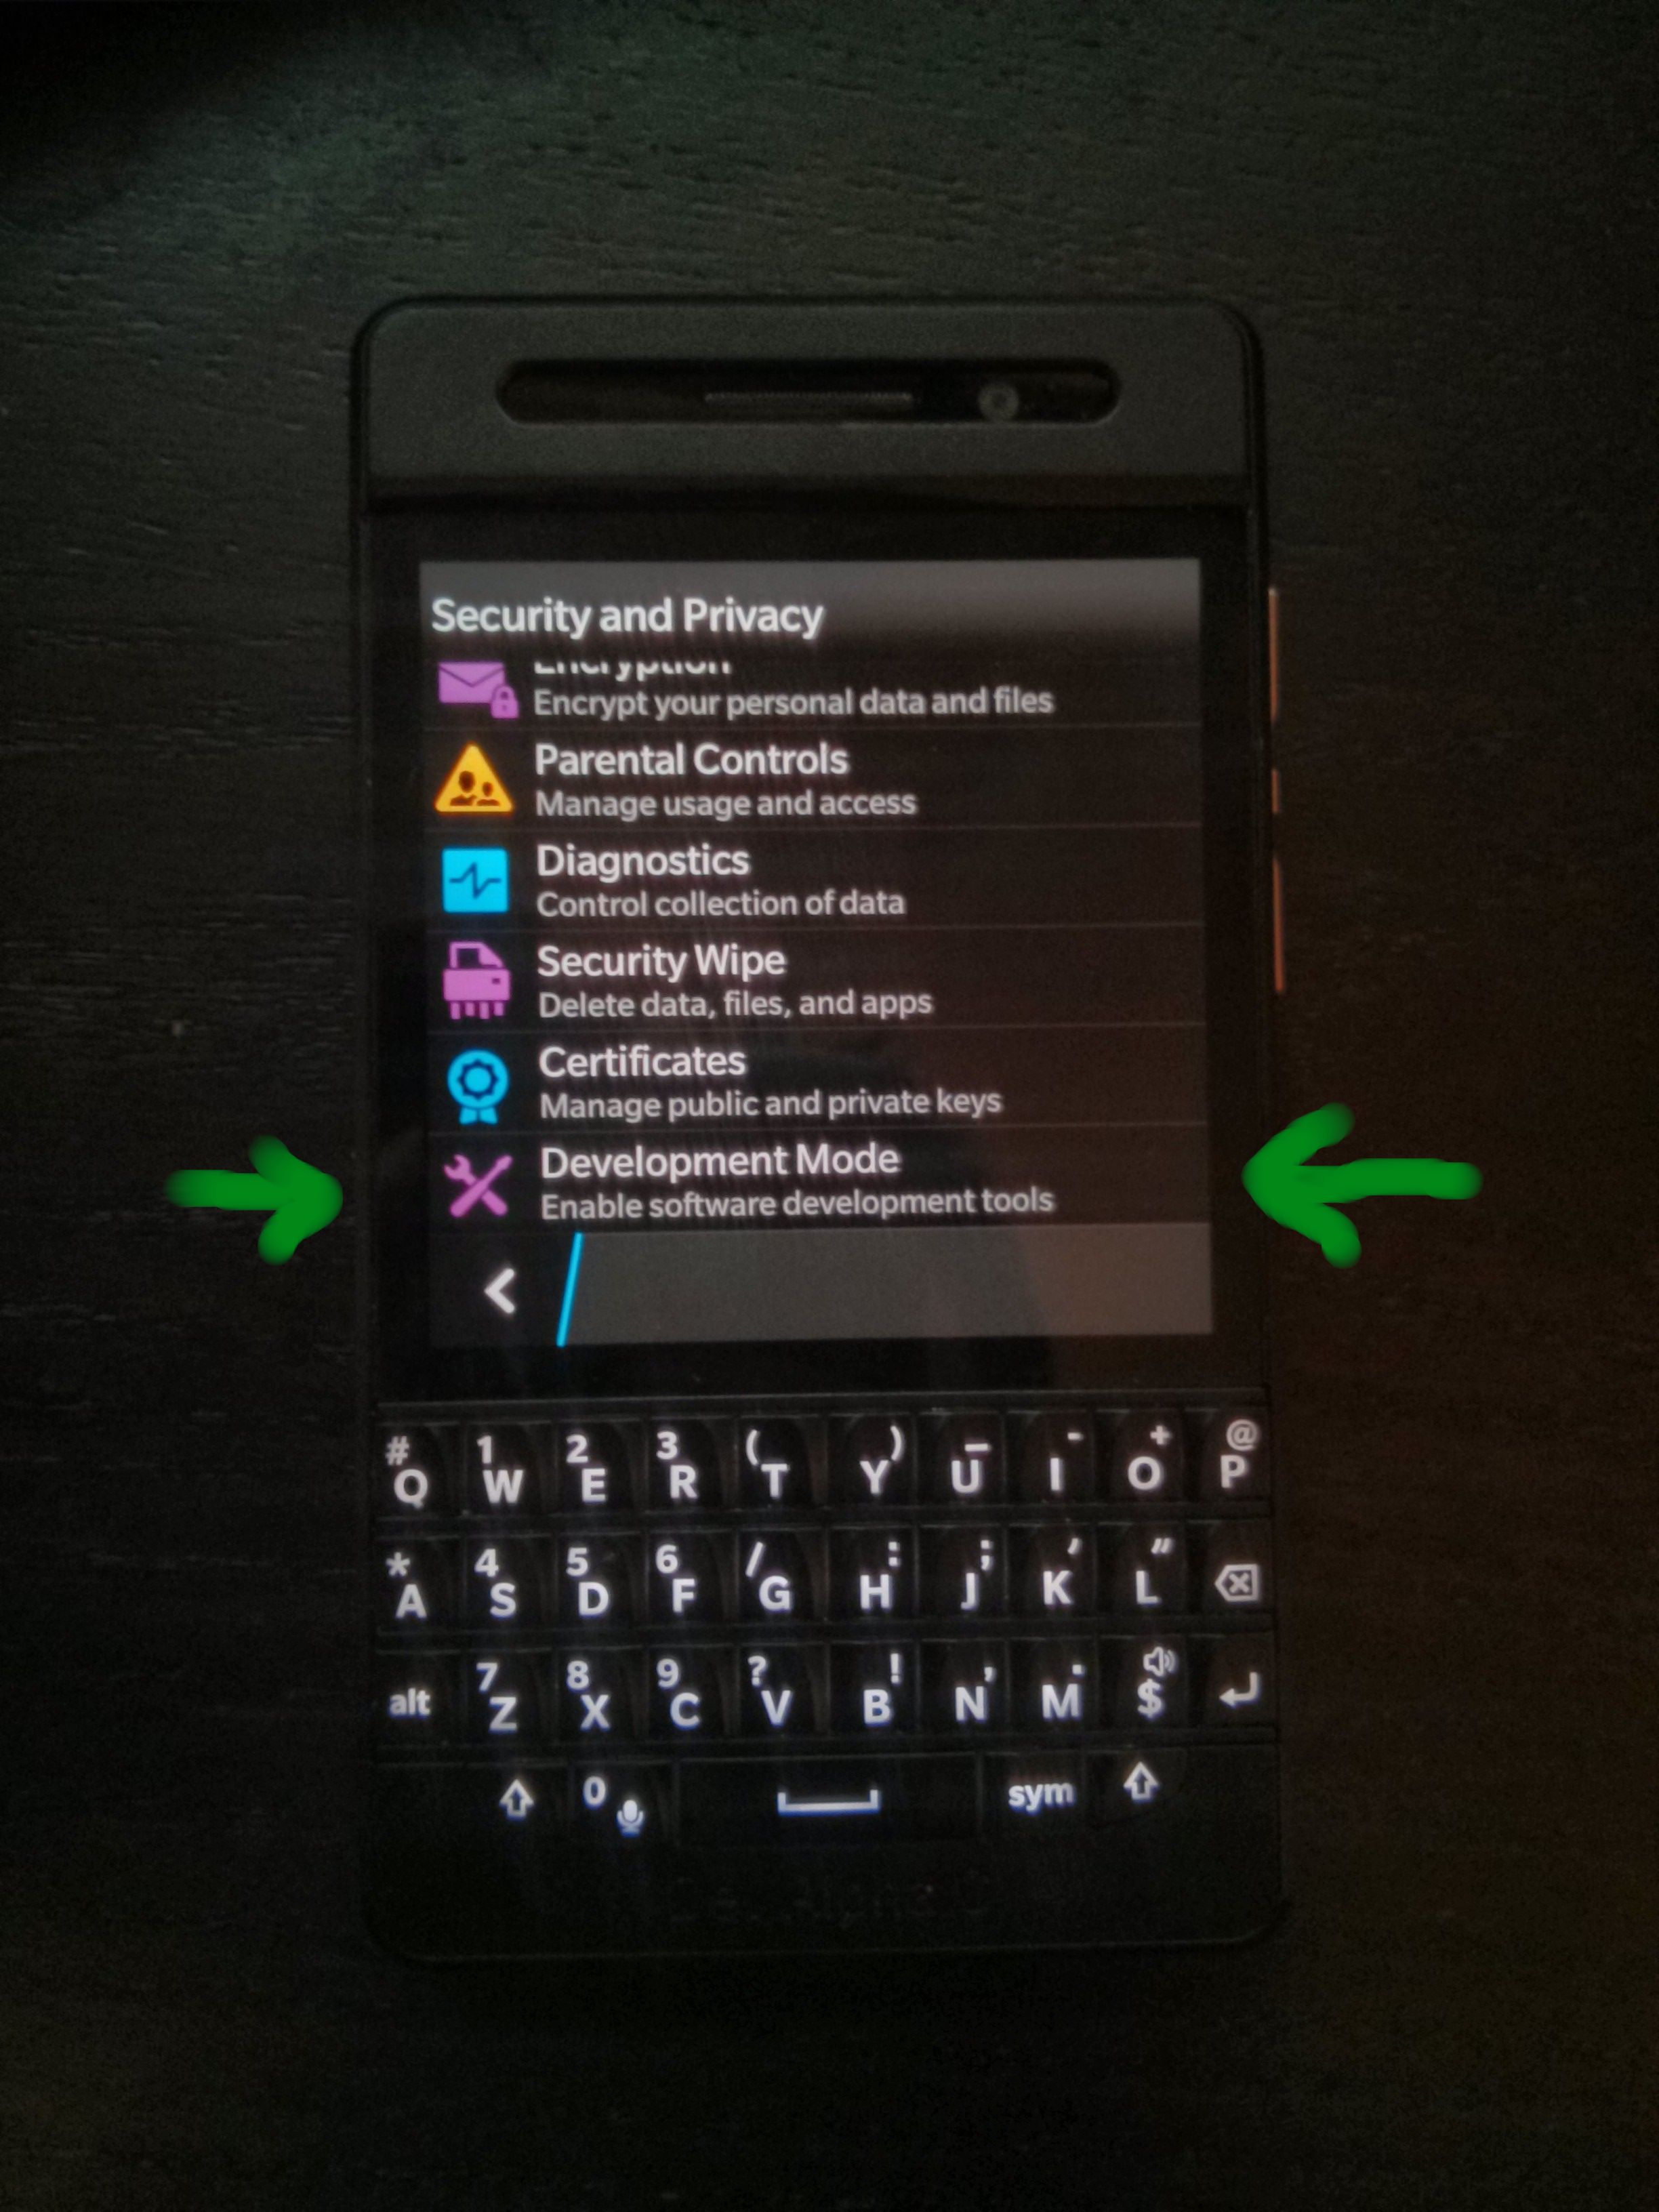
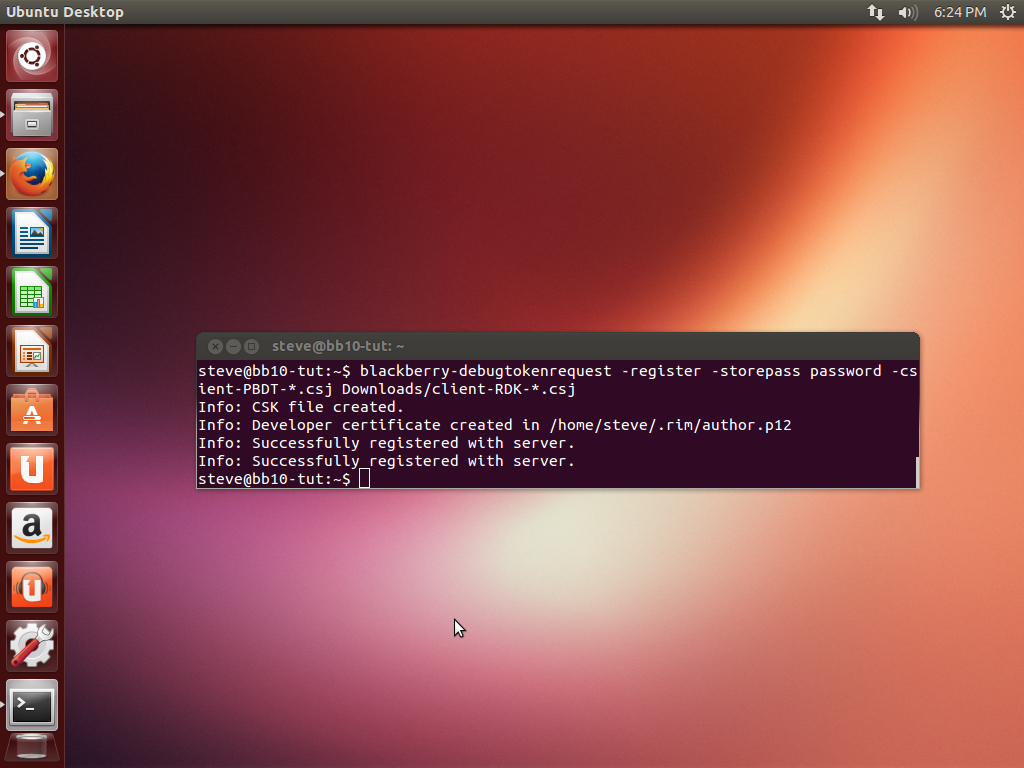
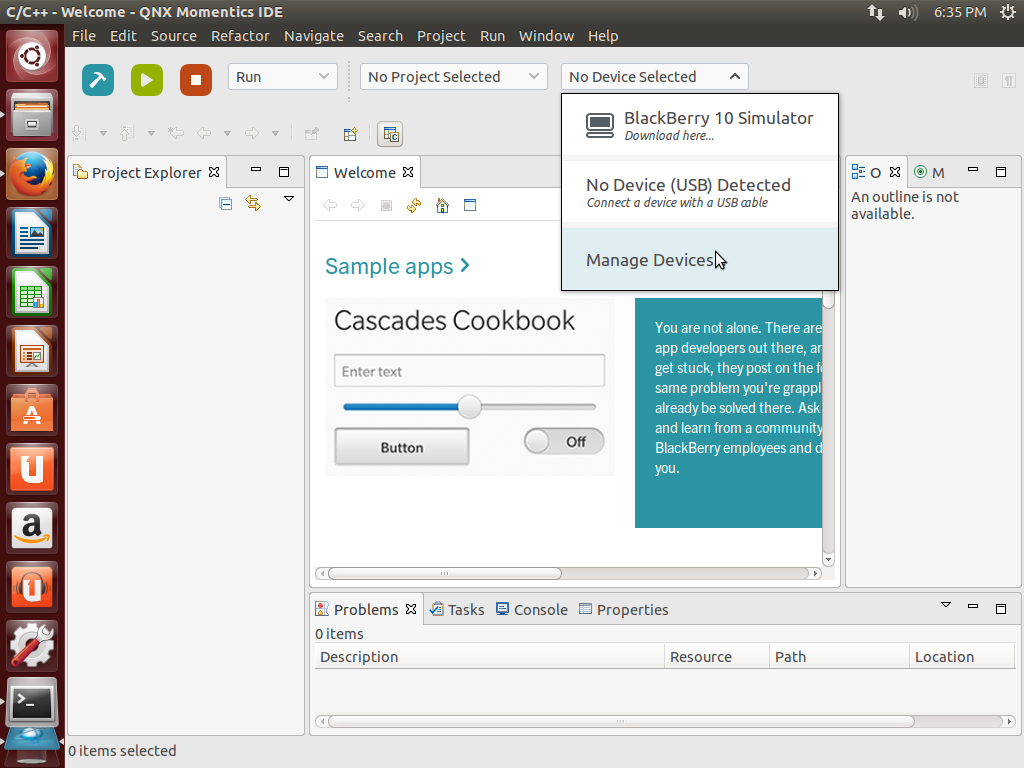
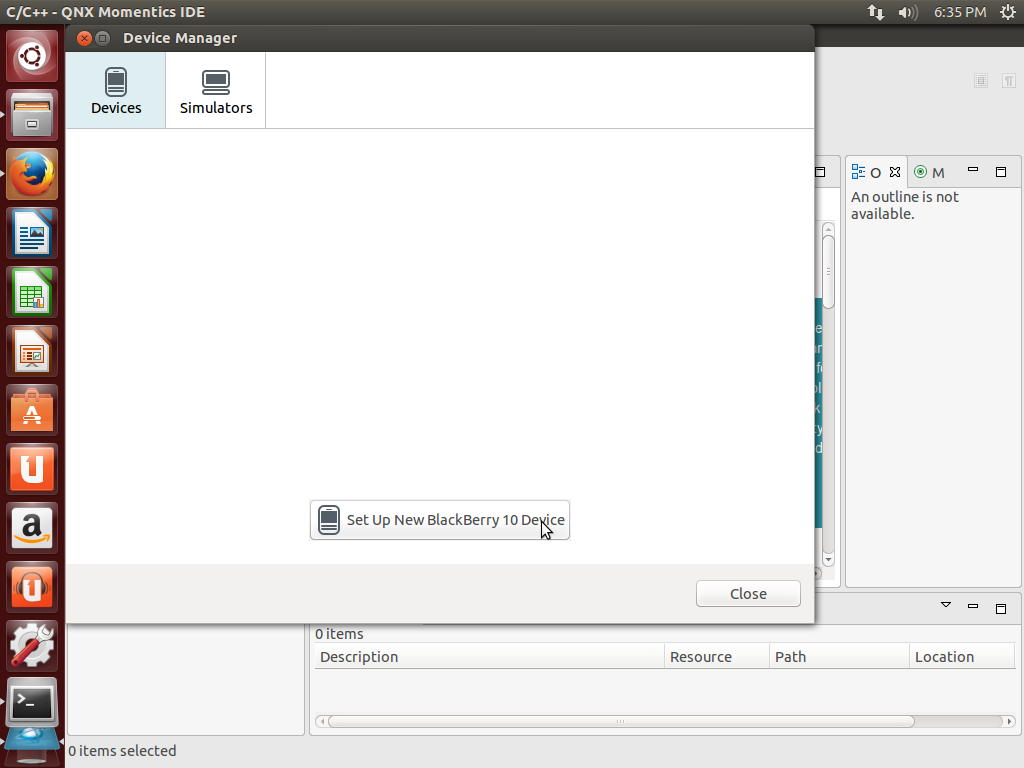
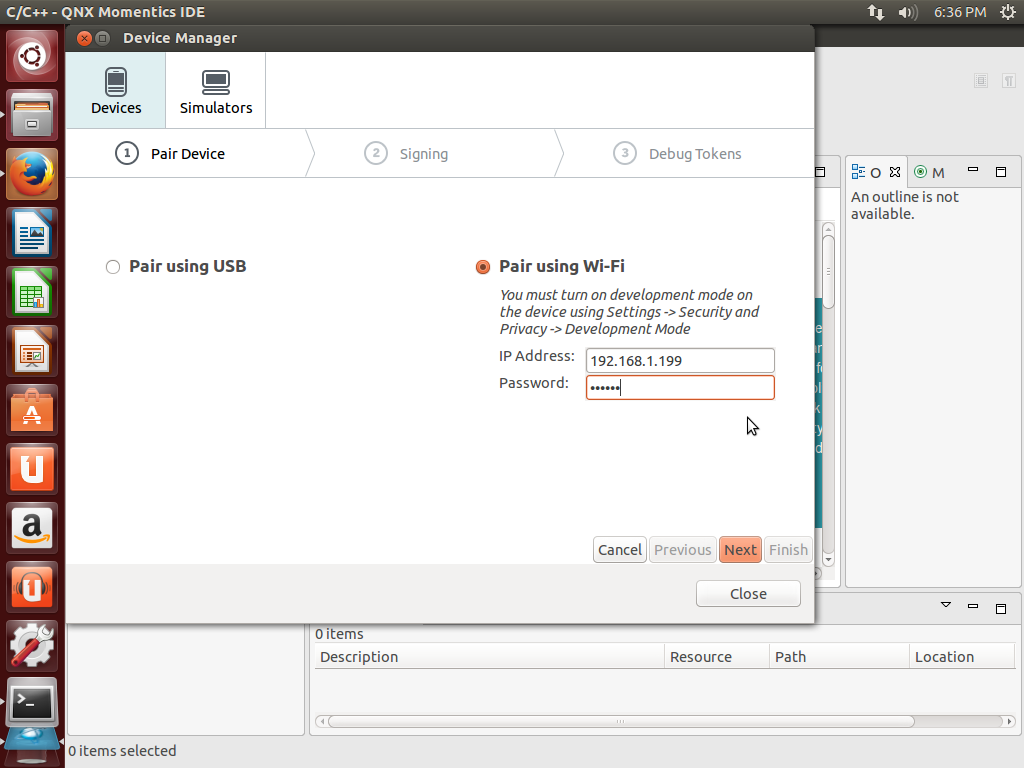
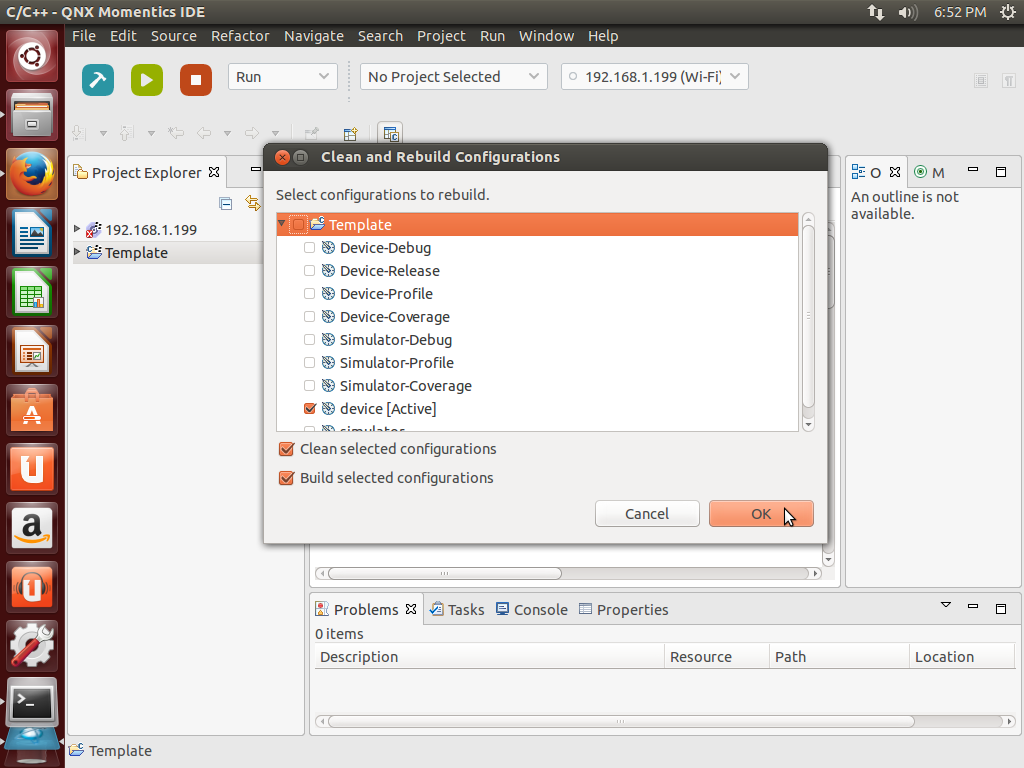
For our part this hackathon. was spent setting up our development environments. Sad to say but the setup process is a PITA. Clocking in at 15 steps when I wrote it up, there is zero chance I would have figured it out without our mentor’s inside knowledge of BB10. At this point I should mention that our mentor works at Blackberry so in a way our project was an extension of BB10’s development.

In a far too real way, half our pain was rooted in BB10’s closed nature. We had to request keys from Blackberry and these keys were only batch generated every two hours. Once the server sent you a key, you had to setup two different processes for package signing. The dev phone themselves needed to be put into dev mode after every reboot or you would hit misleading error messages. By far, the most painful mobile dev environment I’ve ever setup and it stands it stark contrast to Firefox OS’s dead simple html5 environment.

IMG_20130921_155015

This may have been the morning of the 21st, or the evening. In either case we were all tired.


IMG_20130920_102218

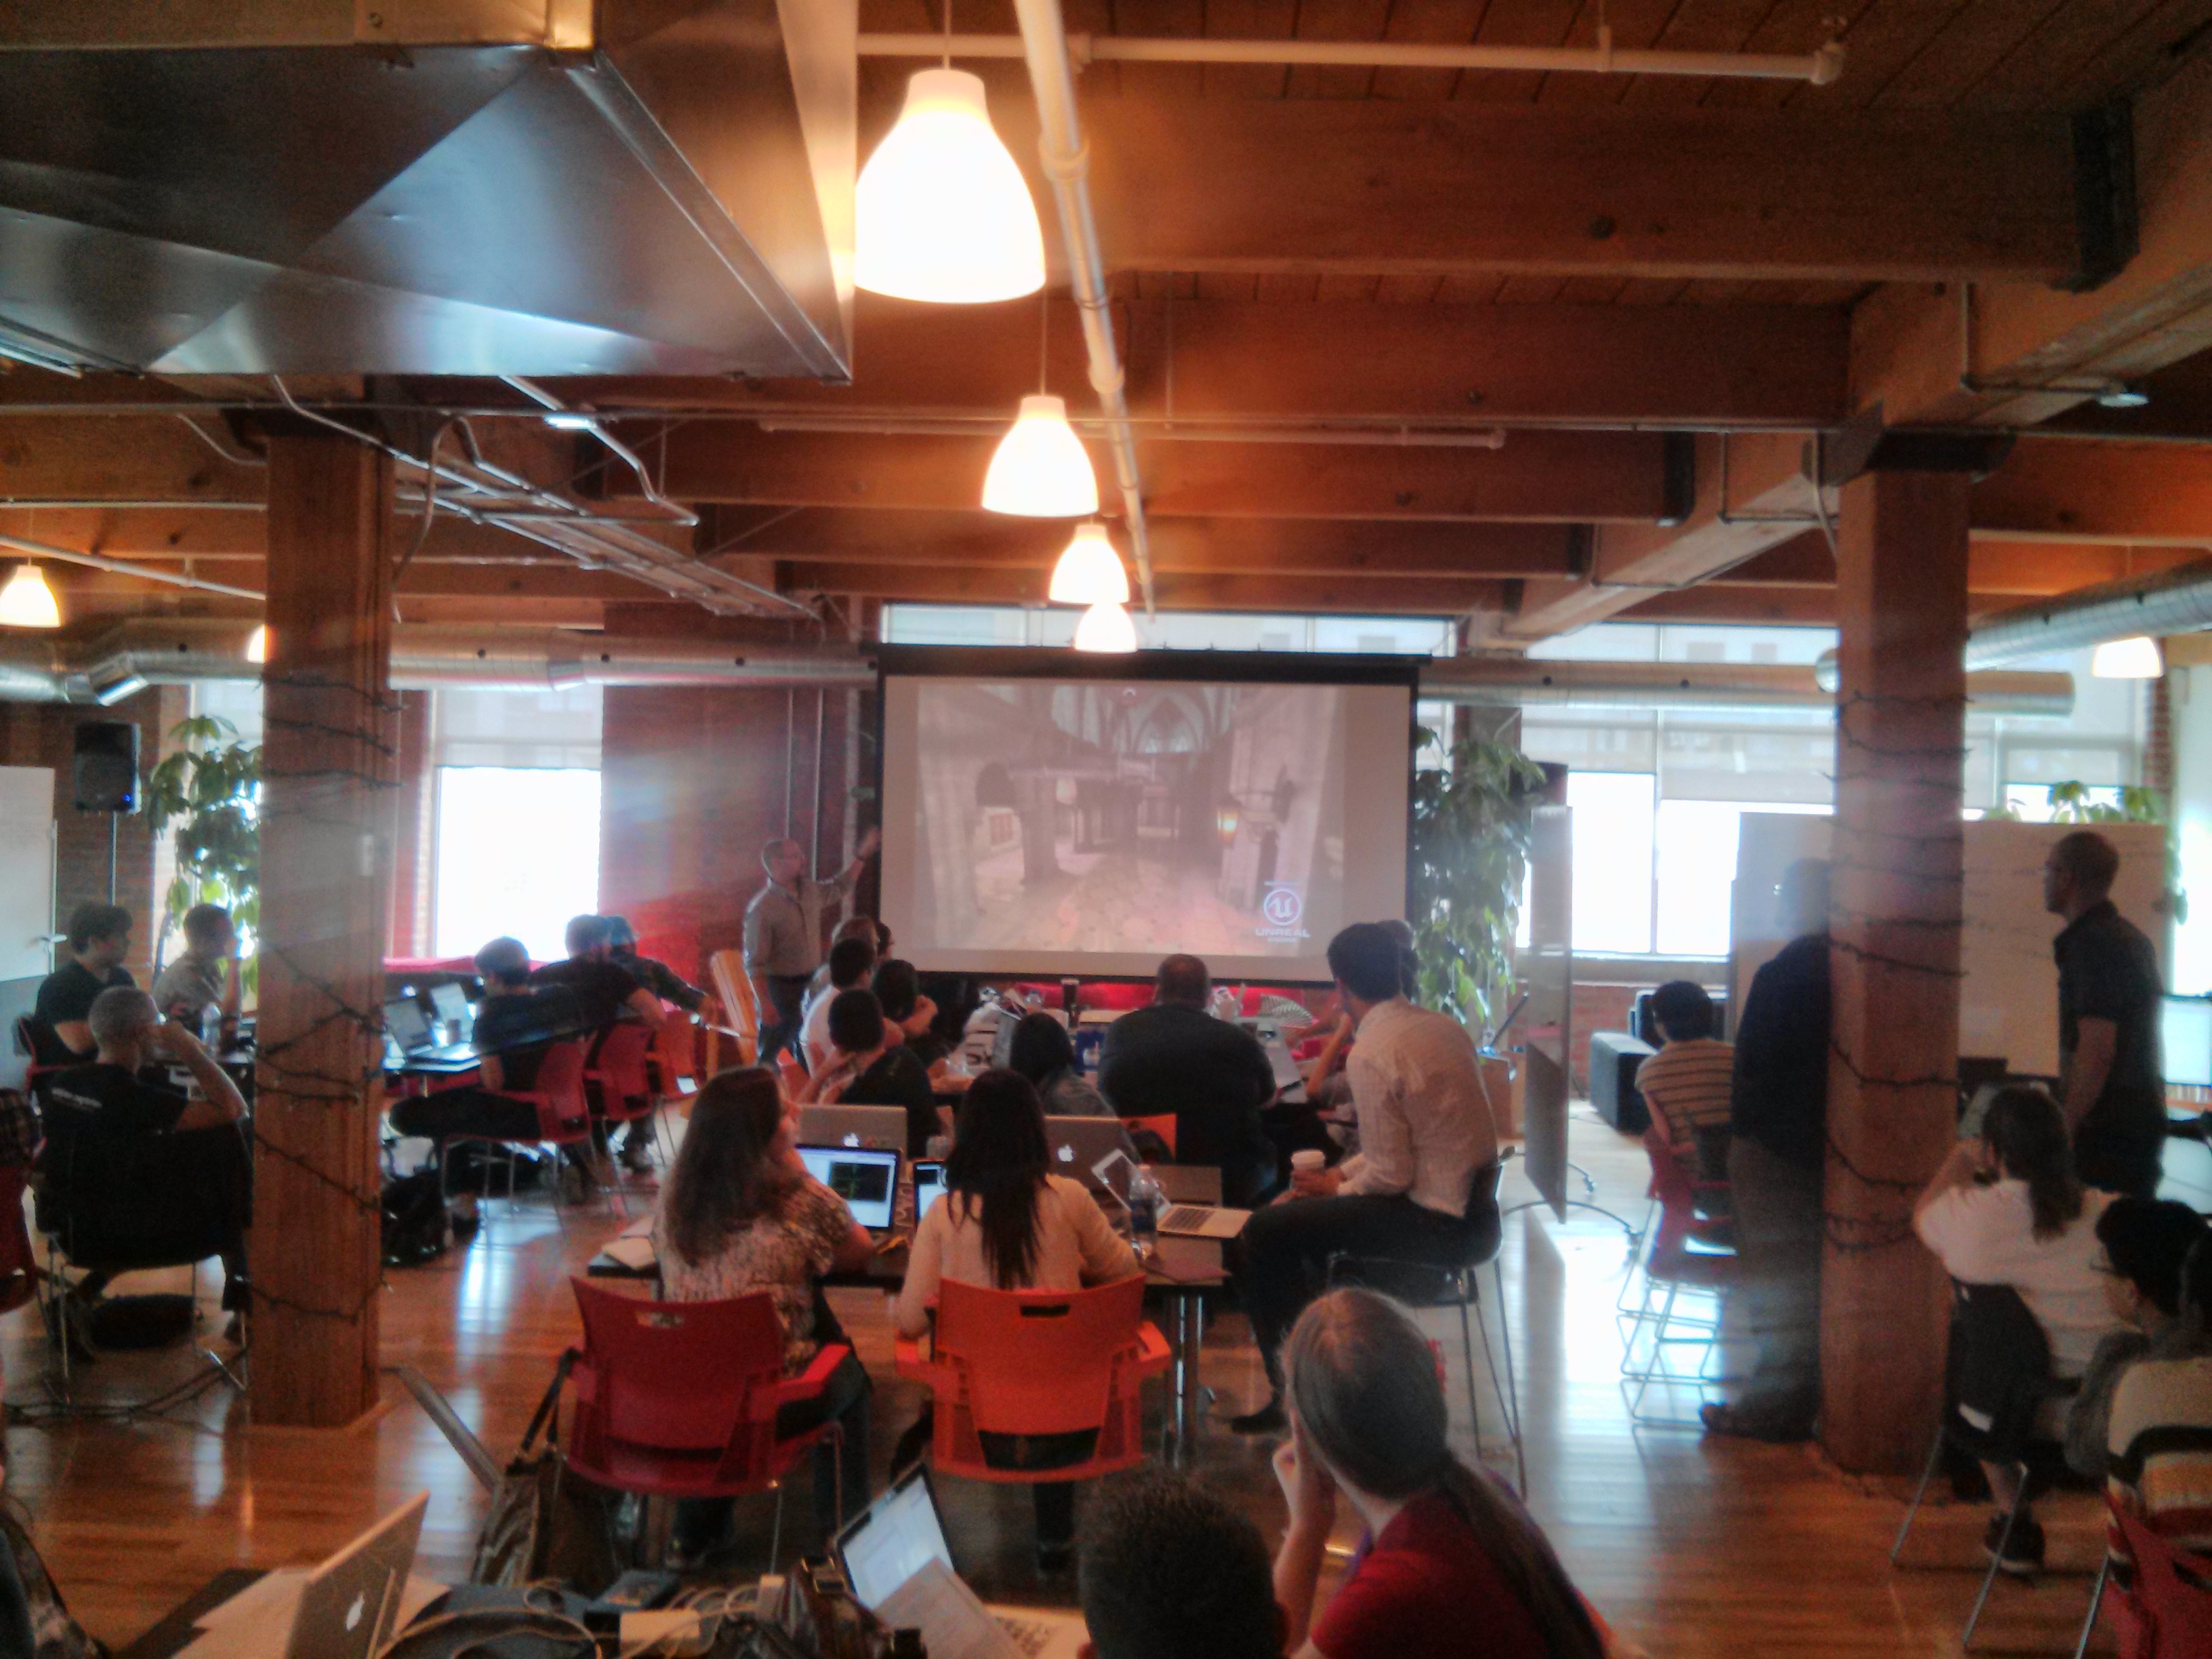
Midway through the 20th, Mozilla gave a demo of asm.js. I’ve seen it before, but it was exciting to see a demo of the tech from Mozilla themselves.

IMG_20130922_090127

I’ve never been on a real tram before so it was nice to have the chance on my way back to the airport.

In prior years UCOSP tried to go right up until the offical end hour but this year they organized things to allow early departures. This gave me plenty of time for my airport commute.

IMG_20130922_171439

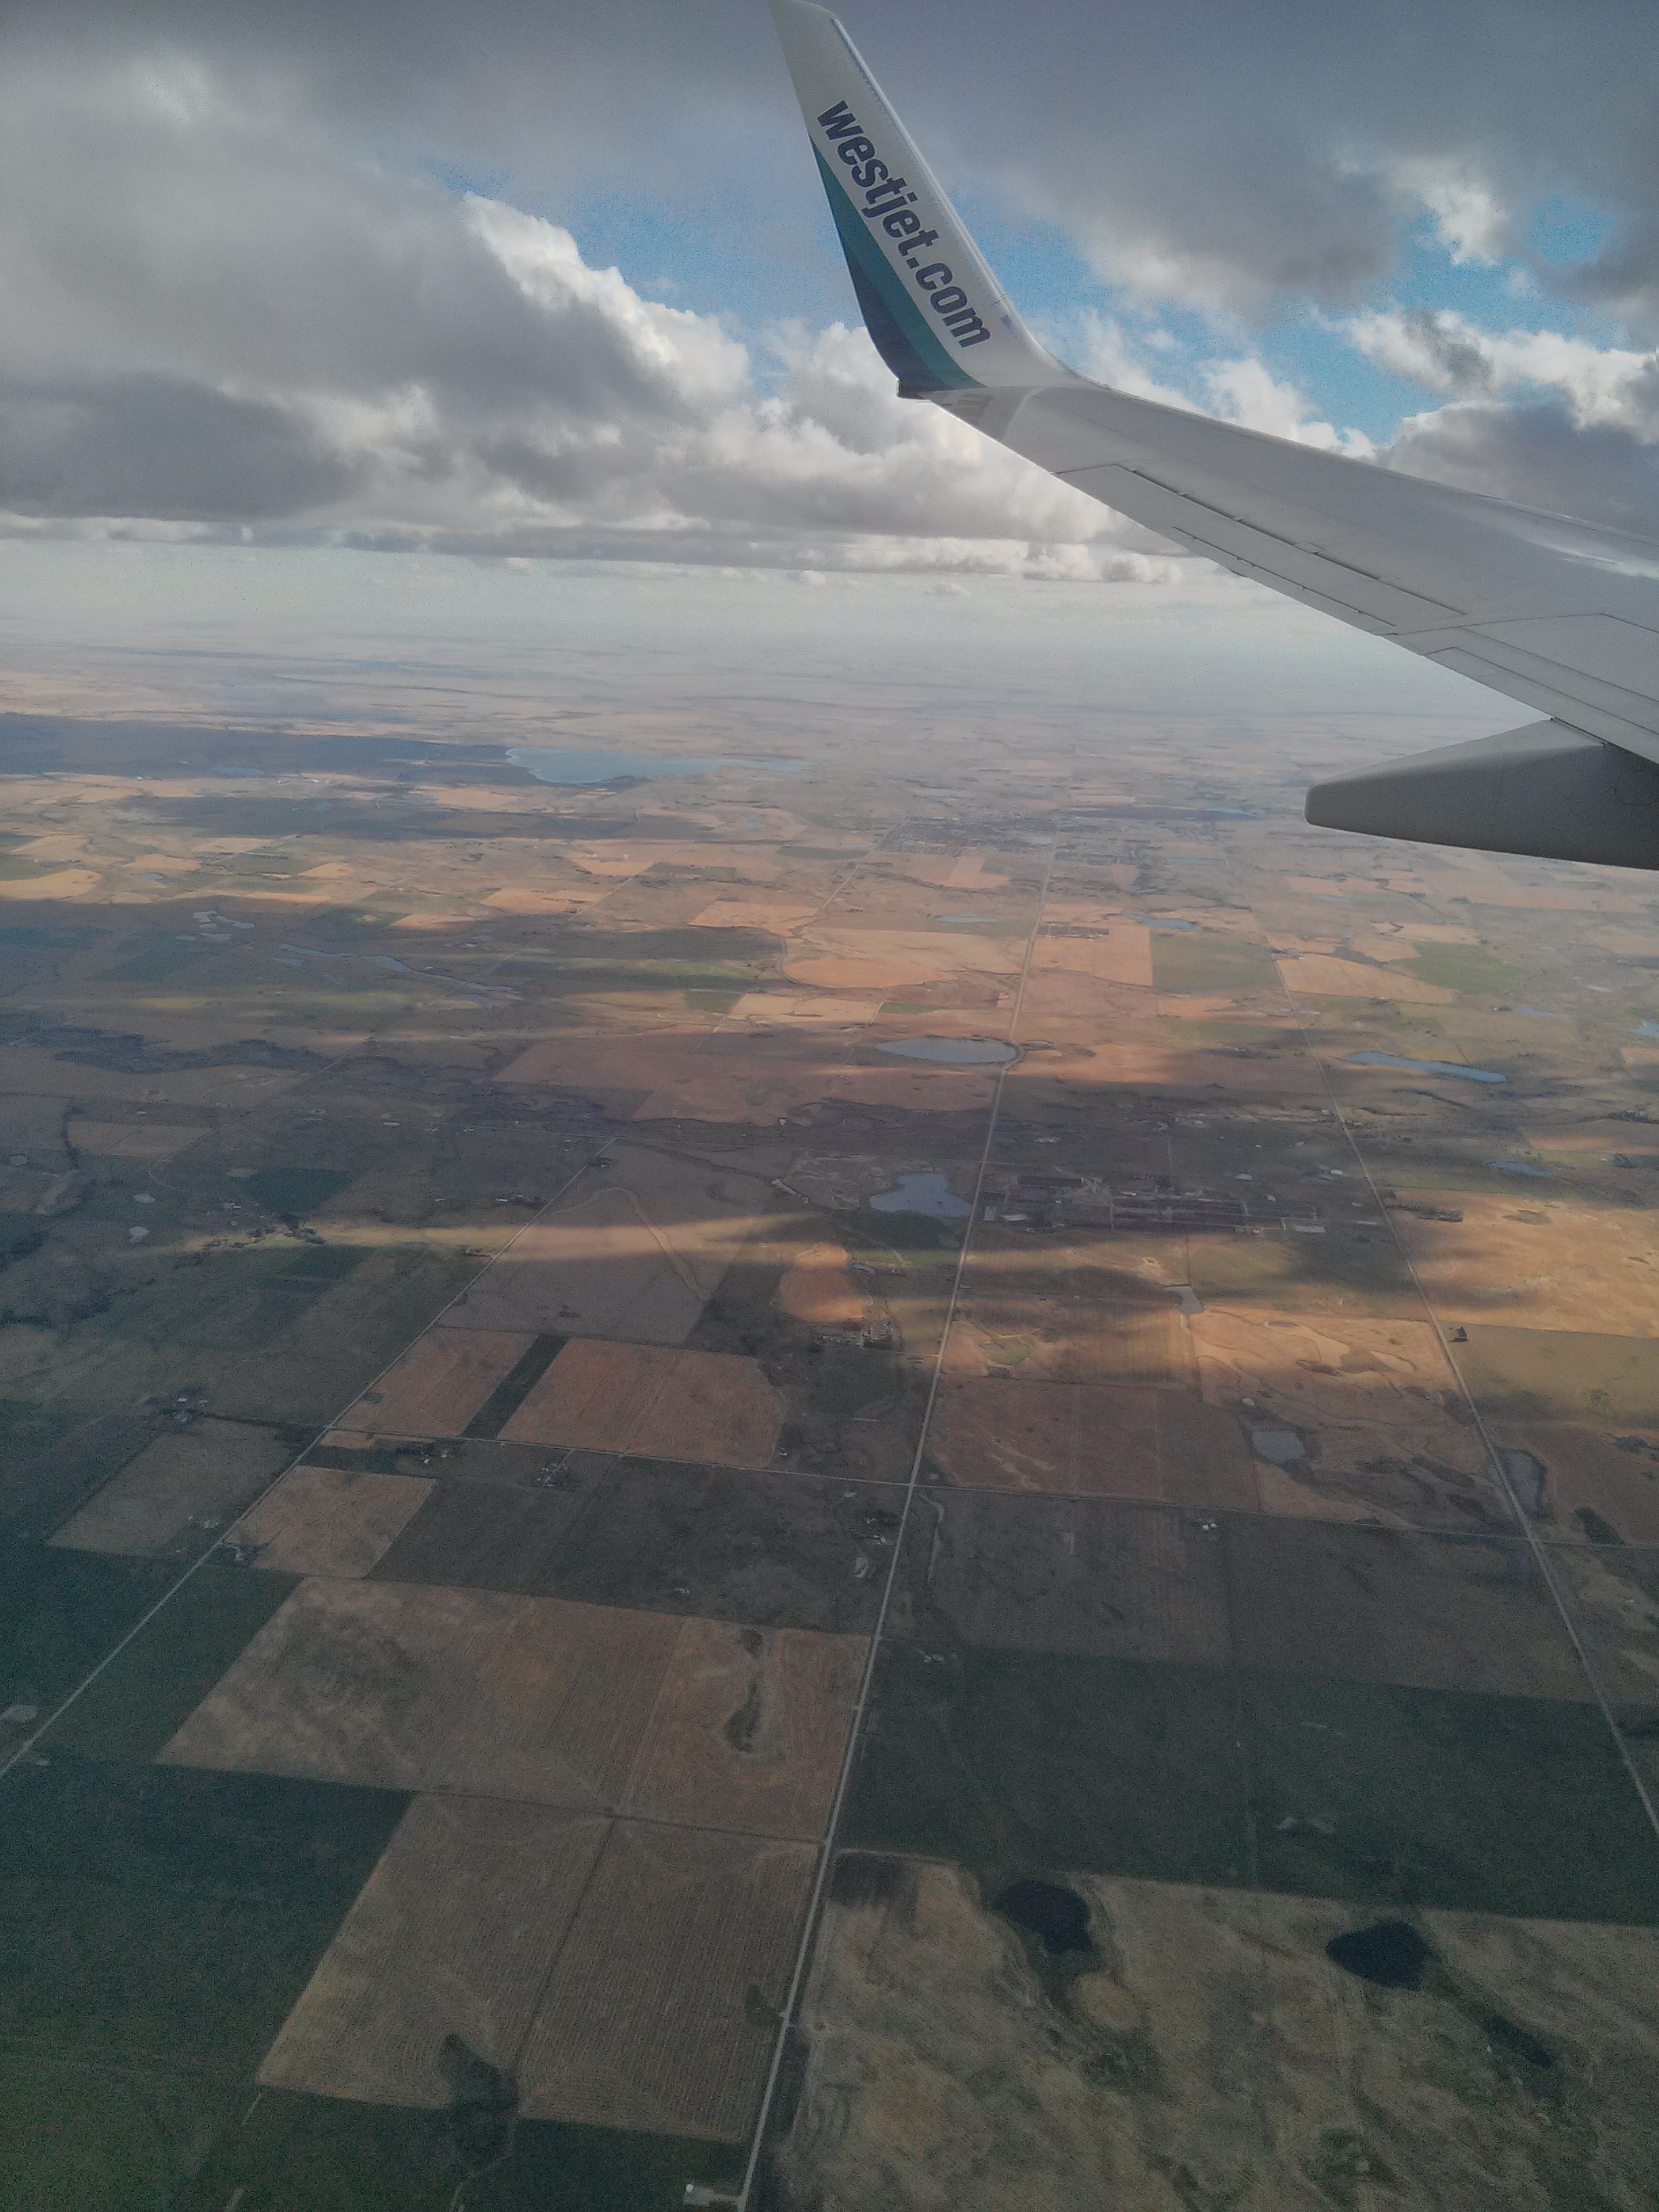
Somewhere over the prairies. Judging by the abundance of lakes, I’d guess Manitoba.

Rest of the Semester

Once home I met with my professor on Monday to plan how the work would go. He suggested writing a list of commitments for the week in our weekly monday meeting. Then during the next meeting I had something concrete to report on. For the first week I took it slow to catch up on missed school work. In the later weeks the goals were sub-milestones for my zip plugin.

At the semester’s end he had us UCOSP students give a presentation on our projects to each other and to the students in his other capstone course.

In the end we hit our goal at four plugins but there is a chance we were still the least successful this semester. We got the work done and I’m proud of that, but we didn’t act as a distributed team. We set out as two subgroups of two devs a group. Due to some hardware, failure my partner didn’t have a development environment setup until half-way through the semester. By this time I was deep into my zip extraction plugin so instead of joining me on the zip plugin, my partner decided to start out on his own plugin and salvage what was left of his semester. I regret not keeping in better contact with him. I had pinged him a few times but I held back checking too often for fear of being nosey.

Thus, I cannot report doing the fun distributed team things like code reviews or hanging out on irc. With that said, please don’t let my experience discourage you. Stuff happens and sometimes things go wrong, but in general they go right. The other UCOSP students from my university reported lots of code reviews, wikis, and even team blogs! Just imagine, next year you could be hanging out with team members from across Canada working on your own UCOSP project! Apply today!

Ubuntu 13.10 Blackberry OS 10 Cordova plugin development setup

After upgrading to Ubuntu 13.10 the QDE setup for 13.04 needs new dependencies. The change itself is small, just install the following libraries before you run qde:

sudo apt-get install libgtk2.0-0:i386 libpangox-1.0-0:i386 libpangoxft-1.0-0:i386 libidn11:i386 gstreamer0.10-pulseaudio:i386 gstreamer0.10-plugins-base:i386 gstreamer0.10-plugins-good:i386 gstreamer0.10-ffmpeg:i386libcanberra-gtk-module:i386 libcanberra-gtk0:i386 libcanberra-gtk3-0:i386 libcanberra-gtk3-module:i386 libxtst6:i386

If you do not install those you will get errors like:

After upgrading to Ubuntu 13.10 the QDE setup for 13.04 needs new dependencies. The change itself is small, just install the following libraries before you run qde:

If you do not install those you will get errors like:

java.lang.UnsatisfiedLinkError: Could not load SWT library. Reasons: 
	/home/danieru/.bbndk/configuration/org.eclipse.osgi/bundles/364/1/.cp/libswt-pi-gtk-4236.so: libgtk-x11-2.0.so.0: 共有オブジェクトファイルを開けません: そのようなファイルやディレクトリはありません
	no swt-pi-gtk in java.library.path


Linux Blackberry OS 10 Cordova plugin development setup

This semester I’m contributing towards HTML5 on BB10 with thanks to UCOSP and my team’s mentor Tim Windsor from Blackberry. We’re implementing and porting cordova (phonegap) plugins.

Setting up my development environment under linux (Ubuntu 13.04) took the full first day of our face-to-face sprint. I am thankful Tim was sitting across the table and was willing to  answer my many questions.

For this tutorial I am going to assume you are on Ubuntu 13.04 but other linux distros should be the a similar process.

For Ubuntu 13.10 you’ll need to take one extra step.

0. Install dependencies and linux tools

The non-BB10 specific tools we need can all be downlaoded through apt-get. Bring up a command line interface by pressing Ctrl + Alt + t.

In the command line run the following:

sudo apt-get install git ia32-libs openjdk-6-jre

That installs the BB10 IDE’s dependencies, java, and Git. Git being a version control tool we’ll use later to get the example Cordova plugin. Java is needed for the signing tools. If you are on 32bit linux you should not need ia32-libs

We also need a current vesrion of node.js for which we can use a ppa. Run the following commands:

sudo apt-get update
sudo apt-get install python-software-properties python g++ make
sudo add-apt-repository ppa:chris-lea/node.js
sudo apt-get update
sudo apt-get install nodejs

Now install cordova through node.js’s package manager with the following commands:

sudo npm install -g cordova

1. Download the BB10 IDE, BB10 specific Cordova, and signing tools

We need to download the following:

  1. “QNX Momentics IDE for Linux”, which is the Blackberry OS 10 Native Development Kit: http://developer.blackberry.com/native/downloads/
  2. Community ported old BB10 Webworks SDK: https://github.com/badtoyz/BB10-WebWorks-SDK-Linux-Gold/archive/master.zip

We have many files to download so get those downloads started now and start reading ahead.

2. Install the IDE, which includes some Cordova tools

The IDE install file we downloaded is an installer binary which we must mark as executable and then execute, run the following in the command line:

chmod +x Downloads/bbndk-BB10_*
./Downloads/bbndk-BB10_2_0X-1155-106-201308081646.bin

The IDE installer will ask where to install the IDE into. For the purpose of the tutorial we’ll install in a folder called “bbndk”, the default suggested folder. If you feel comfortable with linux then we can install it elsewhere provided you know how to edit the below commands to use your desired install path.

installing_bbndk

Installing the IDE (QDE) into bbndk folder

3. Extract the signing tools

The signing tools we need can only be found in the community ported version of the old WebWorks tools. We downloaded them earlier and now we should extract them to the folder “bbndk-signing”. You can use the default Ubuntu unzipper or run the following on the command line:

unzip Downloads/BB10-WebWorks-SDK-Linux-Gold-master.zip -d bbndk-signing

4. Add the tools into our PATH

When you run things from the command line the shell looks for the program in the list of directories in your PATH. We need to add the directory with the IDE, the signing tools, and the BB10 specific Cordova tools.

Open the hidden file ‘.bashrc’ by running:

gedit ~/.bashrc

We must add the following lines at the bottom of .bashrc:

export PATH="${HOME}/bbndk:${PATH}" # The IDE 'qde'
export PATH="${HOME}/bbndk-signing/BB10-WebWorks-SDK-Linux-Gold-master/dependencies/tools/bin:${PATH}" # signing tools
export PATH="${HOME}/bbndk/host_10_2_0_15/linux/x86/usr/bin:${PATH}" # BB10 Cordova

Now you must close your terminal window and re-open it so that the new PATH setting will take effect.

bbndk_in_PATH

Once the additional directories to the PATH have been added the bottom of .bashrc should look like the above


5. Download an SDK through the IDE

Now that your PATH variable is set correct you may launch the IDE by running the following command:

qde

The IDE will open a window asking you to connect a device and download an SDK. For our purposes you do not yet need to setup your device for the SDK. As such select the “No Device” option and uncheck the “Download Simulator”, then click next until the download starts.

qde_download_sdk_no_device_or_simulator

We shall be using the Cordova tools to package and push the complete application but we’ll still add the device later on for different reasons.

The SDK download may take a while, I have found the Blackberry servers to be slower than one might expect. It is safe to perform step 6 & 7 SDK is downloading but we shall need the SDK for steps 8 and onwards.

6. Request a signed development key

Before we can sign and push our applications we need a special signed key from Blackberry. We can request such a key through https://www.blackberry.com/SignedKeys/codesigning.html

Select the second option as we’ll be signing with the Blackberry WebWorks tools. Request the key now as it takes upto 2 hours for it to arrive. The two files we’ll need shall be emailed to you.

7. Find your phone’s IP address

Since BB10 simulator requires a paid license to proprietary software I will only be able to cover how to use a real BB10 device. Blackberry was gracious enough to provide my team members each with a “Dev Alpha C”, a cooler looking model of the Q10.

The IP address we need is the one associated with your WiFi network, not the usb connection, nor your mobile data connection. The exact path through the menus is non-obvious so we’ll go over board on the photo guide for this section.

bb10_1_network_connections

Open the Settings app and select “Network Connections”

bb10_2_wifi_network

Select your WiFi network

bb10_3_wifi_network_settings

Now find the settings tab in the bottom right

bb10_4_dropdown

We need to switch the type of details shown by using the dropdown list

bb10_5_internet_connection

From the dropdown select “Internet Connection”

bb10_6_ip_address

Now the IP address should be the first detail shown

In my case the IP address of my development phone is 192.168.1.199

Make note of your phones address as we shall use it later on.

8. Clone the community plugin repository

Now we must get the example cordova plugin. We can find said plugin in the community plugin git repository hosted on github: https://github.com/blackberry/WebWorks-Community-APIs

The exact commands we must run are:

git clone https://github.com/blackberry/WebWorks-Community-APIs.git

That will clone the git repository. From now on we should issue all commands from the example plugin which is called “Template”. Navigate to “Template” plugin with the following command:

cd ~/WebWorks-Community-APIs/BB10-Cordova/Template/sample

With the “Template” plugin the “sample” folder contains the cordova app which acts as an example for the plugin’s usage. We’ll use this sample as our hello world.

9. Enable development mode on your device

bb10_9_1_privacy_and_security

From the main settings screen select “Security & Privacy”

bb10_9_2_navigate_to_dev_settings

Scroll to the bottom and select “Development Mode”


bb10_9_3_turnon_dev_mode

Now turn on “Devlopment Mode”. The phone will set Development Mode to off after every restart so you’ll have to redo these steps if you restart the phone.

Your phone should now be in development mode. It might also be flashing a red light, the flashing will go away in time. Notice that the IP address listed does not match the one we wrote down earlier. That is because this IP address is for the usb connection.


10. Generate an author .csk

Now let us register our signing key. This will generate a author .csk key store which we’ll later use to generate the debug token which gets push to the device. You must edit the following command with your own password and the pin you selected when registering for the signing key:

blackberry-debugtokenrequest -register -storepass PASSWORD -csjpin PIN Downloads/client-PBDT-*-.csj Downloads/client-RDK-*-.csj

Notice that this command assumes you downloaded the two signing key files into your Downloads folder. Edit the paths if this is not the case.

register_signing_key

What it looks like when after registering the signing key. Notice when I registered for my key I used a very weak password, please use a stronger password.

11. Generate a debug token

Now we must use the IDE to generate the debug token. Then we must move a copy of this debug token to where the cordova tools expect. To do this we must add the device to the IDE.

add_device_step1

From the “No Device Selected” dropdown select “Manage Devices”

add_device_step2

Click the “Set up new bb10 device” button

add_device_step3

Use the IP address we wrote down earlier and the password you have set on your phone.

Now click next until it asks if you would like to generate a new debug token or import one. Please do generate a new token and follow the on screen instructions. Once the debug token has been pushed to the device the IDE will ask you if you would like to download debug symbols. We do not need them but there is no harm in downloading the symbols anyway.

Now run the following command to move the debug token to where cordova can use it:

cp .rim/debugtoken1.bar .cordova/blackberry10debugtoken.bar

The filenames are important so please do not change them.

12. Add device to cordova

Since it is cordova which does the heavy lifting we must tell cordova how to connect to your device. Since cordova remembers devices on a project by project basis you must navigate to Template’s sample cordova app.

cd WebWorks-Community-APIs/BB10-Cordova/Template/sample

Now edit the following command with our device’s IP address and password:

./platforms/blackberry10/cordova/target add dev_phone 192.168.1.199 --password PASSWORD

13. Build the native binaries

We must use the IDE for compiling the native binaries. We must add the plugin to QDE and then use a non-obvious build command so please follow the screenshot guide:

import_template_step1

Select Import from the main dropdown menu

import_template_step2

Select import from existing project

import_template_step3

Select the root directory of the plugin’s project.

import_template_step4

The plugin’s project directory is the one which contains the hidden .project file. It is the following folder: ~/WebWorks-Community-APIs/Template/plugin/src/blackberry10/native

import_template_step5

Now click finish and you’ll have the plugin project in the IDE

import_template_step6

Now before we build we must set the active target profile to build. We want to build for the regular “device” profile.

import_template_step7

Once the active build configuration has been set to “device” we can build by selecting the “Build Selected” option.

import_template_step8

14. Use cordova to build and run the plugin sample

Now the fun!

Run the following commands to copy the plugin’s native binaries into the plugin sample and then build and run the sample on our device!

cd ~/WebWorks-Community-APIs/BB10-Cordova/Template/sample
cordova plugin rm community.template
cordova plugin add ../plugin/
cordova run

15. You’re done!

You should see the sample app runing on your device. It should look something like thus:

sample_app_running

When developing your plugin whenever you make changes to the native files you must use the IDE to build new binaries as we did in ste 13 and then use step 14 to test them.

Congratulations!