This semester I’m contributing towards HTML5 on BB10 with thanks to UCOSP and my team’s mentor Tim Windsor from Blackberry. We’re implementing and porting cordova (phonegap) plugins.
Setting up my development environment under linux (Ubuntu 13.04) took the full first day of our face-to-face sprint. I am thankful Tim was sitting across the table and was willing to answer my many questions.
For this tutorial I am going to assume you are on Ubuntu 13.04 but other linux distros should be the a similar process.
For Ubuntu 13.10 you’ll need to take one extra step.
0. Install dependencies and linux tools
The non-BB10 specific tools we need can all be downlaoded through apt-get. Bring up a command line interface by pressing Ctrl + Alt + t.
In the command line run the following:
sudo apt-get install git ia32-libs openjdk-6-jre
That installs the BB10 IDE’s dependencies, java, and Git. Git being a version control tool we’ll use later to get the example Cordova plugin. Java is needed for the signing tools. If you are on 32bit linux you should not need ia32-libs
We also need a current vesrion of node.js for which we can use a ppa. Run the following commands:
sudo apt-get update
sudo apt-get install python-software-properties python g++ make
sudo add-apt-repository ppa:chris-lea/node.js
sudo apt-get update
sudo apt-get install nodejs
Now install cordova through node.js’s package manager with the following commands:
sudo npm install -g cordova
1. Download the BB10 IDE, BB10 specific Cordova, and signing tools
We need to download the following:
- “QNX Momentics IDE for Linux”, which is the Blackberry OS 10 Native Development Kit: http://developer.blackberry.com/native/downloads/
- Community ported old BB10 Webworks SDK: https://github.com/badtoyz/BB10-WebWorks-SDK-Linux-Gold/archive/master.zip
We have many files to download so get those downloads started now and start reading ahead.
2. Install the IDE, which includes some Cordova tools
The IDE install file we downloaded is an installer binary which we must mark as executable and then execute, run the following in the command line:
chmod +x Downloads/bbndk-BB10_*
./Downloads/bbndk-BB10_2_0X-1155-106-201308081646.bin
The IDE installer will ask where to install the IDE into. For the purpose of the tutorial we’ll install in a folder called “bbndk”, the default suggested folder. If you feel comfortable with linux then we can install it elsewhere provided you know how to edit the below commands to use your desired install path.
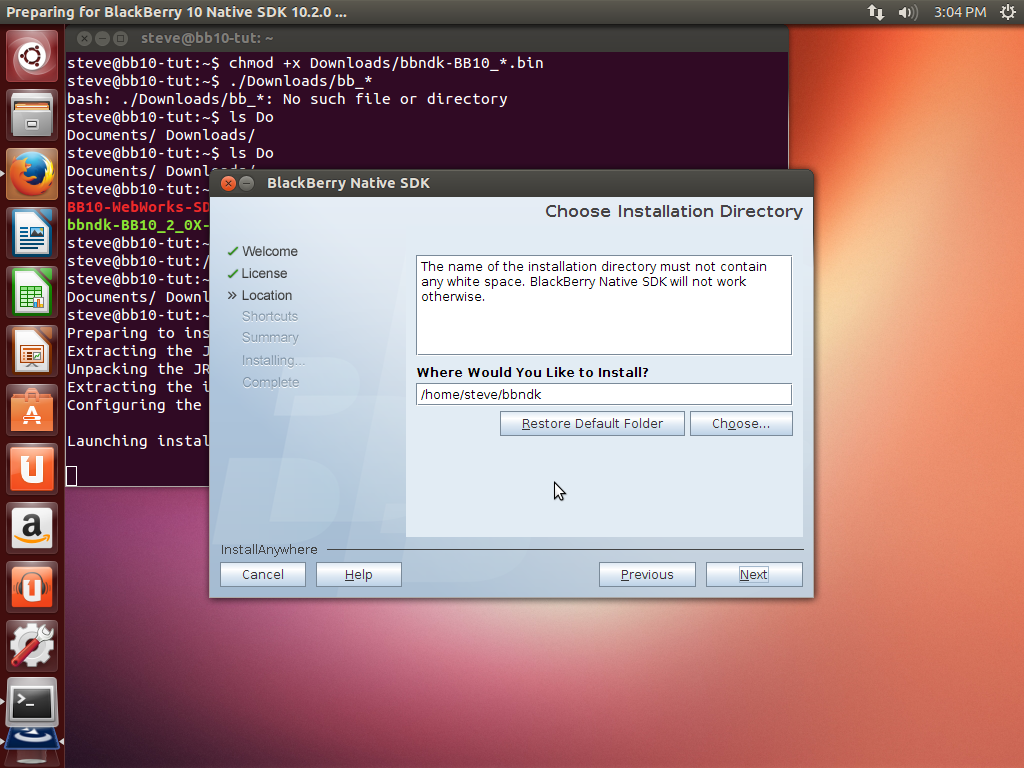
Installing the IDE (QDE) into bbndk folder
3. Extract the signing tools
The signing tools we need can only be found in the community ported version of the old WebWorks tools. We downloaded them earlier and now we should extract them to the folder “bbndk-signing”. You can use the default Ubuntu unzipper or run the following on the command line:
unzip Downloads/BB10-WebWorks-SDK-Linux-Gold-master.zip -d bbndk-signing
4. Add the tools into our PATH
When you run things from the command line the shell looks for the program in the list of directories in your PATH. We need to add the directory with the IDE, the signing tools, and the BB10 specific Cordova tools.
Open the hidden file ‘.bashrc’ by running:
gedit ~/.bashrc
We must add the following lines at the bottom of .bashrc:
export PATH="${HOME}/bbndk:${PATH}" # The IDE 'qde'
export PATH="${HOME}/bbndk-signing/BB10-WebWorks-SDK-Linux-Gold-master/dependencies/tools/bin:${PATH}" # signing tools
export PATH="${HOME}/bbndk/host_10_2_0_15/linux/x86/usr/bin:${PATH}" # BB10 Cordova
Now you must close your terminal window and re-open it so that the new PATH setting will take effect.
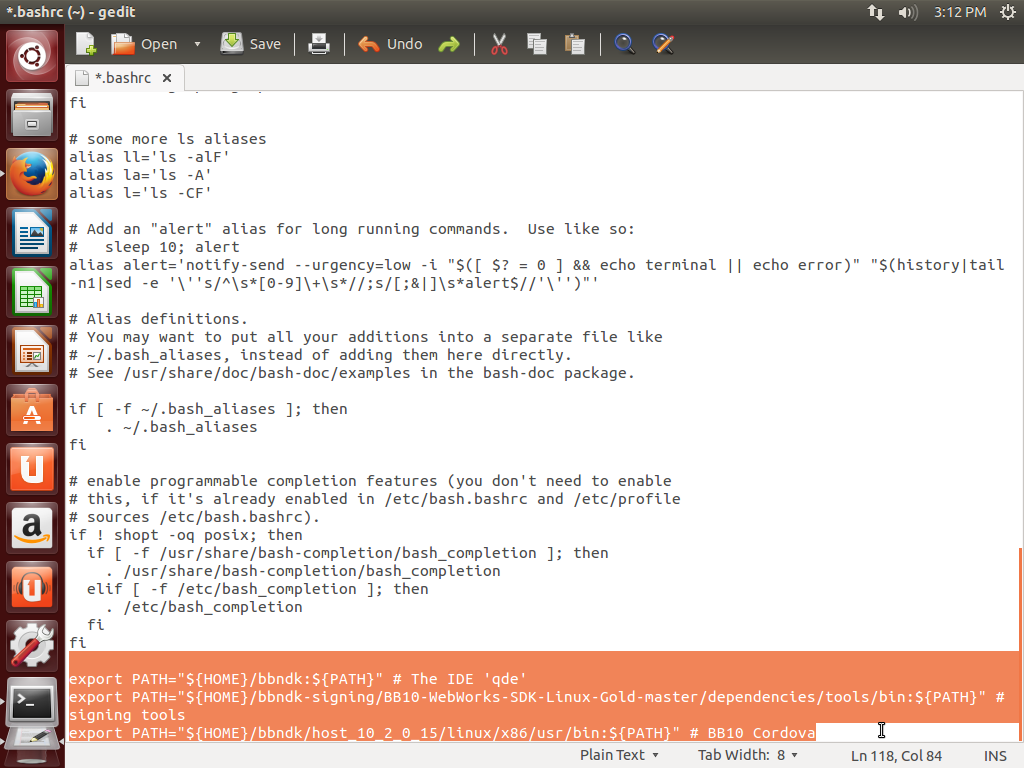
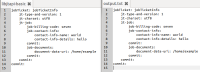
Once the additional directories to the PATH have been added the bottom of .bashrc should look like the above
5. Download an SDK through the IDE
Now that your PATH variable is set correct you may launch the IDE by running the following command:
qde
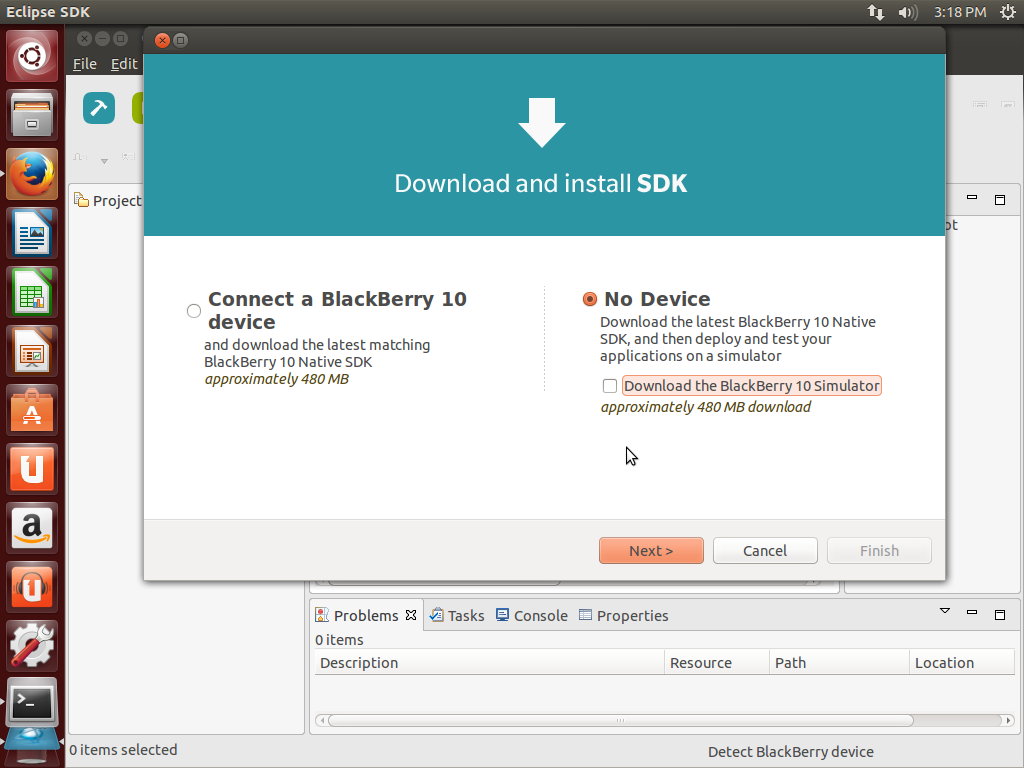
The IDE will open a window asking you to connect a device and download an SDK. For our purposes you do not yet need to setup your device for the SDK. As such select the “No Device” option and uncheck the “Download Simulator”, then click next until the download starts.
We shall be using the Cordova tools to package and push the complete application but we’ll still add the device later on for different reasons.
The SDK download may take a while, I have found the Blackberry servers to be slower than one might expect. It is safe to perform step 6 & 7 SDK is downloading but we shall need the SDK for steps 8 and onwards.
6. Request a signed development key
Before we can sign and push our applications we need a special signed key from Blackberry. We can request such a key through https://www.blackberry.com/SignedKeys/codesigning.html
Select the second option as we’ll be signing with the Blackberry WebWorks tools. Request the key now as it takes upto 2 hours for it to arrive. The two files we’ll need shall be emailed to you.
7. Find your phone’s IP address
Since BB10 simulator requires a paid license to proprietary software I will only be able to cover how to use a real BB10 device. Blackberry was gracious enough to provide my team members each with a “Dev Alpha C”, a cooler looking model of the Q10.
The IP address we need is the one associated with your WiFi network, not the usb connection, nor your mobile data connection. The exact path through the menus is non-obvious so we’ll go over board on the photo guide for this section.
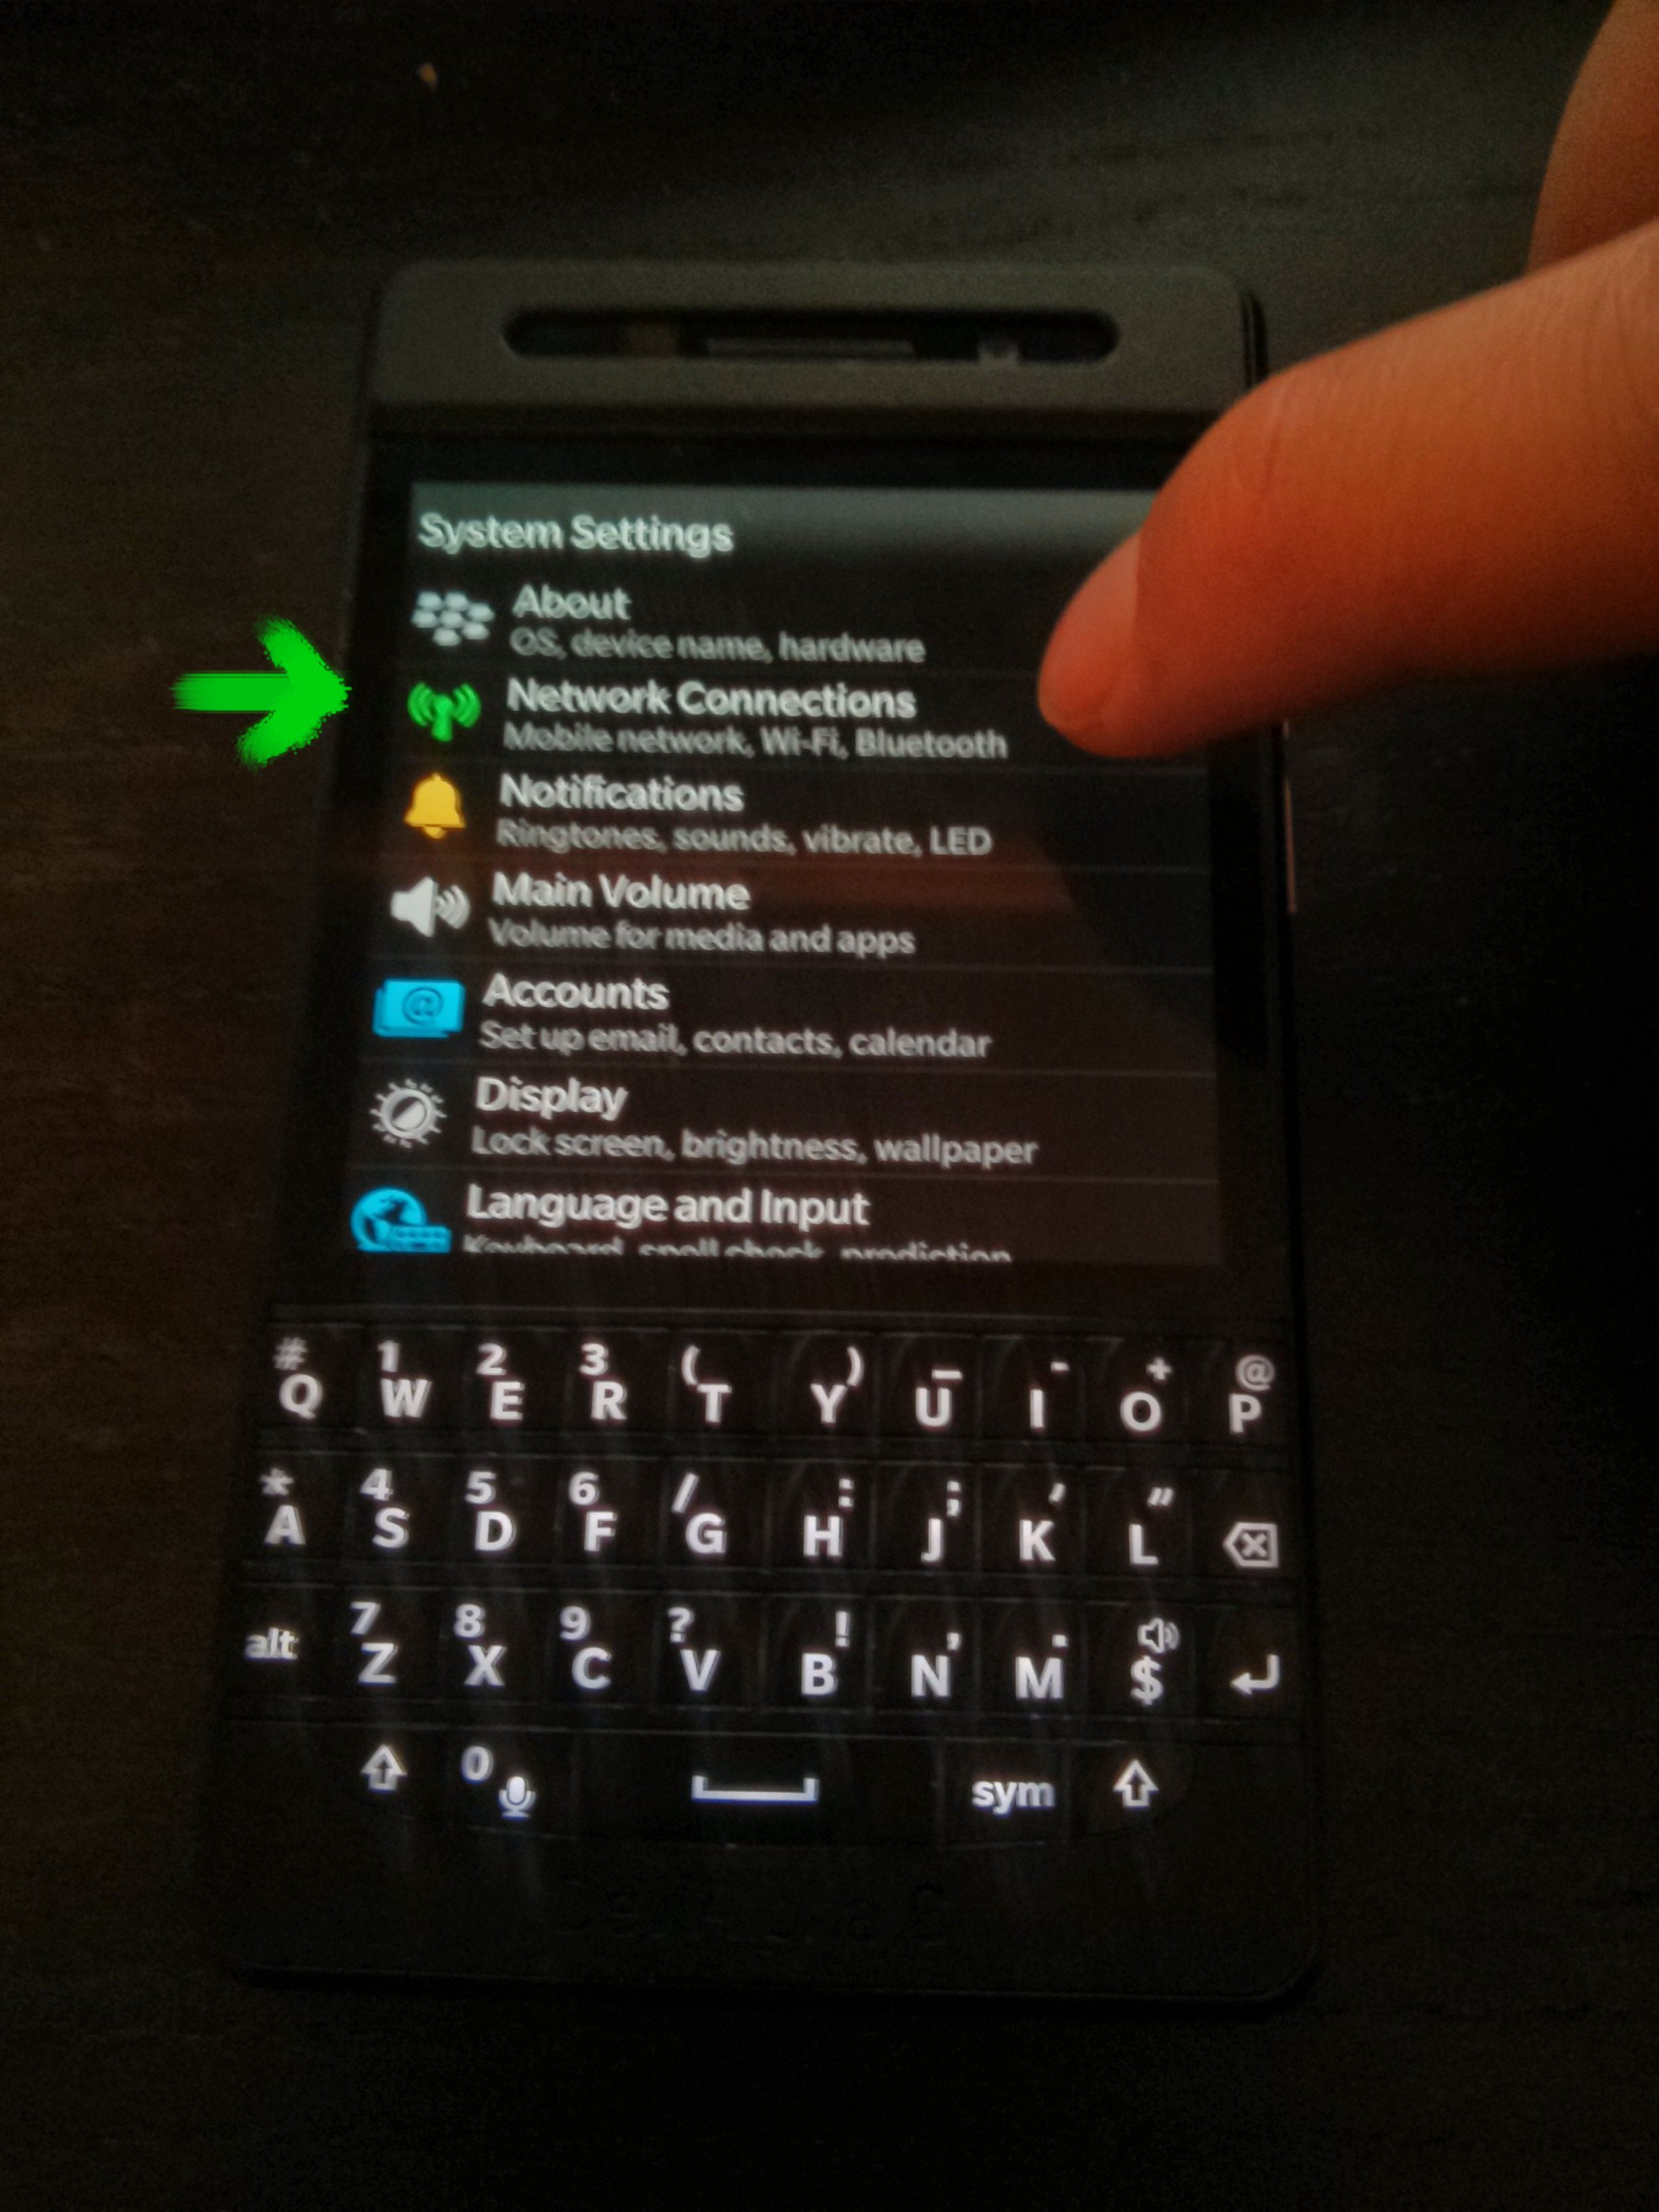
Open the Settings app and select “Network Connections”

Select your WiFi network
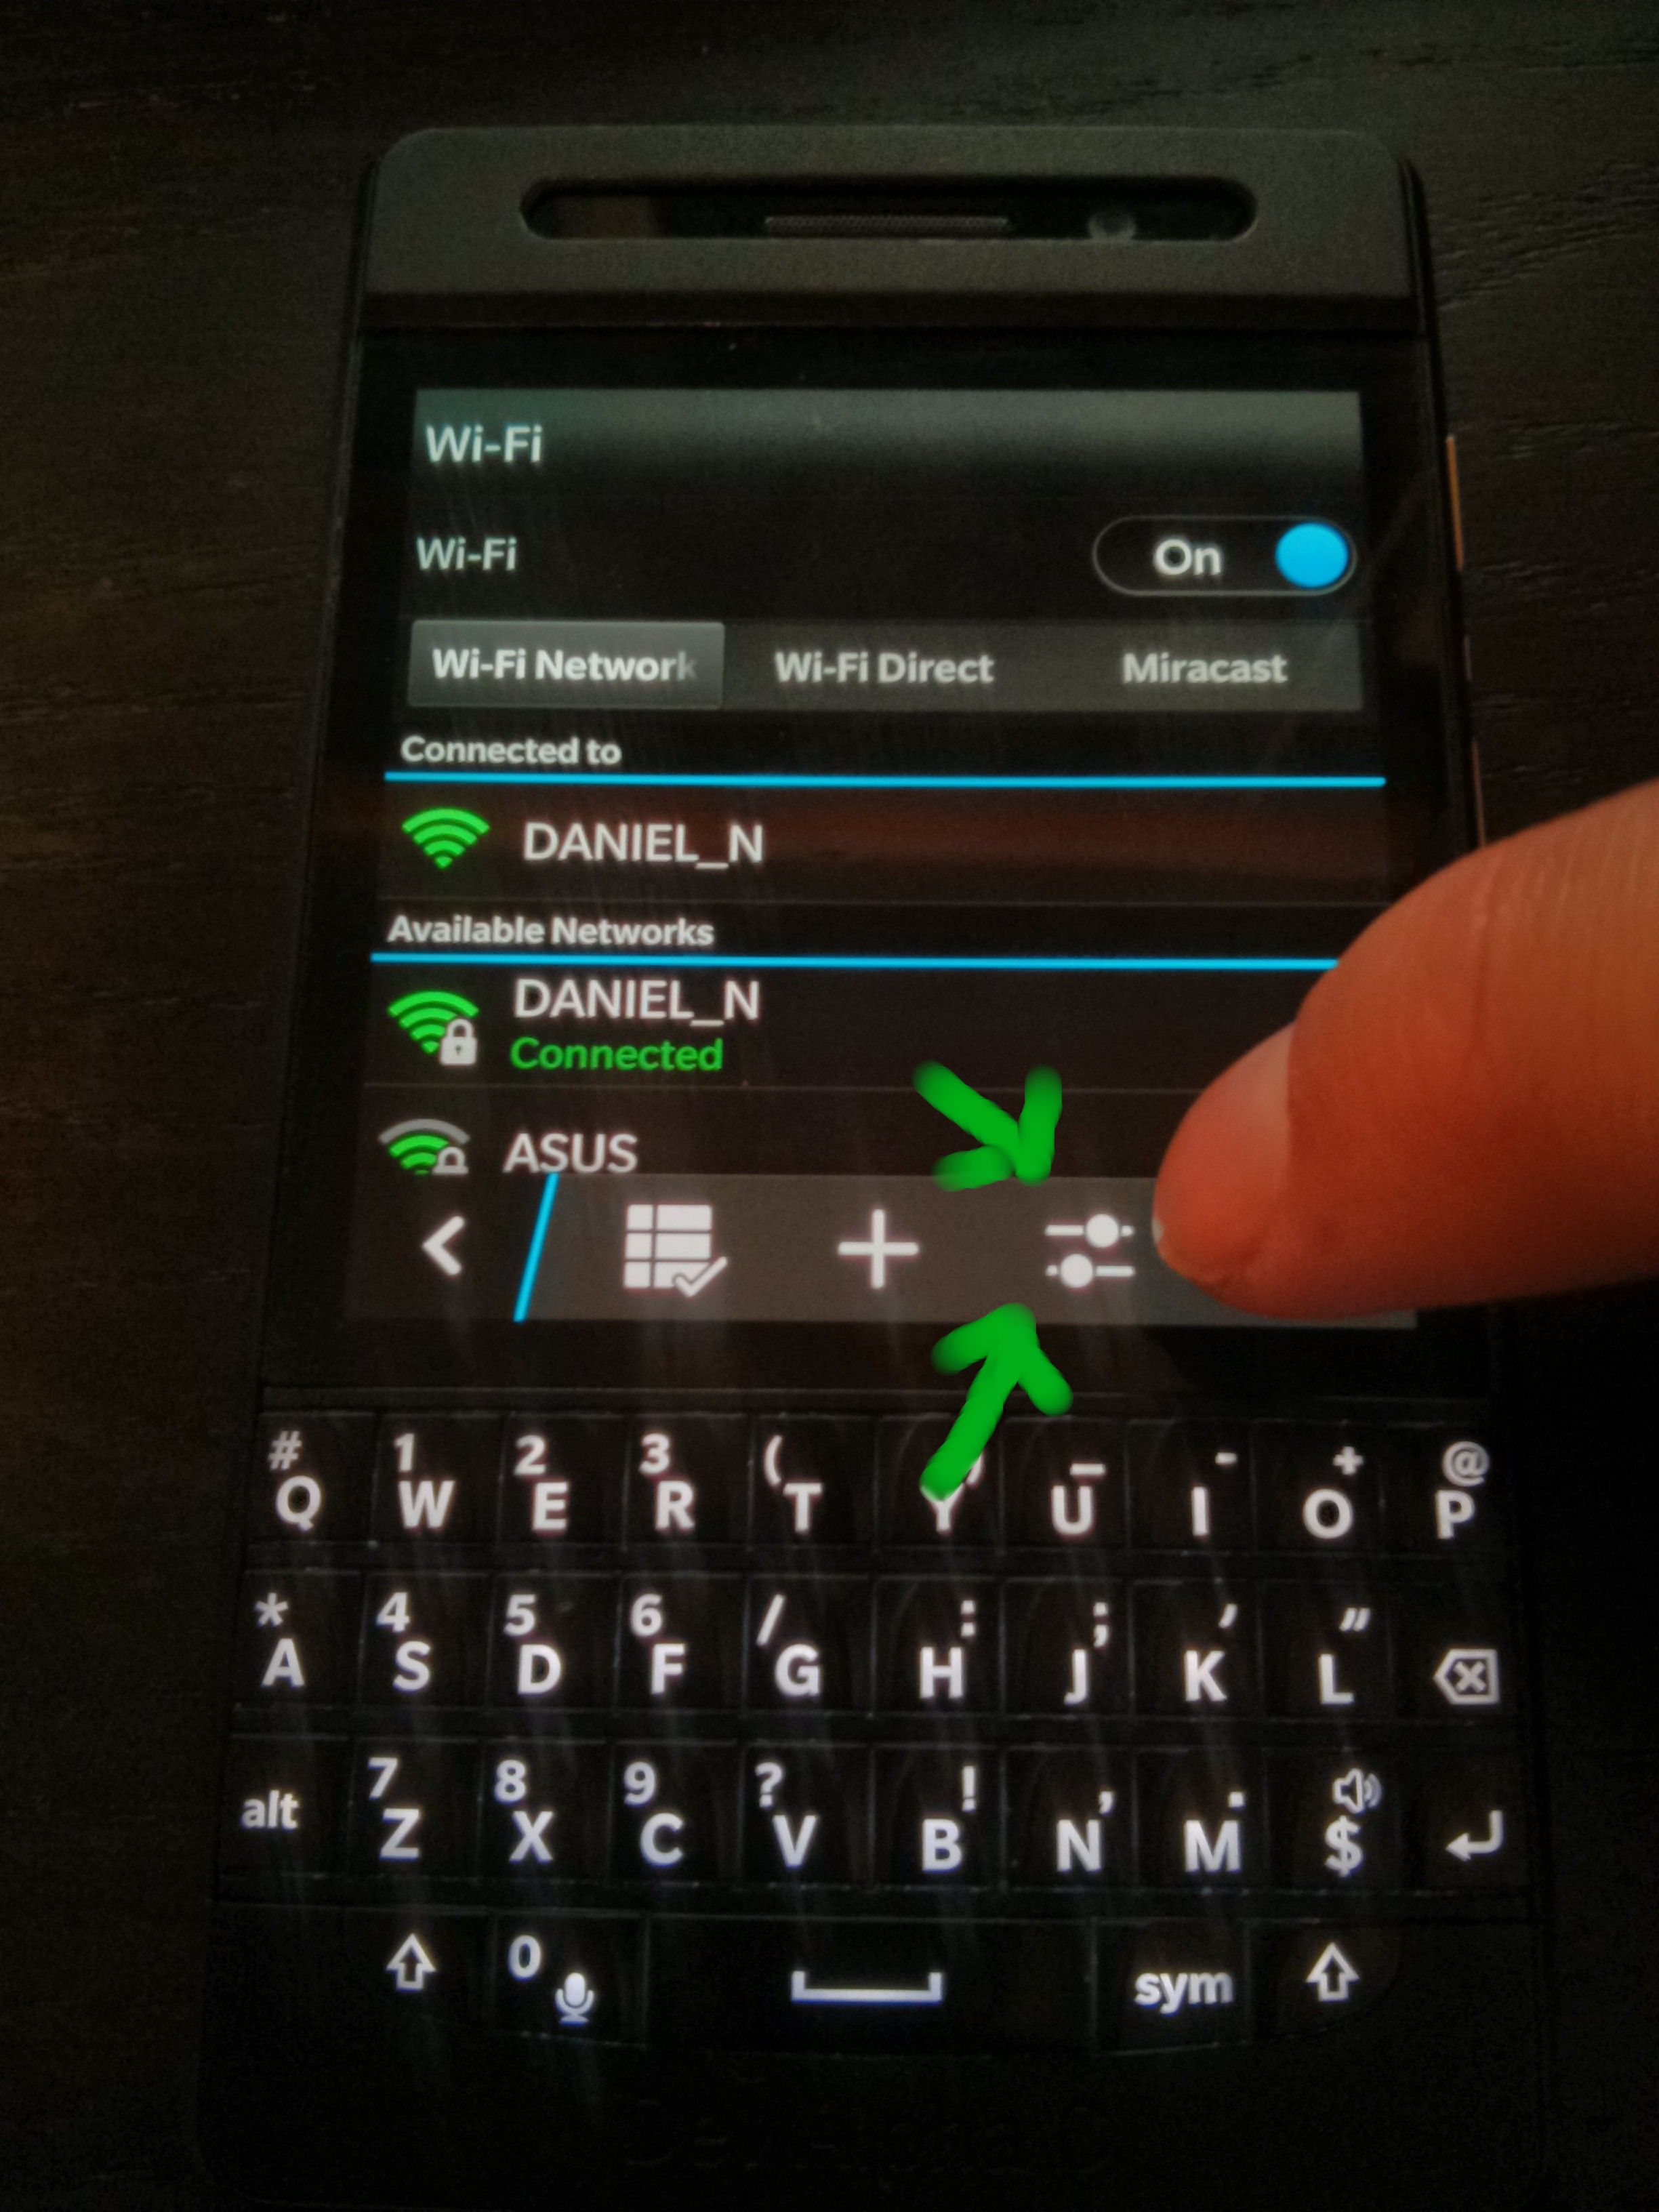
Now find the settings tab in the bottom right
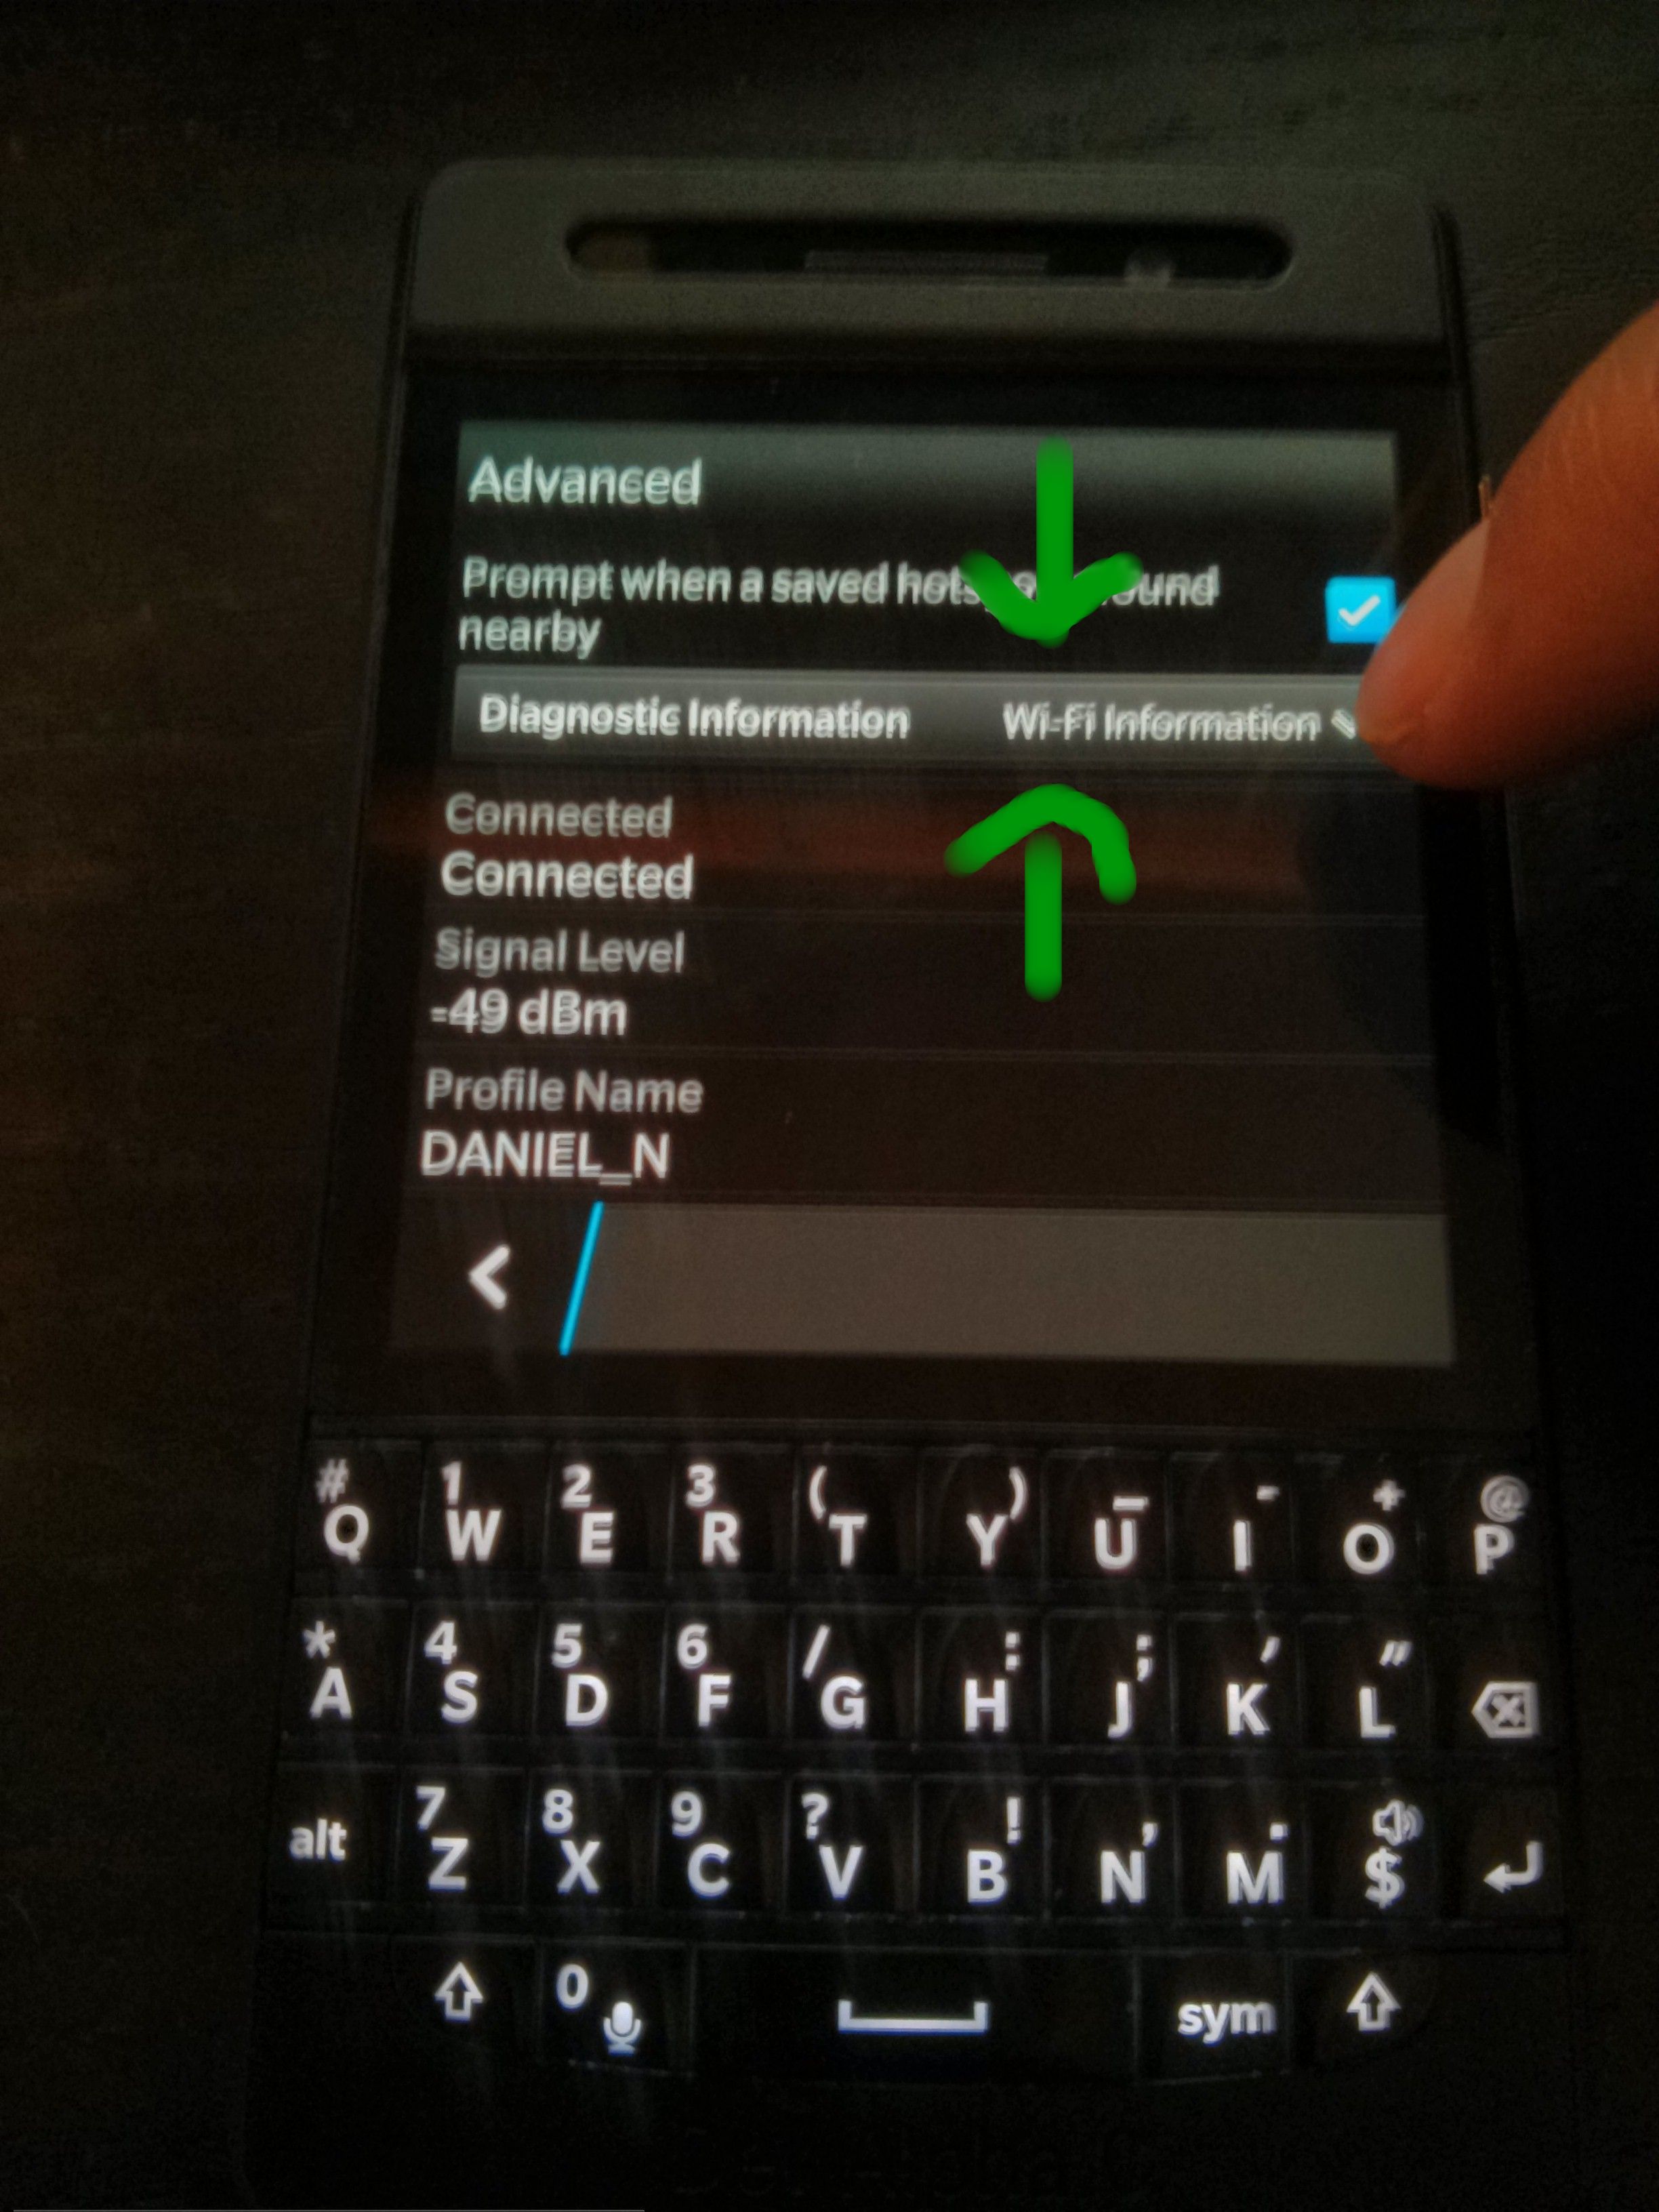
We need to switch the type of details shown by using the dropdown list
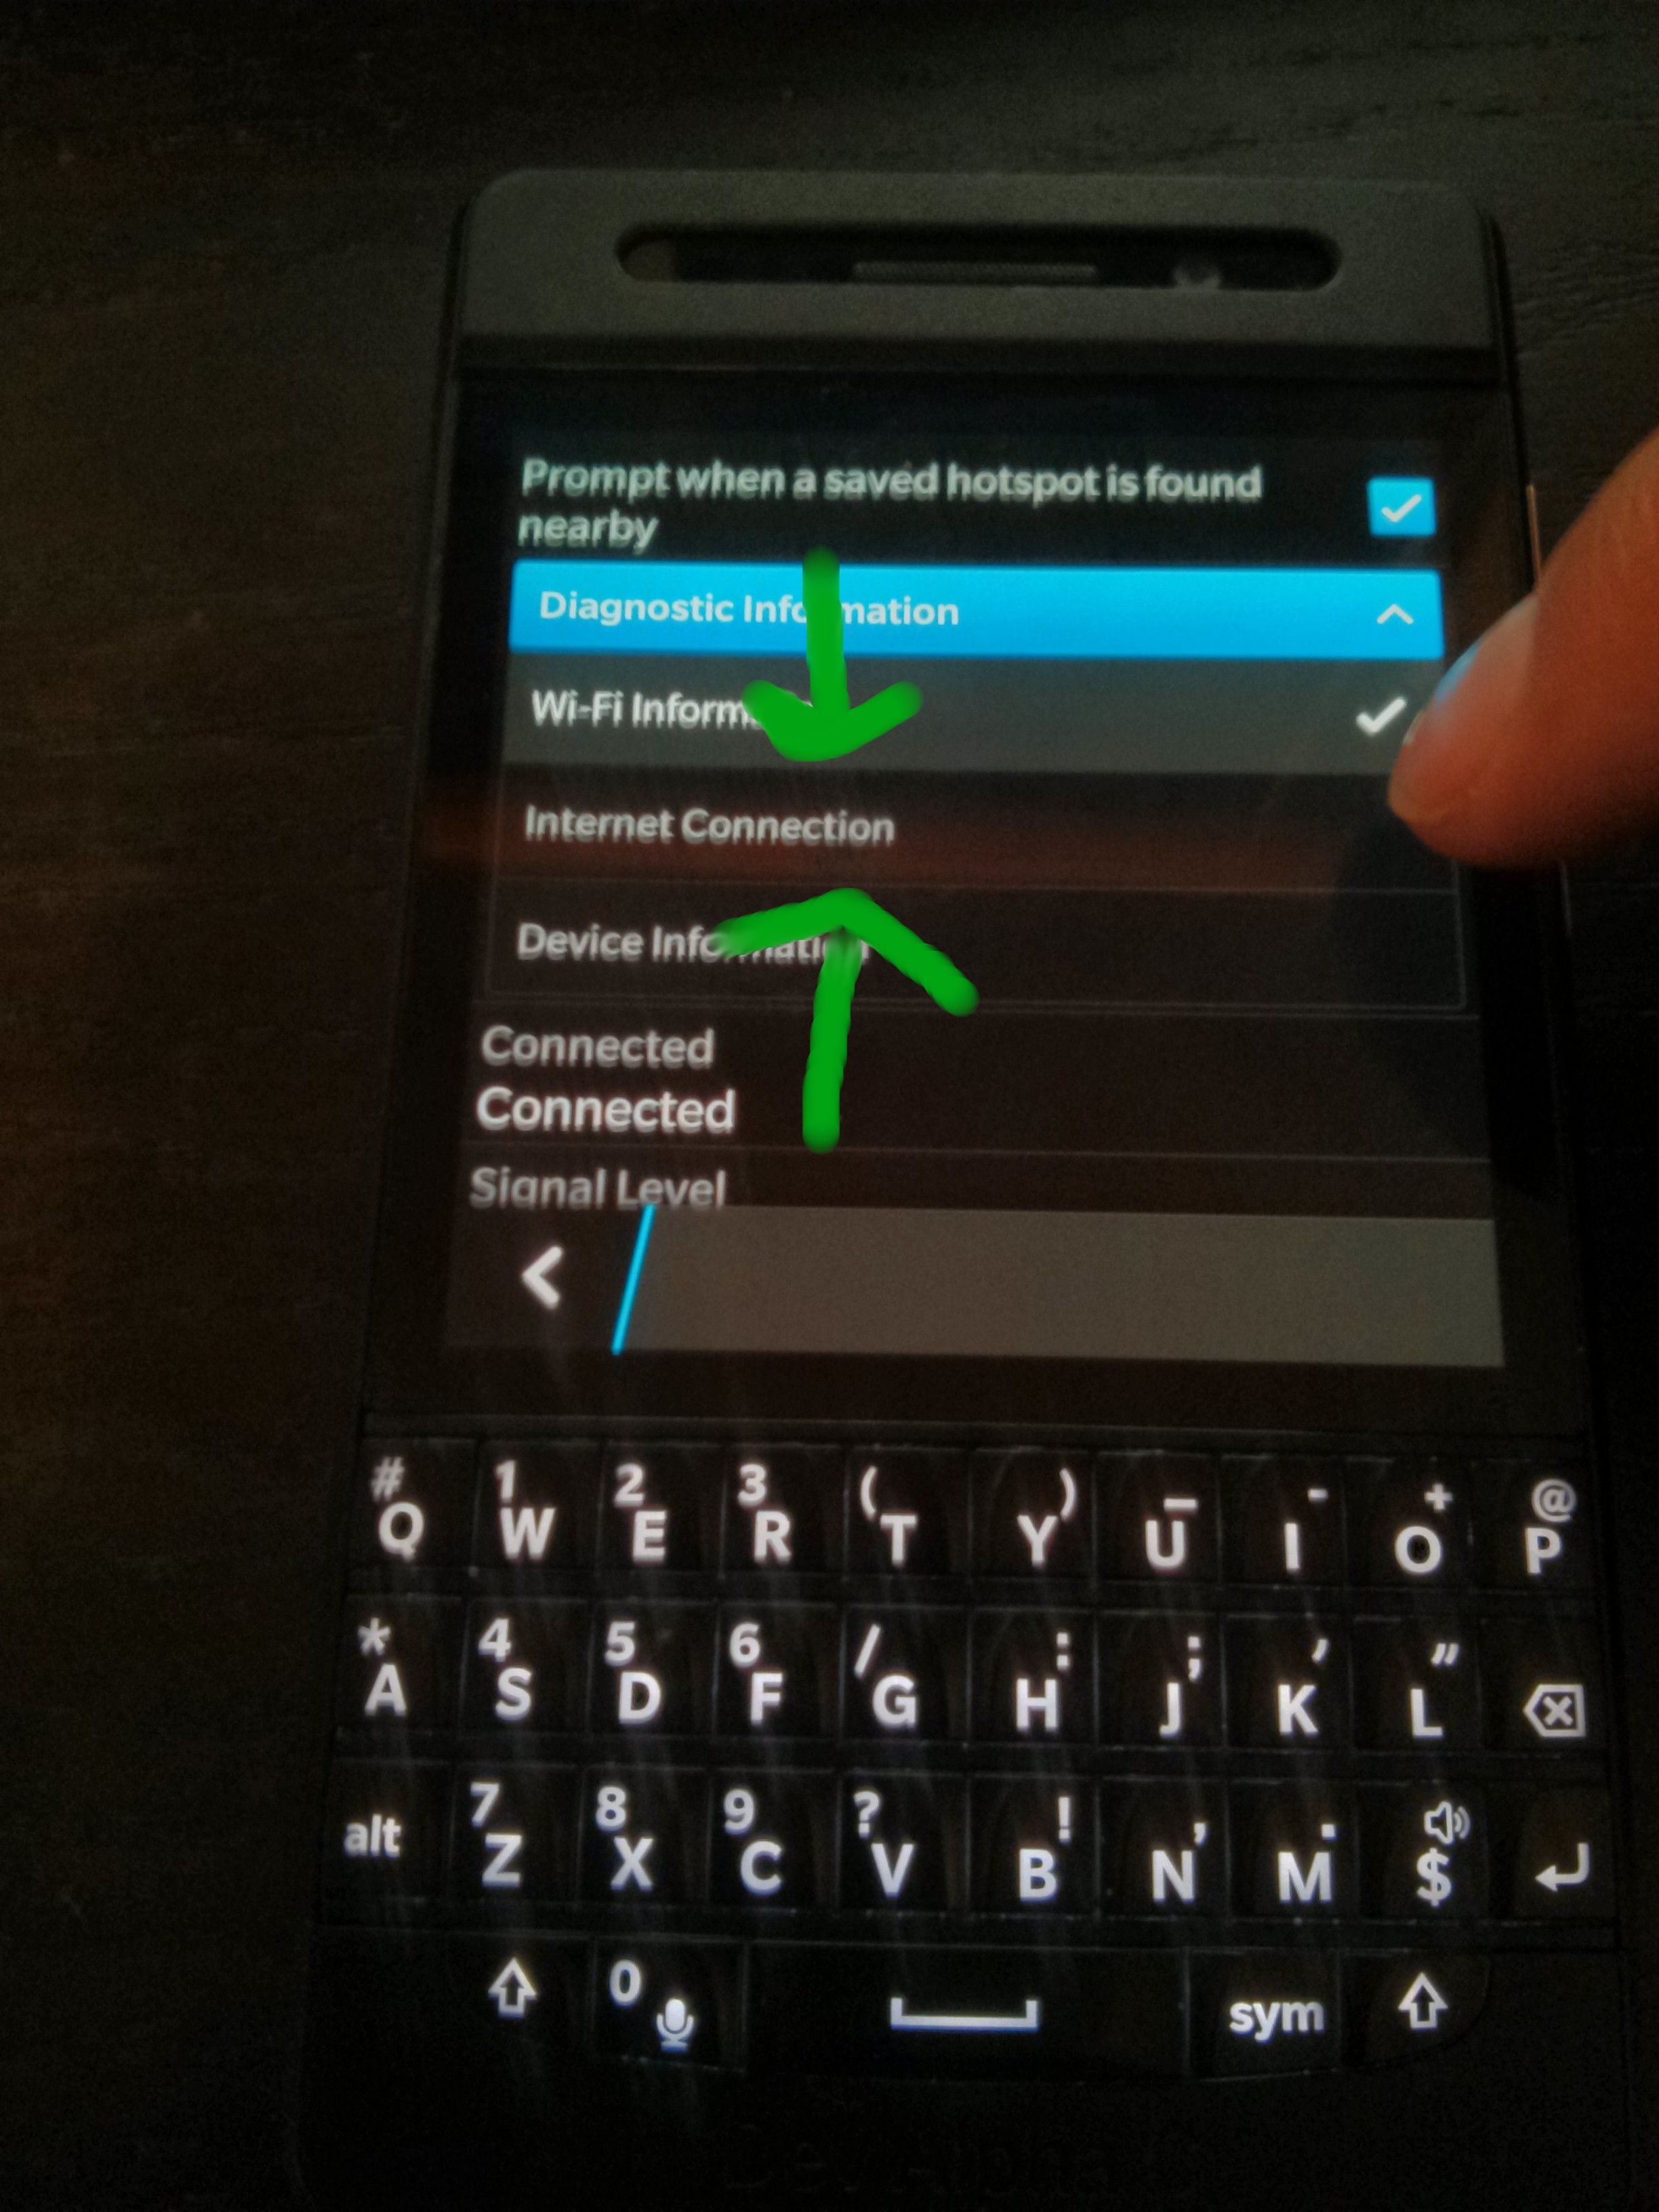
From the dropdown select “Internet Connection”

Now the IP address should be the first detail shown
In my case the IP address of my development phone is 192.168.1.199
Make note of your phones address as we shall use it later on.
8. Clone the community plugin repository
Now we must get the example cordova plugin. We can find said plugin in the community plugin git repository hosted on github: https://github.com/blackberry/WebWorks-Community-APIs
The exact commands we must run are:
git clone https://github.com/blackberry/WebWorks-Community-APIs.git
That will clone the git repository. From now on we should issue all commands from the example plugin which is called “Template”. Navigate to “Template” plugin with the following command:
cd ~/WebWorks-Community-APIs/BB10-Cordova/Template/sample
With the “Template” plugin the “sample” folder contains the cordova app which acts as an example for the plugin’s usage. We’ll use this sample as our hello world.
9. Enable development mode on your device

From the main settings screen select “Security & Privacy”
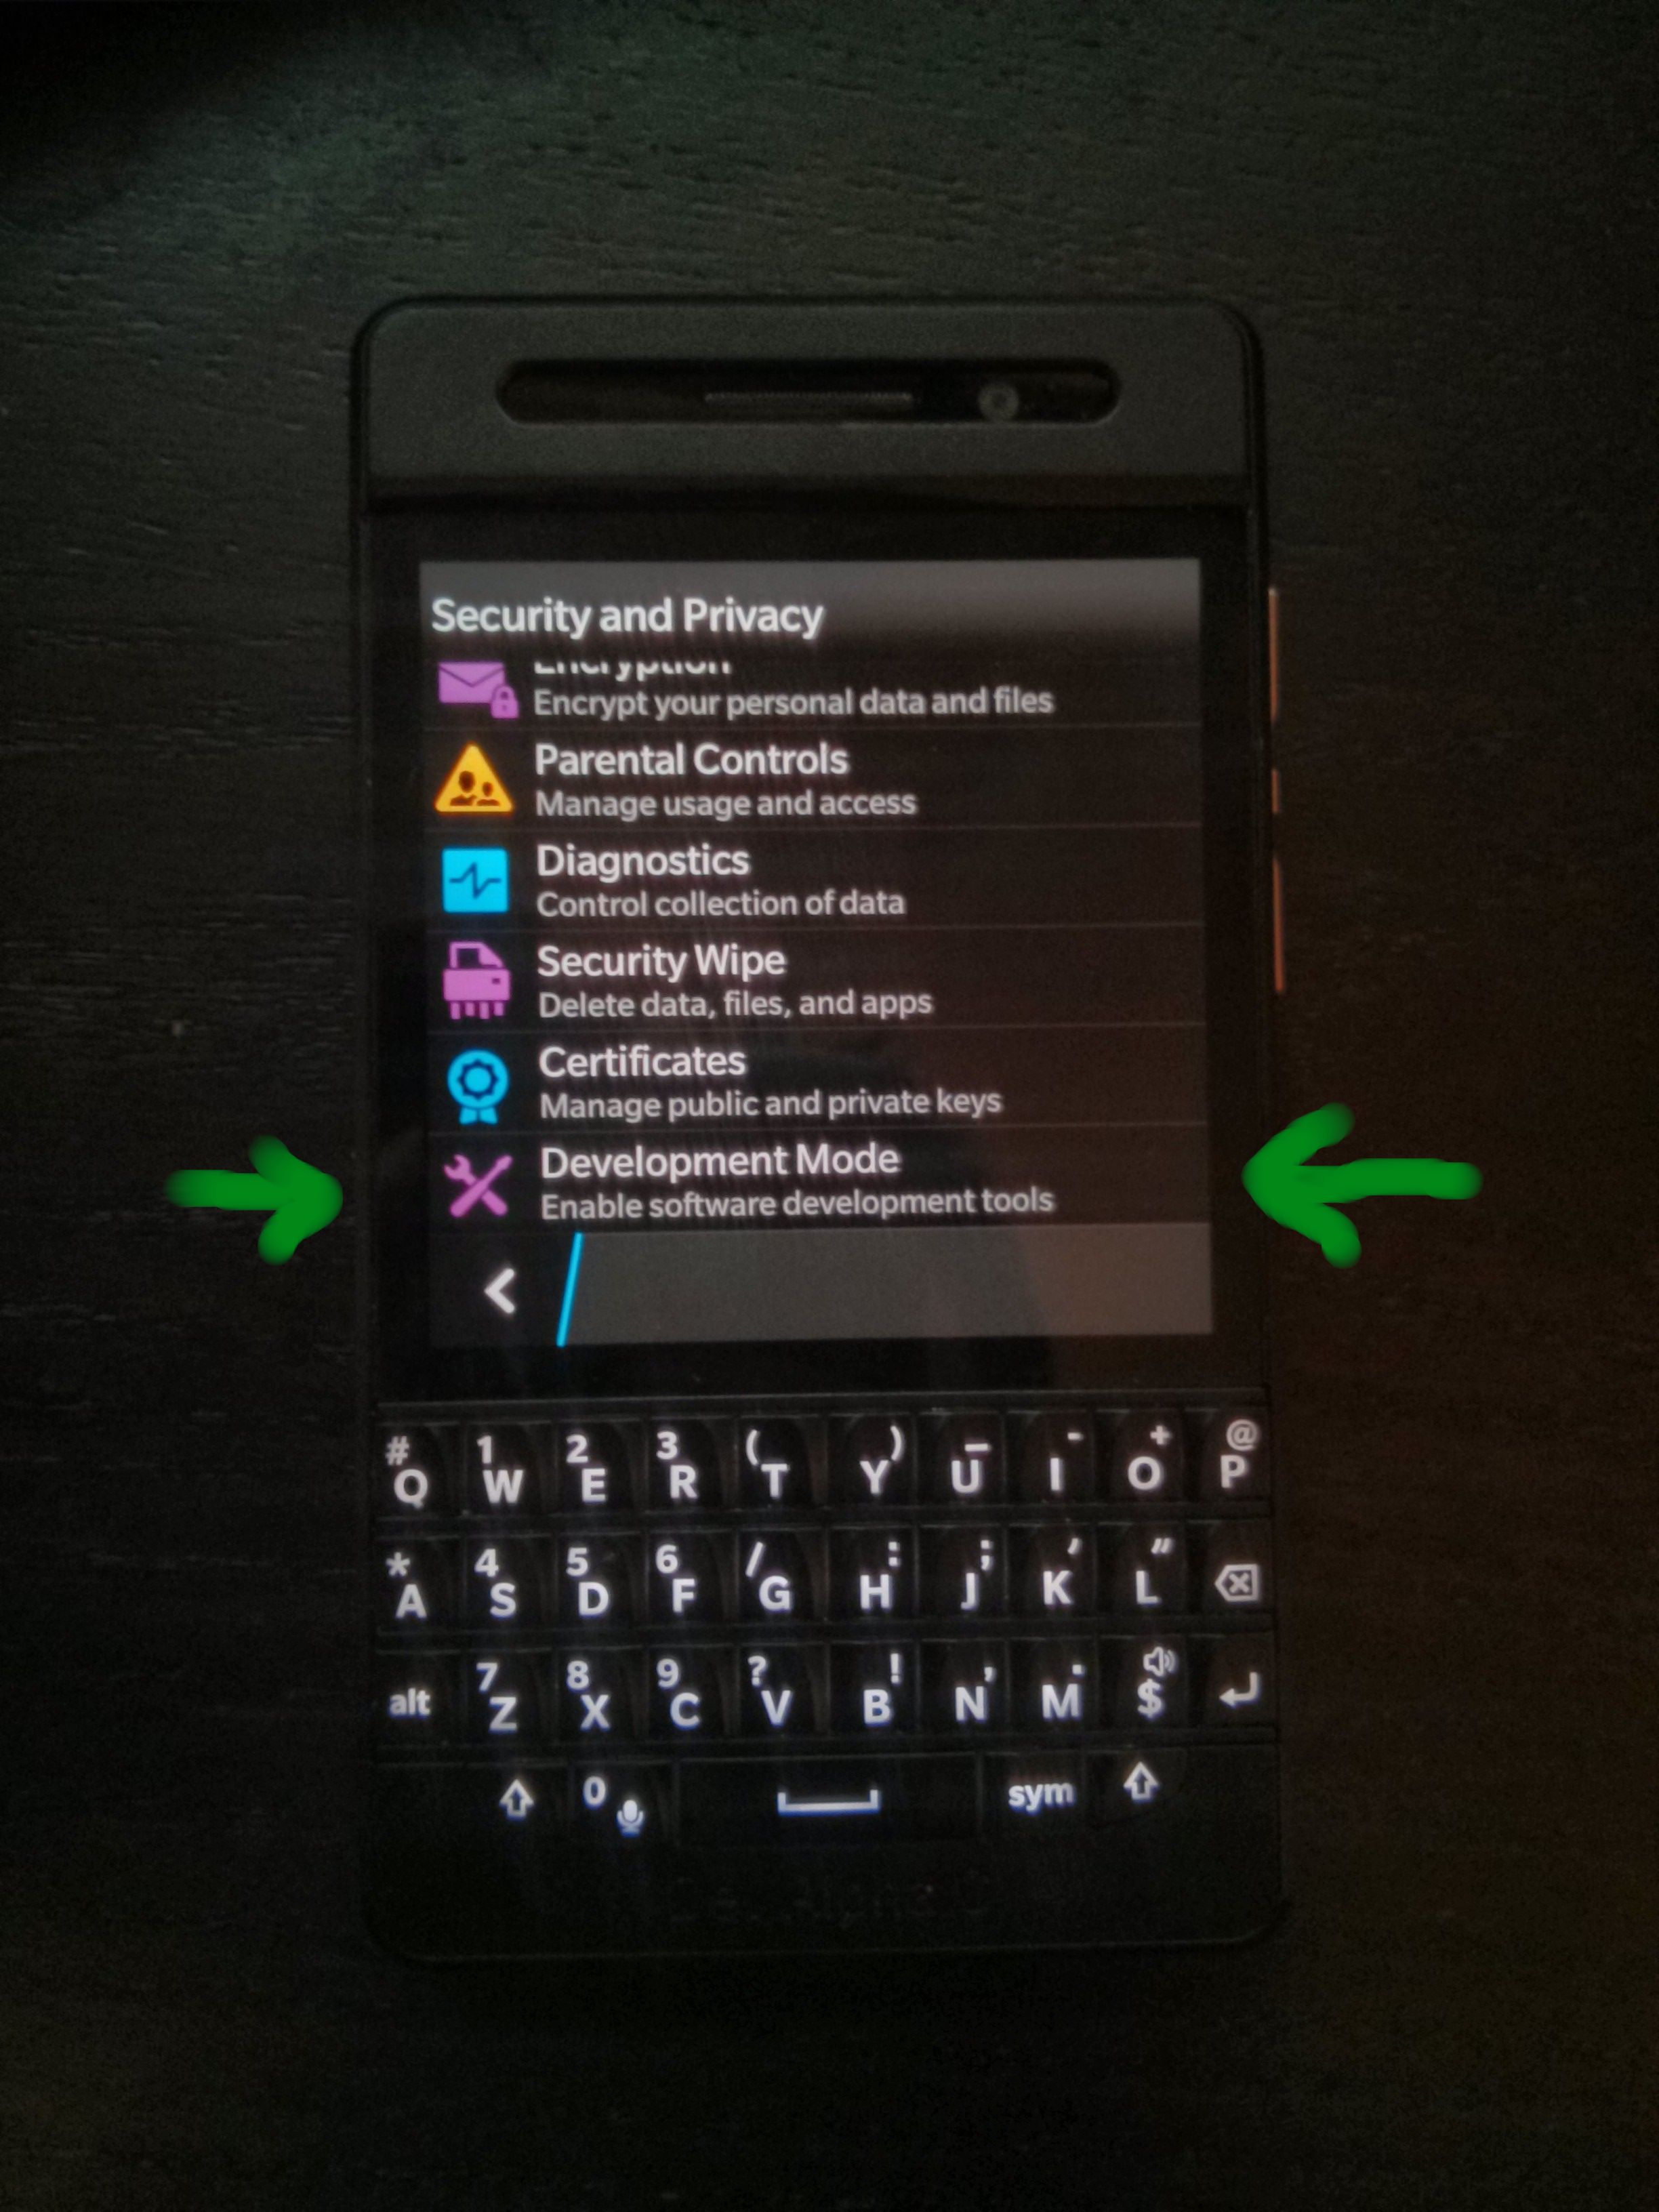
Scroll to the bottom and select “Development Mode”

Now turn on “Devlopment Mode”. The phone will set Development Mode to off after every restart so you’ll have to redo these steps if you restart the phone.
Your phone should now be in development mode. It might also be flashing a red light, the flashing will go away in time. Notice that the IP address listed does not match the one we wrote down earlier. That is because this IP address is for the usb connection.
10. Generate an author .csk
Now let us register our signing key. This will generate a author .csk key store which we’ll later use to generate the debug token which gets push to the device. You must edit the following command with your own password and the pin you selected when registering for the signing key:
blackberry-debugtokenrequest -register -storepass PASSWORD -csjpin PIN Downloads/client-PBDT-*-.csj Downloads/client-RDK-*-.csj
Notice that this command assumes you downloaded the two signing key files into your Downloads folder. Edit the paths if this is not the case.
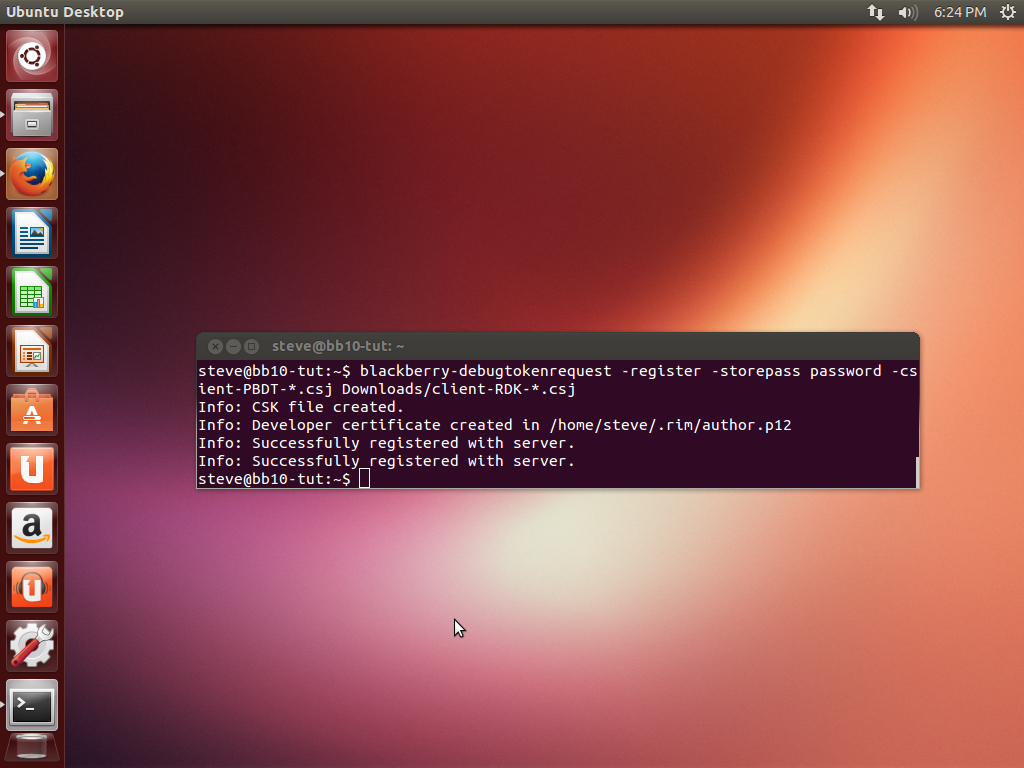
What it looks like when after registering the signing key. Notice when I registered for my key I used a very weak password, please use a stronger password.
11. Generate a debug token
Now we must use the IDE to generate the debug token. Then we must move a copy of this debug token to where the cordova tools expect. To do this we must add the device to the IDE.
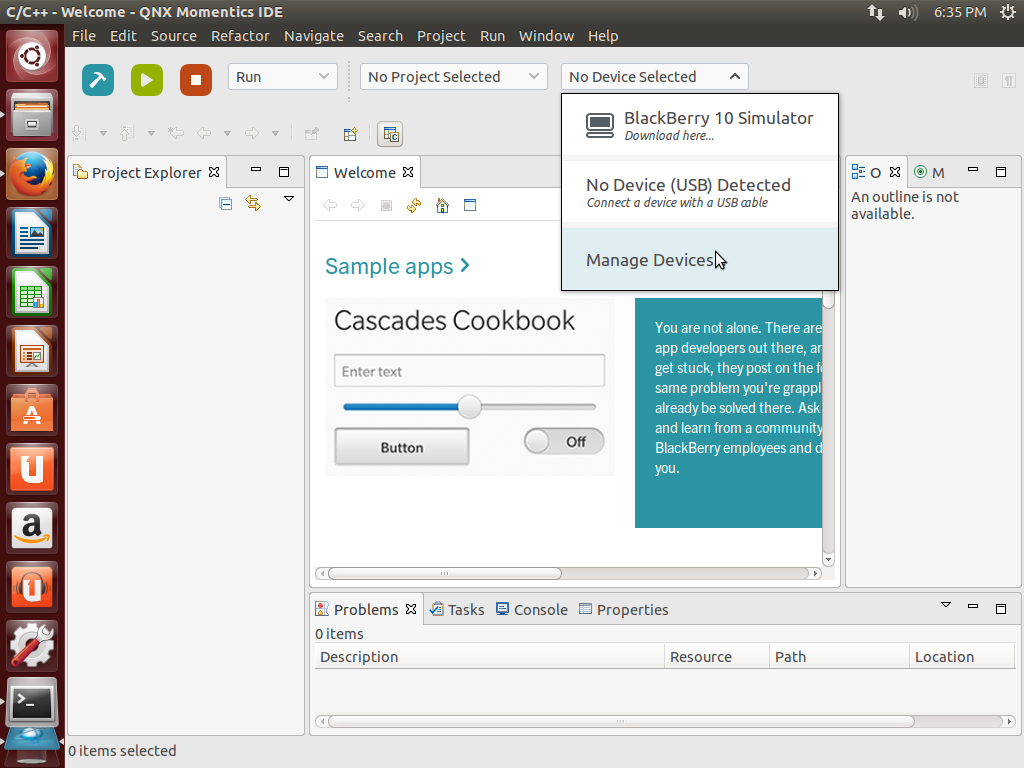
From the “No Device Selected” dropdown select “Manage Devices”
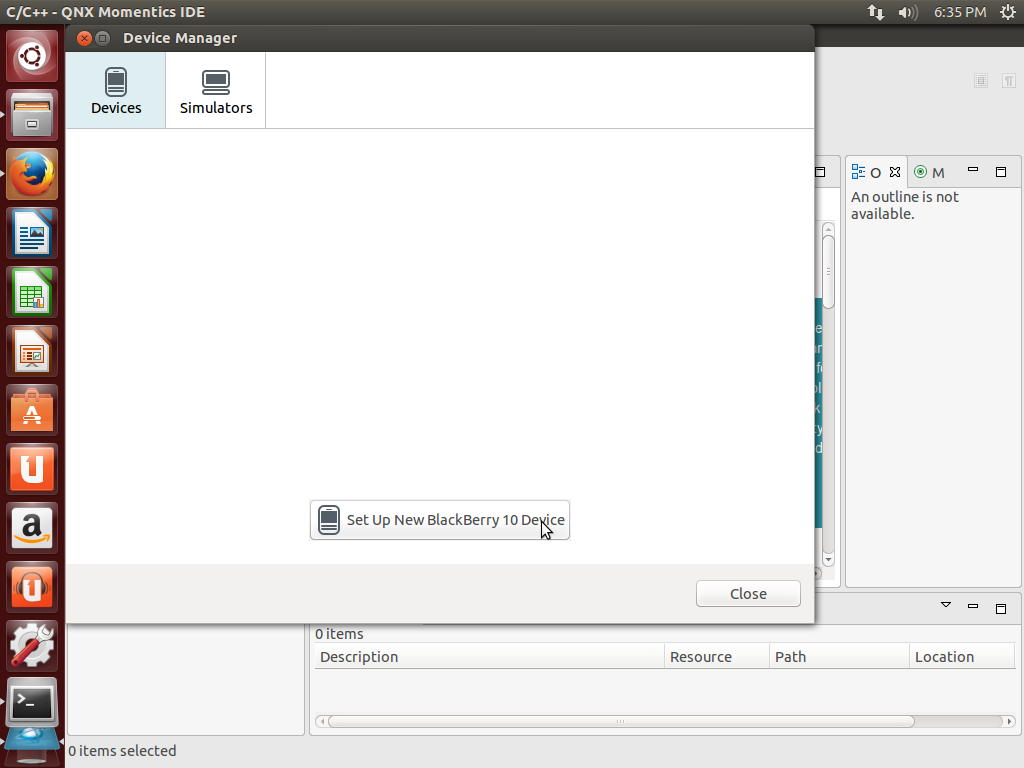
Click the “Set up new bb10 device” button
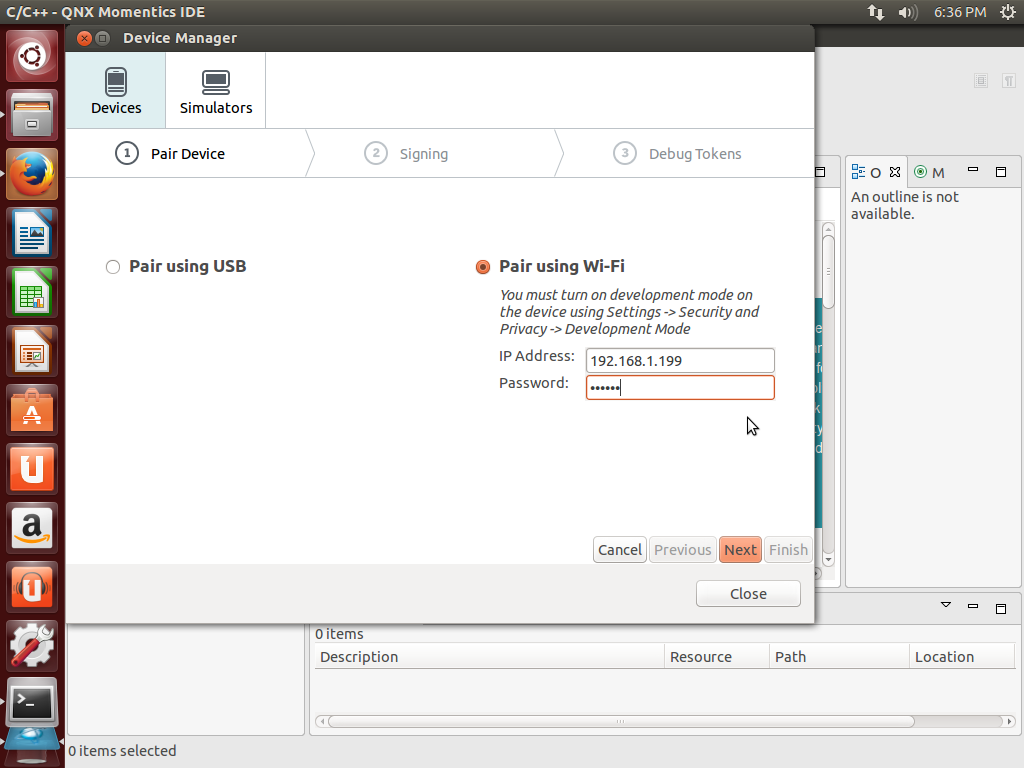
Use the IP address we wrote down earlier and the password you have set on your phone.
Now click next until it asks if you would like to generate a new debug token or import one. Please do generate a new token and follow the on screen instructions. Once the debug token has been pushed to the device the IDE will ask you if you would like to download debug symbols. We do not need them but there is no harm in downloading the symbols anyway.
Now run the following command to move the debug token to where cordova can use it:
cp .rim/debugtoken1.bar .cordova/blackberry10debugtoken.bar
The filenames are important so please do not change them.
12. Add device to cordova
Since it is cordova which does the heavy lifting we must tell cordova how to connect to your device. Since cordova remembers devices on a project by project basis you must navigate to Template’s sample cordova app.
cd WebWorks-Community-APIs/BB10-Cordova/Template/sample
Now edit the following command with our device’s IP address and password:
./platforms/blackberry10/cordova/target add dev_phone 192.168.1.199 --password PASSWORD
13. Build the native binaries
We must use the IDE for compiling the native binaries. We must add the plugin to QDE and then use a non-obvious build command so please follow the screenshot guide:

Select Import from the main dropdown menu

Select import from existing project

Select the root directory of the plugin’s project.
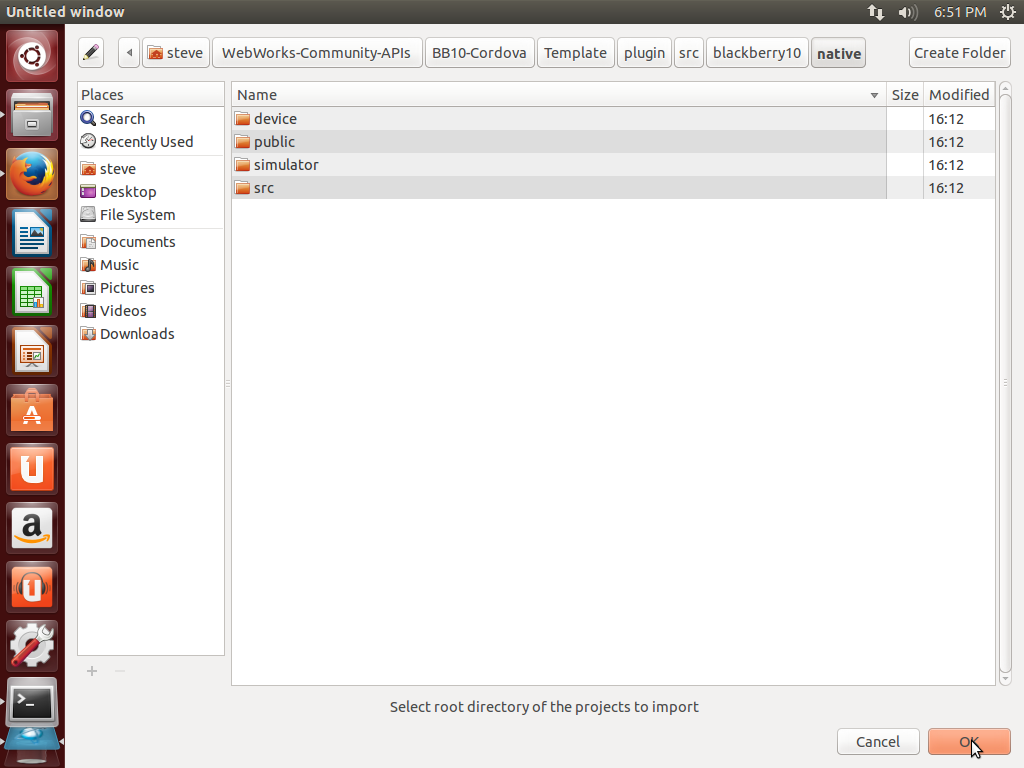
The plugin’s project directory is the one which contains the hidden .project file. It is the following folder: ~/WebWorks-Community-APIs/Template/plugin/src/blackberry10/native
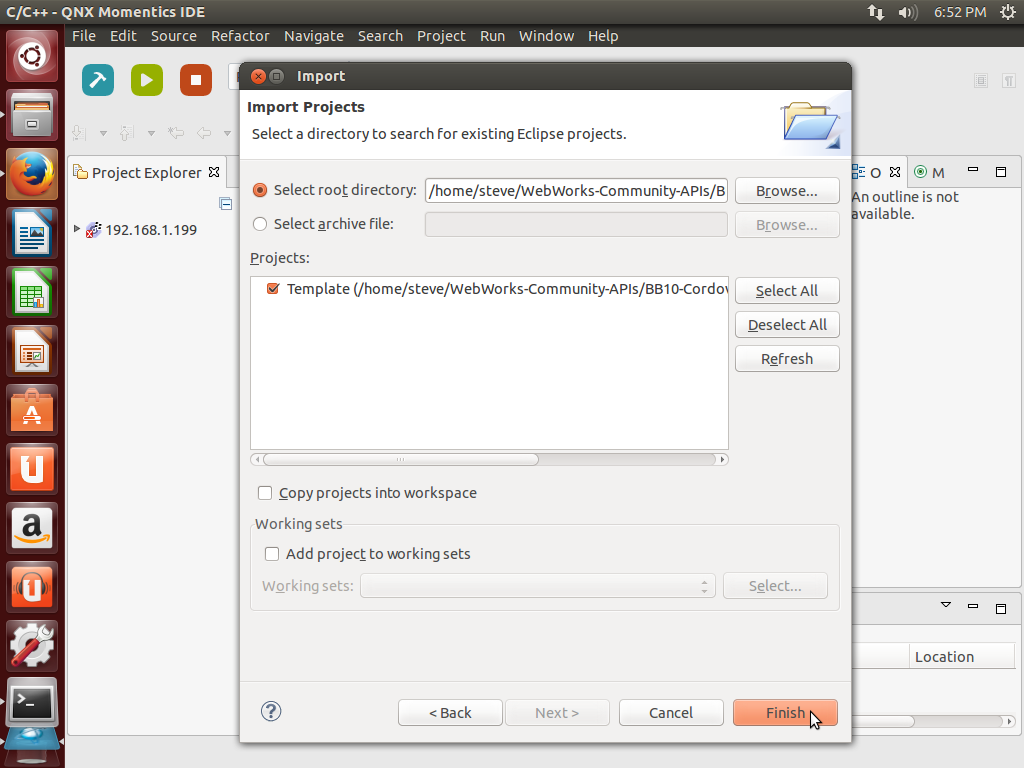
Now click finish and you’ll have the plugin project in the IDE
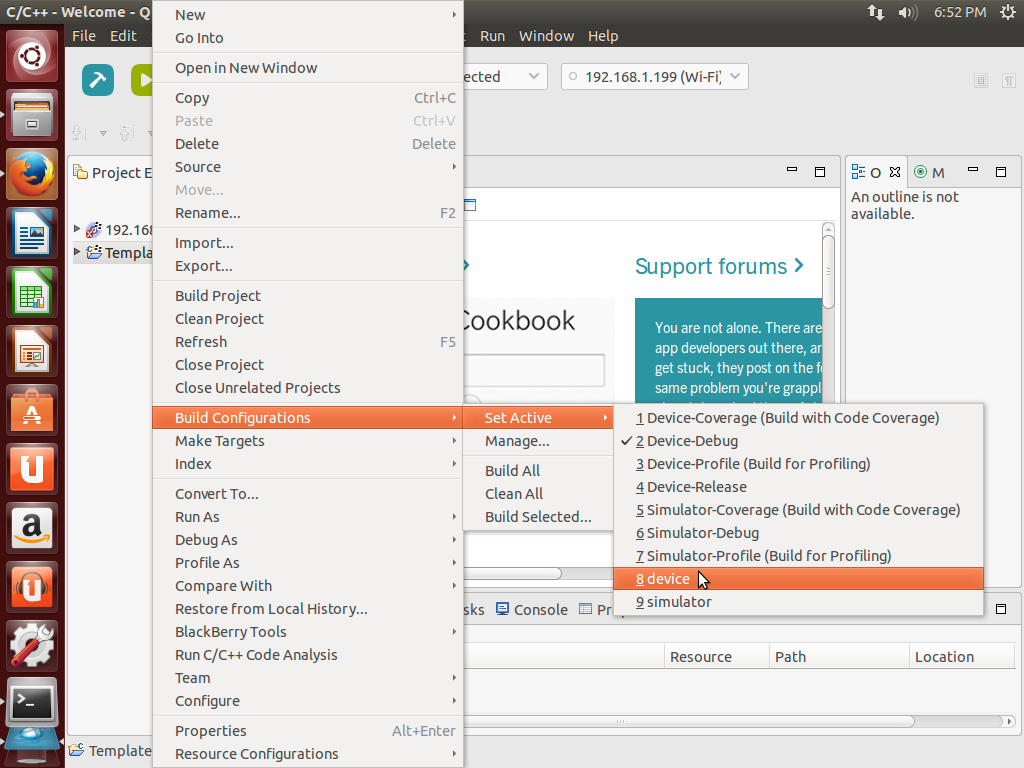
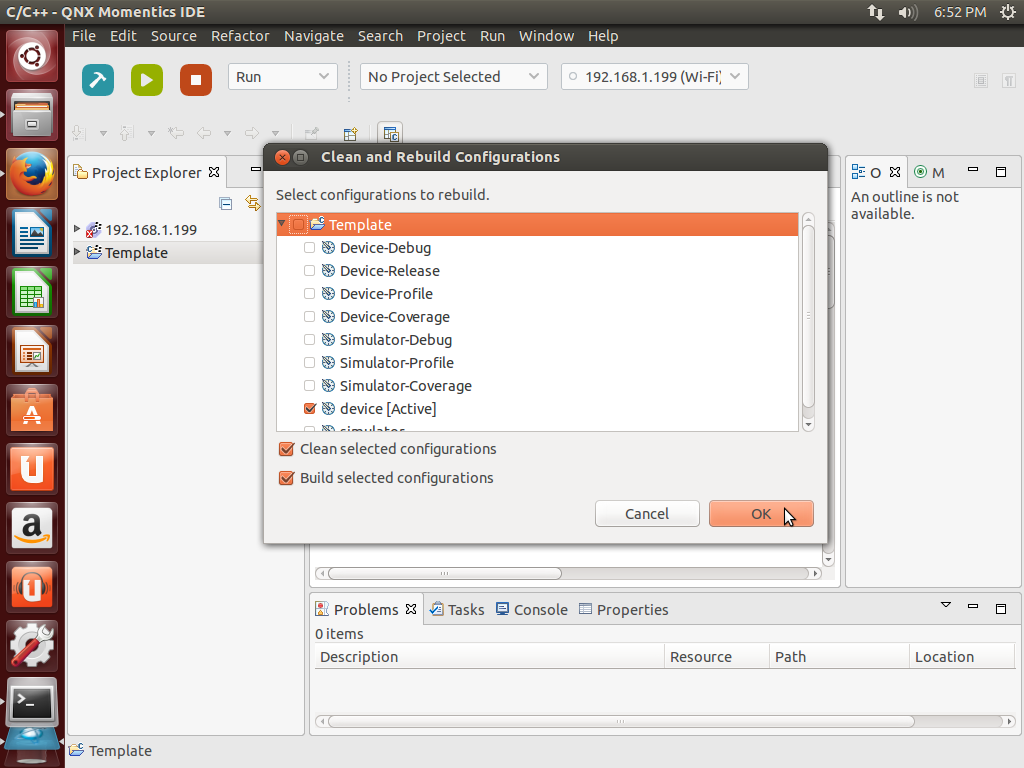
Now before we build we must set the active target profile to build. We want to build for the regular “device” profile.
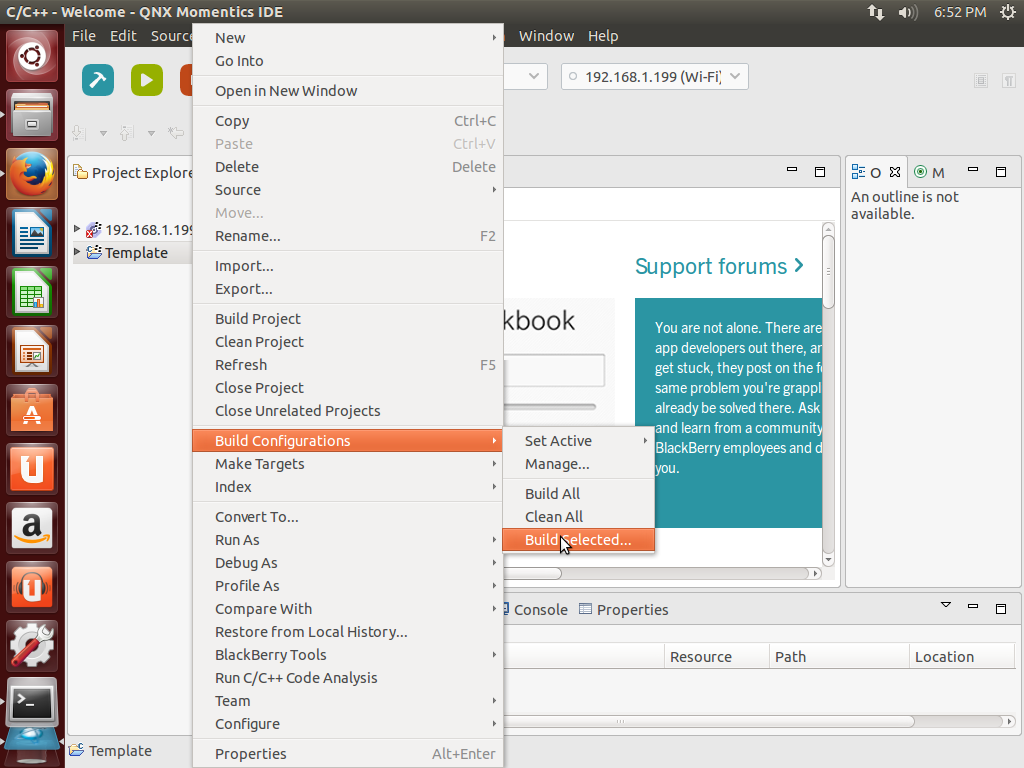
Once the active build configuration has been set to “device” we can build by selecting the “Build Selected” option.
14. Use cordova to build and run the plugin sample
Now the fun!
Run the following commands to copy the plugin’s native binaries into the plugin sample and then build and run the sample on our device!
cd ~/WebWorks-Community-APIs/BB10-Cordova/Template/sample
cordova plugin rm community.template
cordova plugin add ../plugin/
cordova run
15. You’re done!
You should see the sample app runing on your device. It should look something like thus:
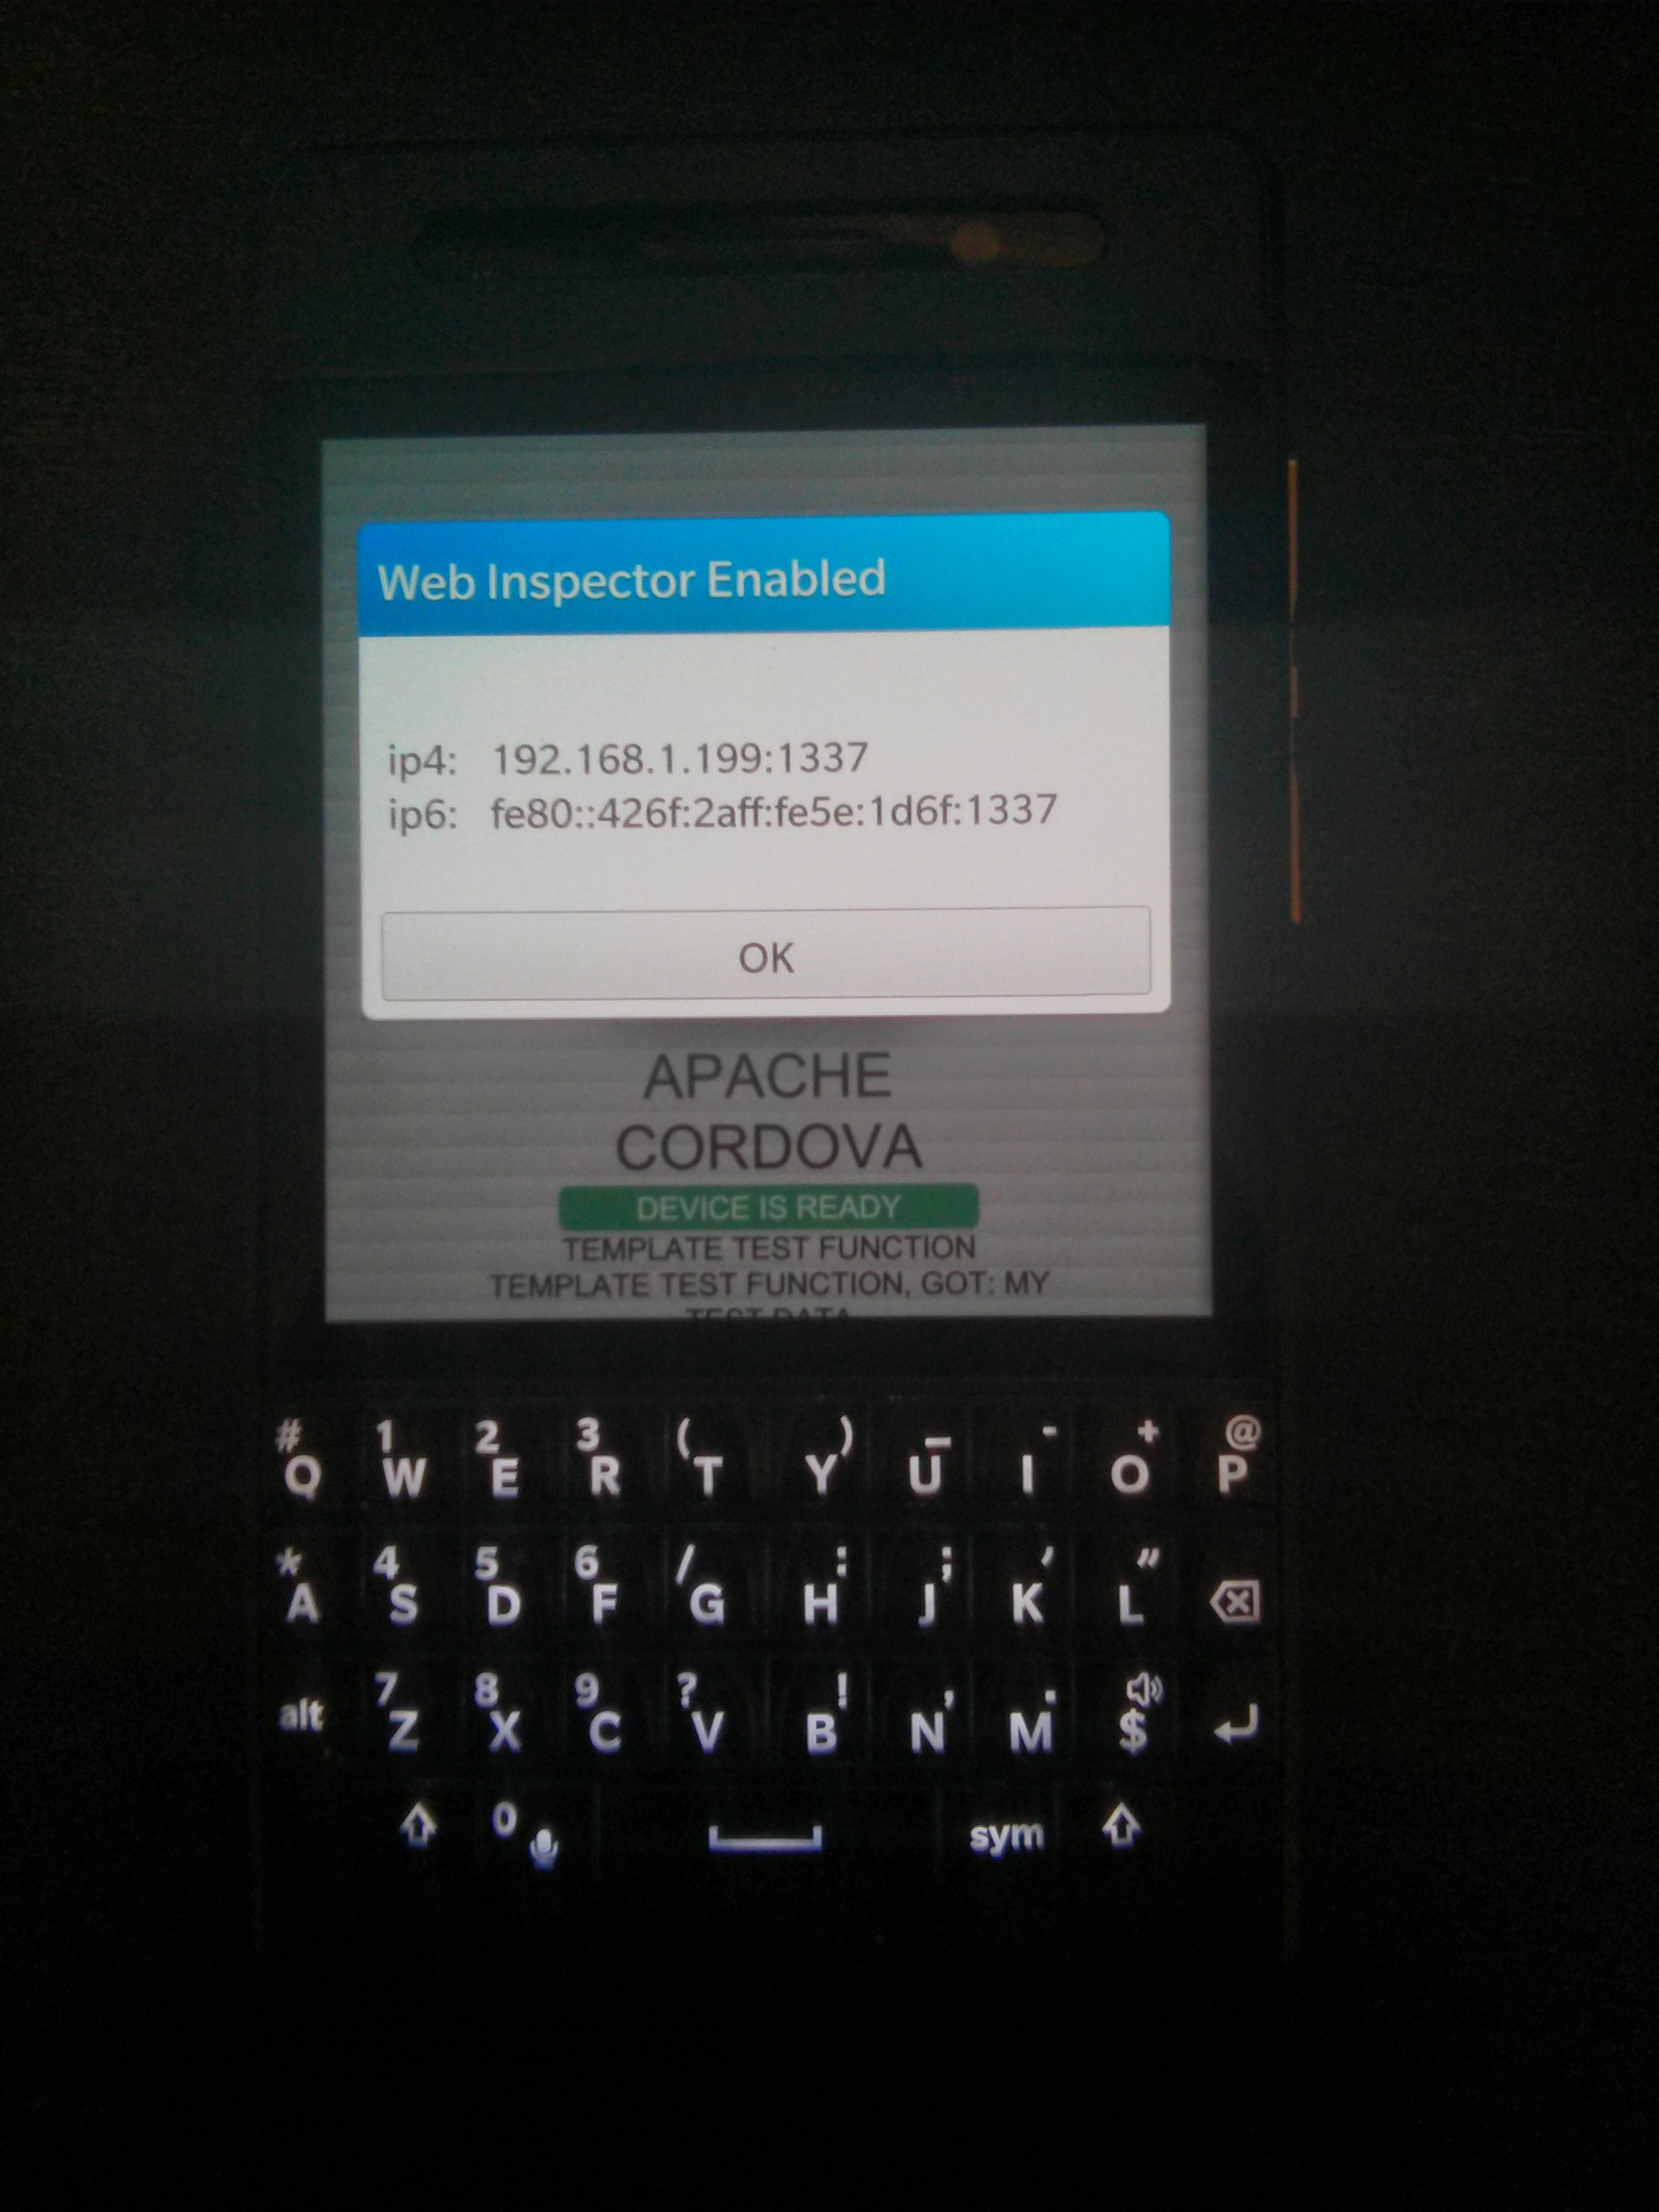
When developing your plugin whenever you make changes to the native files you must use the IDE to build new binaries as we did in ste 13 and then use step 14 to test them.